Building a Frontend for a Backend-only Project
In this guide, we will show you how to create a basic movie database app to showcase the ease of integrating the 8base Backend with your own custom frontend.
If you've followed our full-stack walkthrough, this process will seem familiar. The core difference in this section is that we are focusing solely on implementing our own frontend and integrating it with 8base backend.
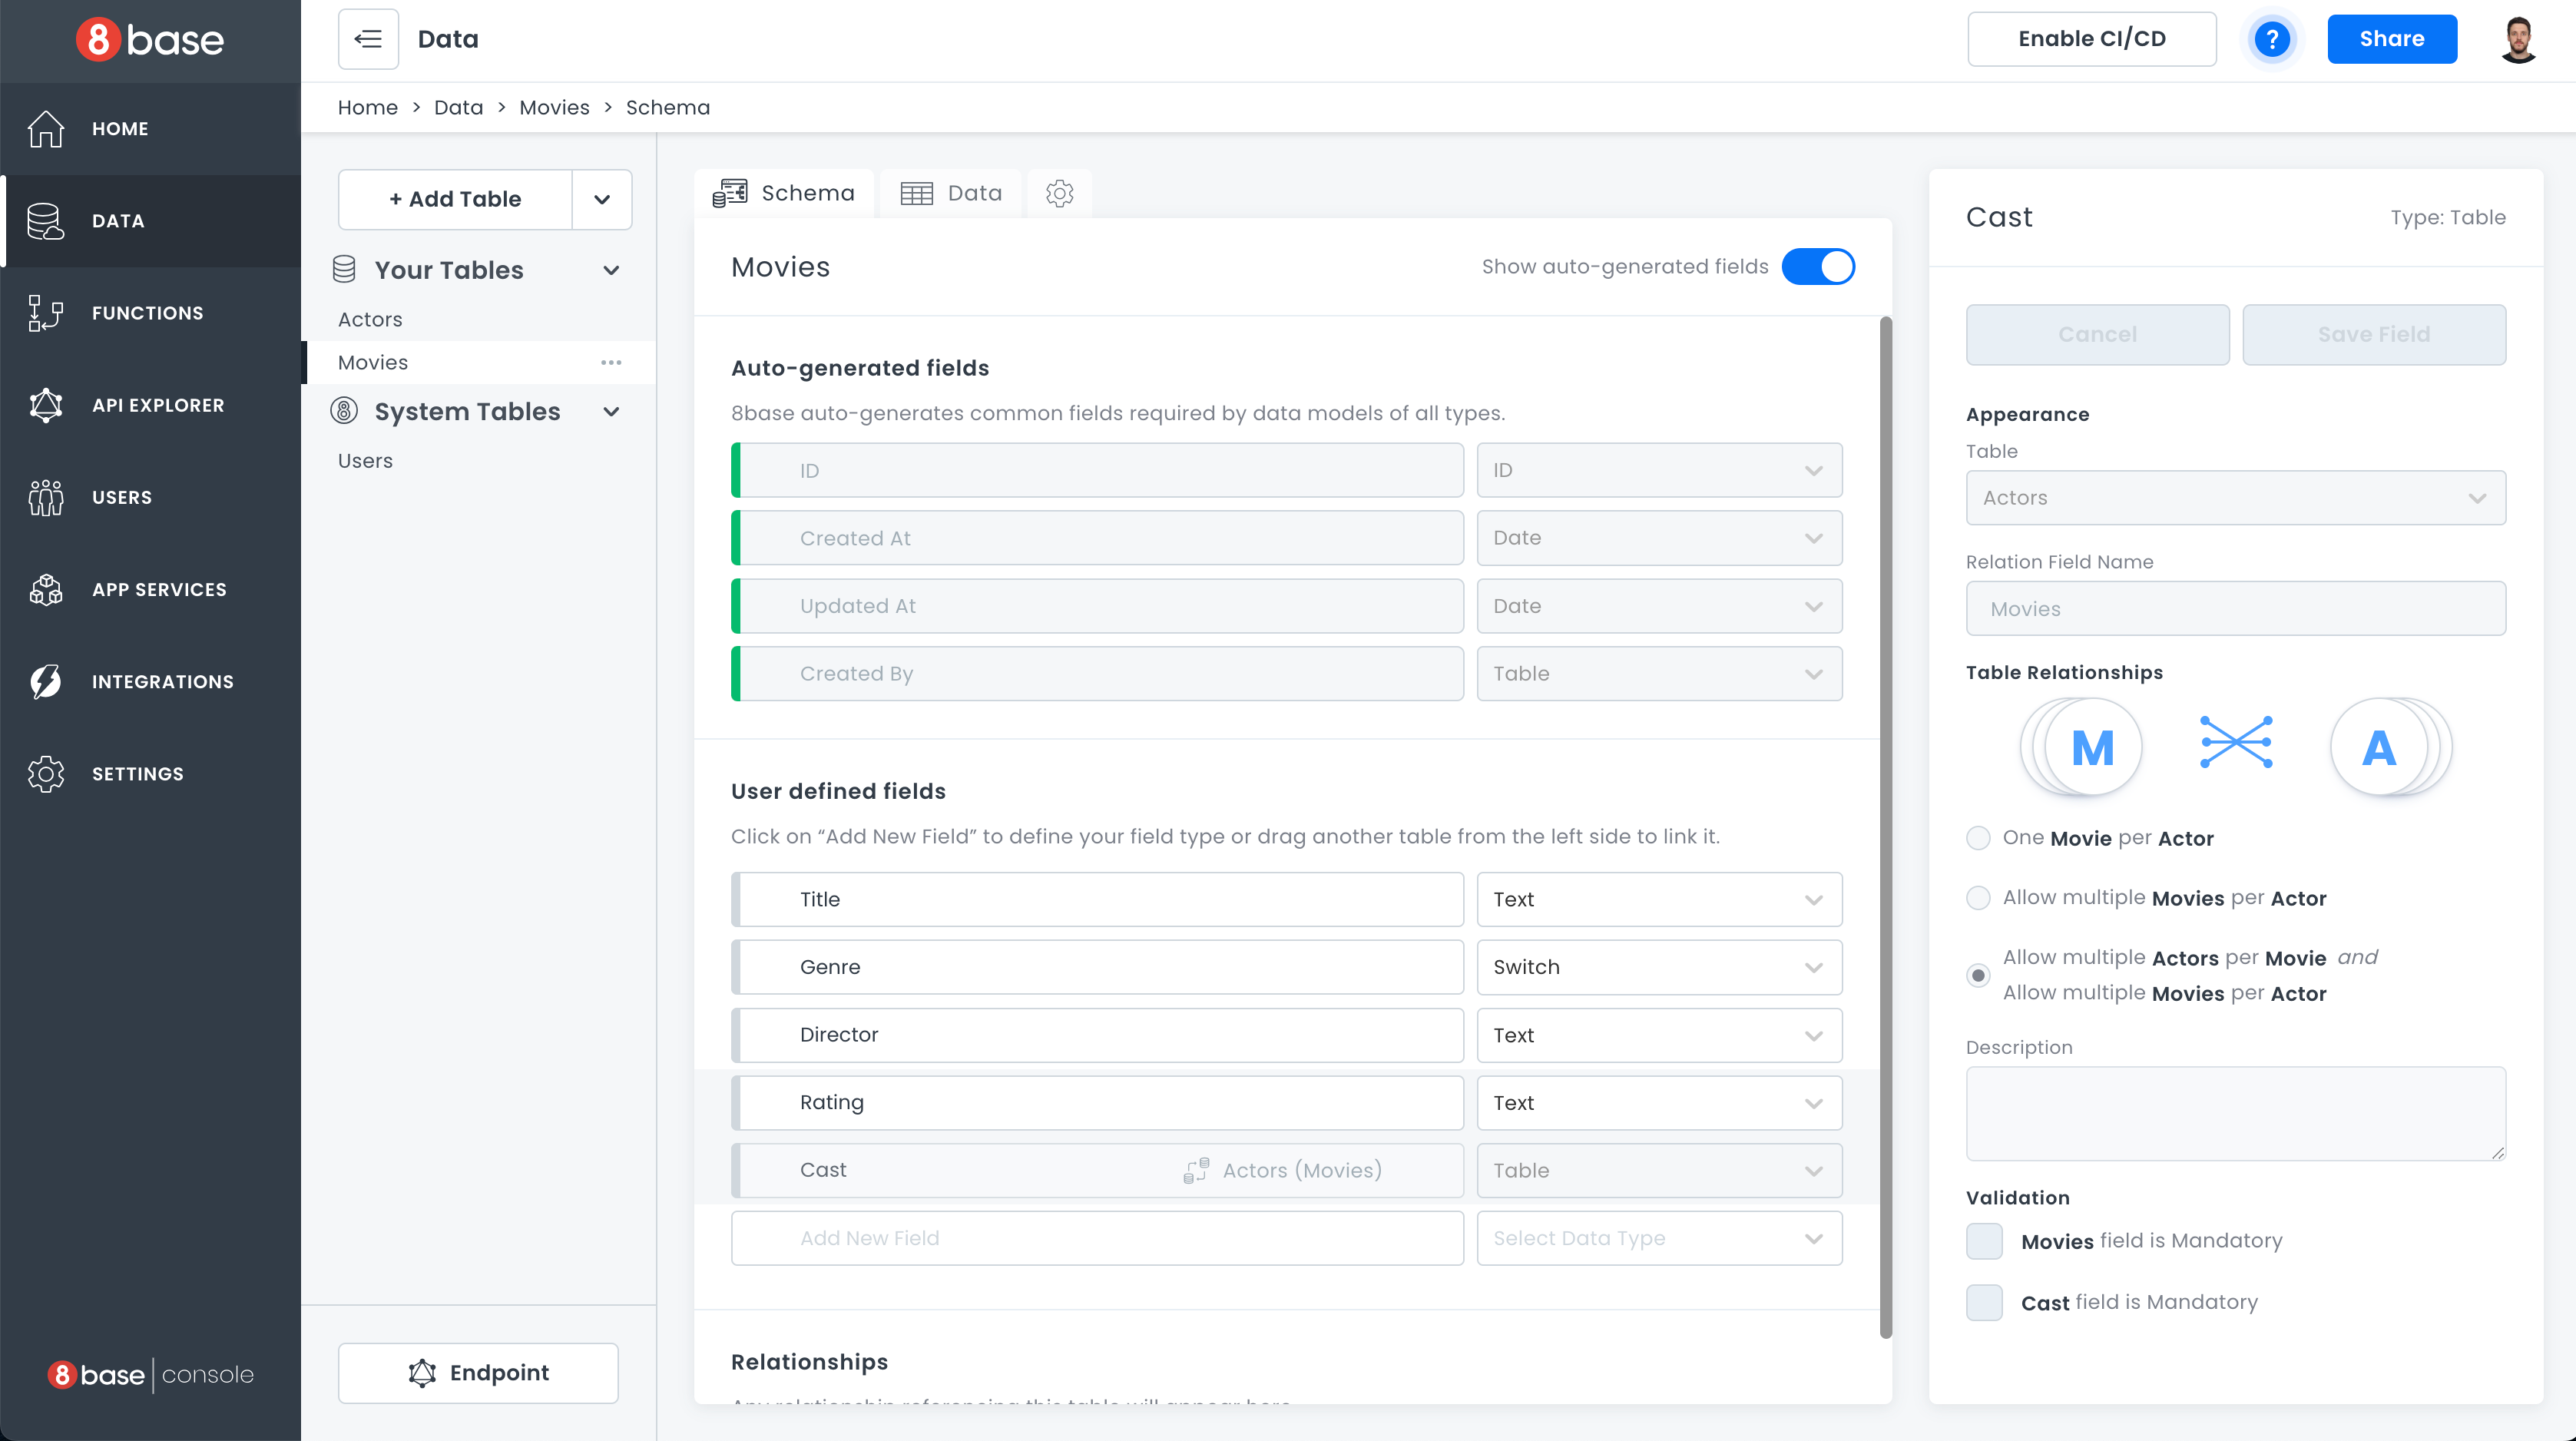
Understanding the Backend Structure
We have already set up at this endpoint: https://api.8base.com/clm0fahrv000008i67set12kz.
Our backend is structured around a Movies table, which has these fields:
titlegenredirectorratingActorstable that holdsfirstName,lastName,gender, anddate of birthfor actors.
Movies has many-to-many relations with Actors.
Setting Up the Project
Initialize a New React Project
We will use create-react-app here, the official tool backed by the React team, to bootstrap our project. It effortlessly sets up a new project environment, ensuring we dive straight into coding without dealing with initial configurations. For this walkthrough, Node.js version 18.11.0 was used:
npm i -g create-react-app
create-react-app 8base-movie-app && cd 8base-movie-app
Install Required Packages
For our project, we will use @apollo/client for GraphQL operations and react-router-dom for routing.
npm install @apollo/client react-router-dom
Modify the index.js File
We must replace the content of src/index.js with following code. This will set up React-Router for our app.
import React from 'react';
import ReactDOM from 'react-dom';
import './index.css';
import App from './App';
import { BrowserRouter } from 'react-router-dom';

ReactDOM.render(
  <React.StrictMode>
    <BrowserRouter>
      <App />
    </BrowserRouter>
  </React.StrictMode>,
  document.getElementById('root')
);
Integrating Apollo Client
- Create a file named
apolloClient.jsin thesrcof your app. This is where we will configure our Apollo Client to connect to the 8base backend. - In
apolloClient.js, set up a new Apollo Client instance. We'll be usingHttpLinkto connect to our 8base Backend API endpoint.
import { ApolloClient, InMemoryCache, HttpLink } from '@apollo/client';

const httpLink = new HttpLink({
  uri: 'https://api.8base.com/clm0fahrv000008i67set12kz',
});

const client = new ApolloClient({
  link: httpLink,
  cache: new InMemoryCache(),
});

export default client;
The backend is public and already configured for you - feel free to use it: https://api.8base.com/clm0fahrv000008i67set12kz
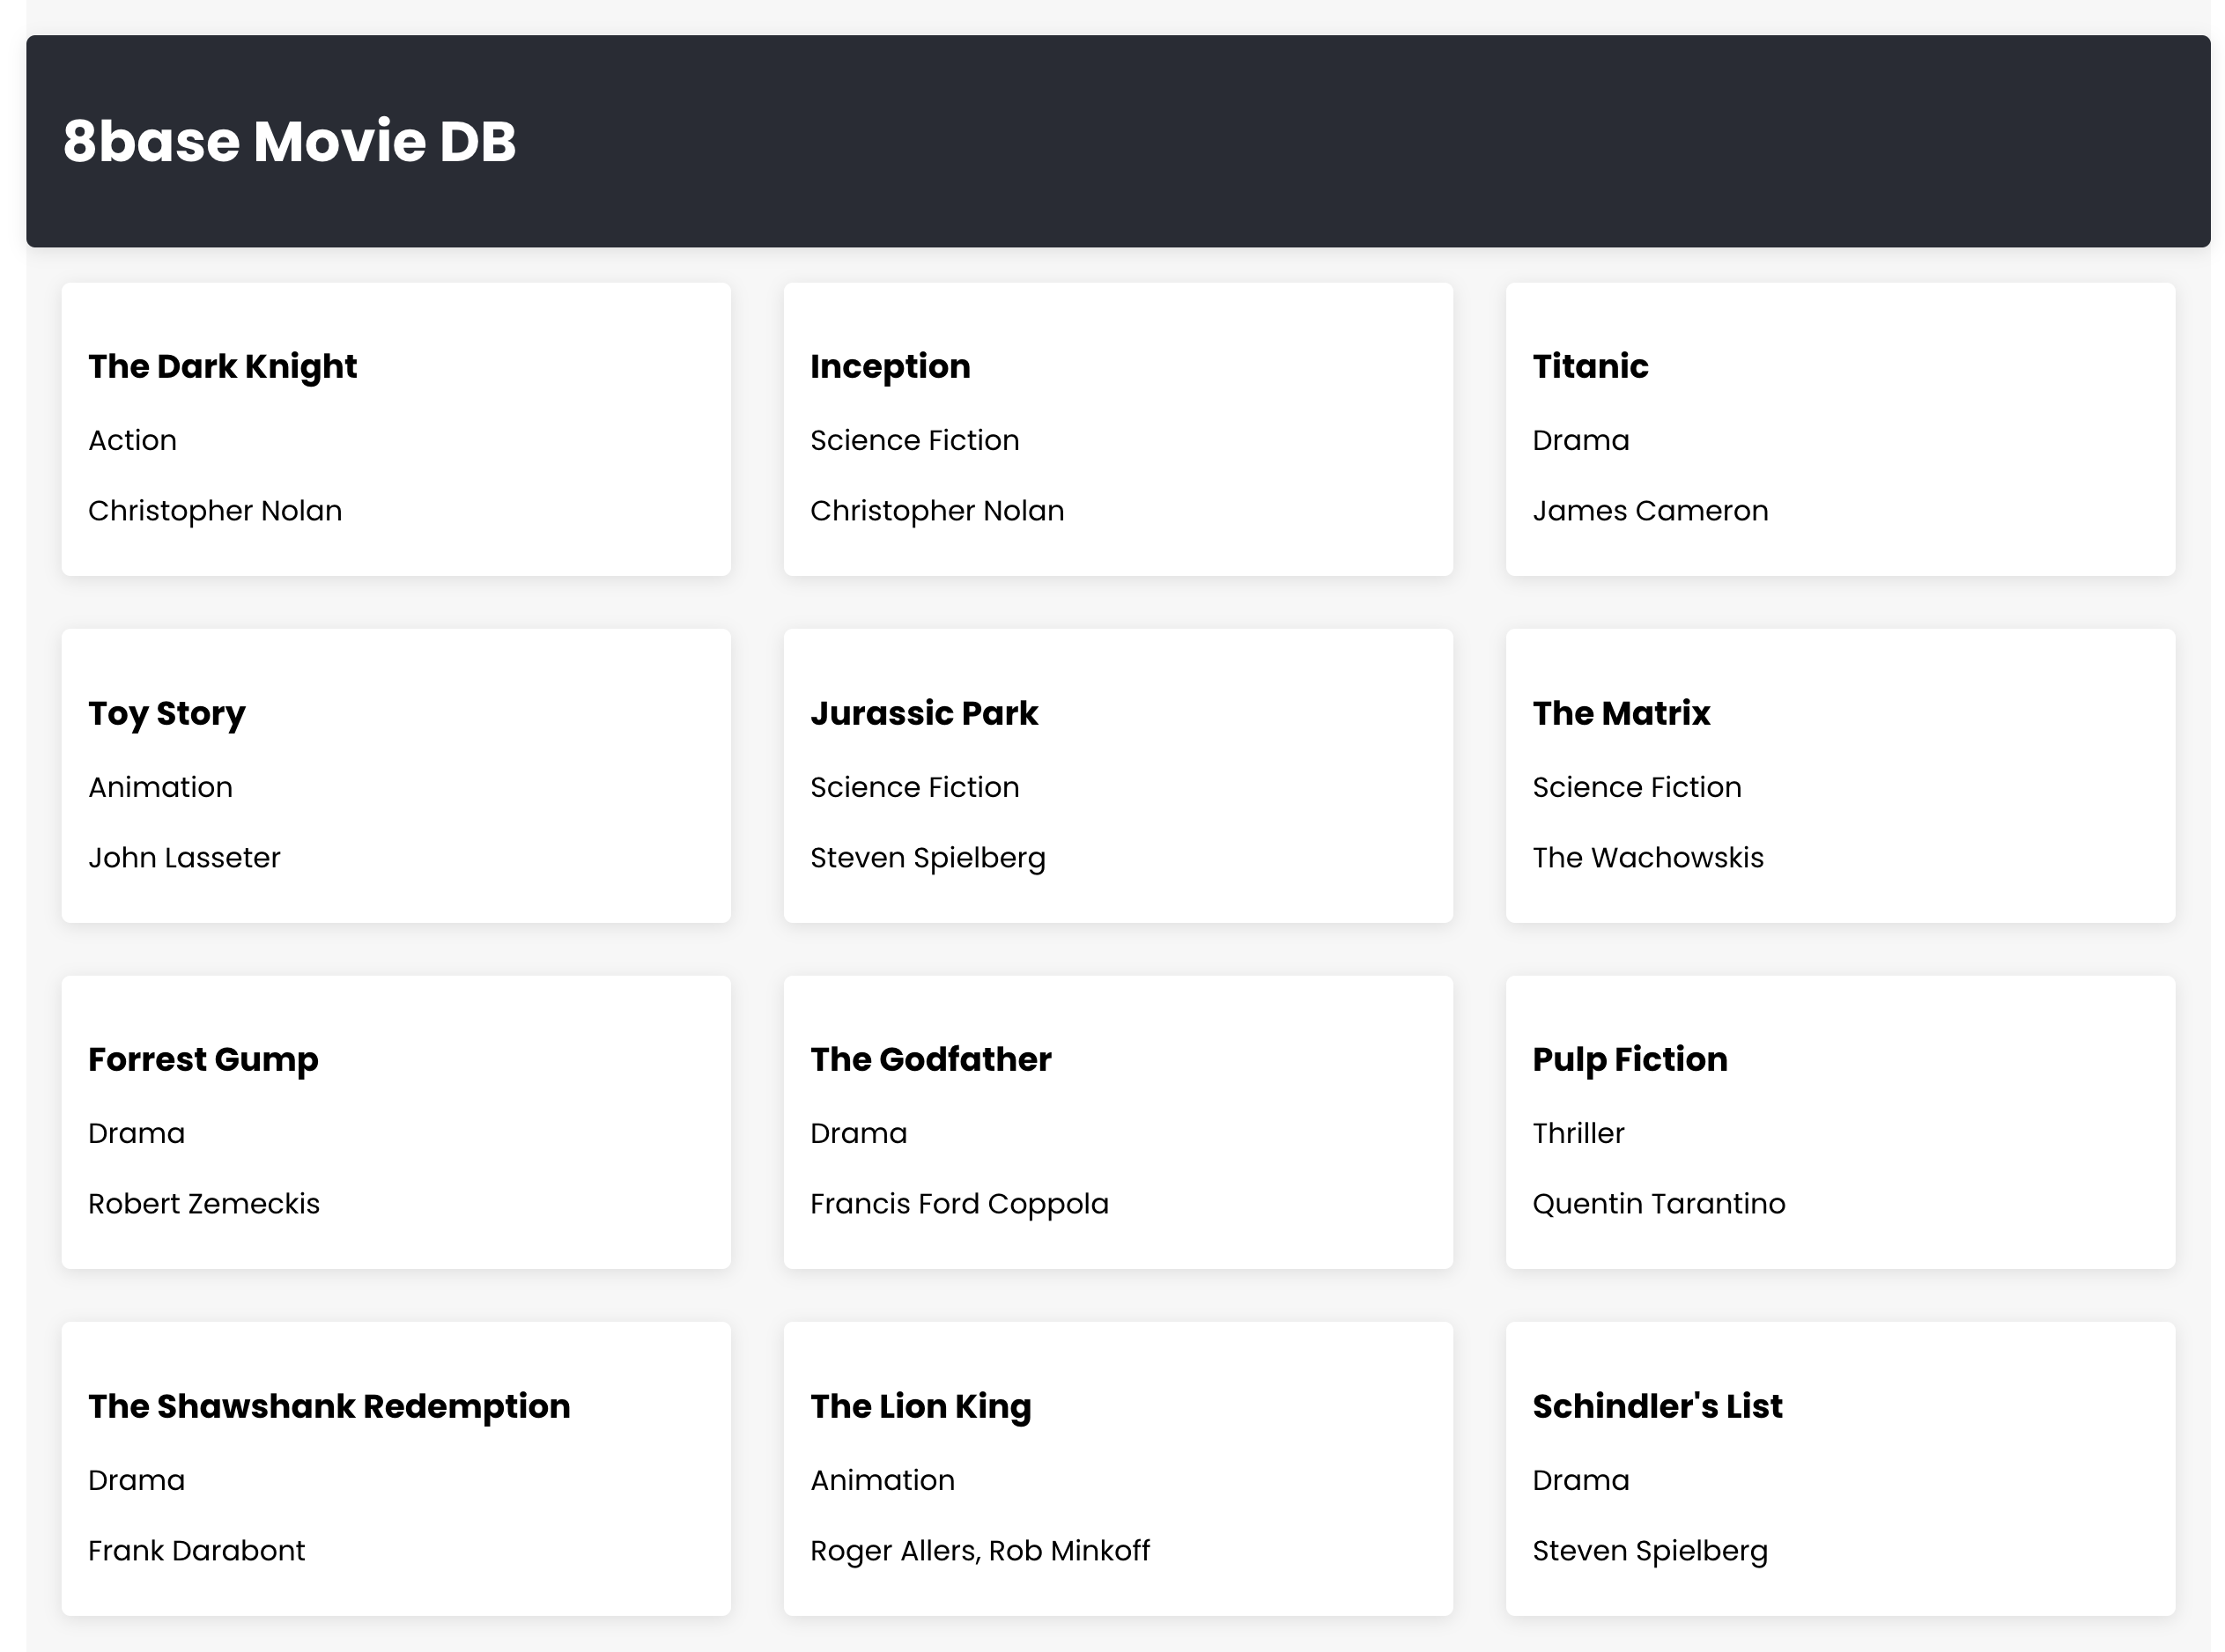
Creating Movie List View
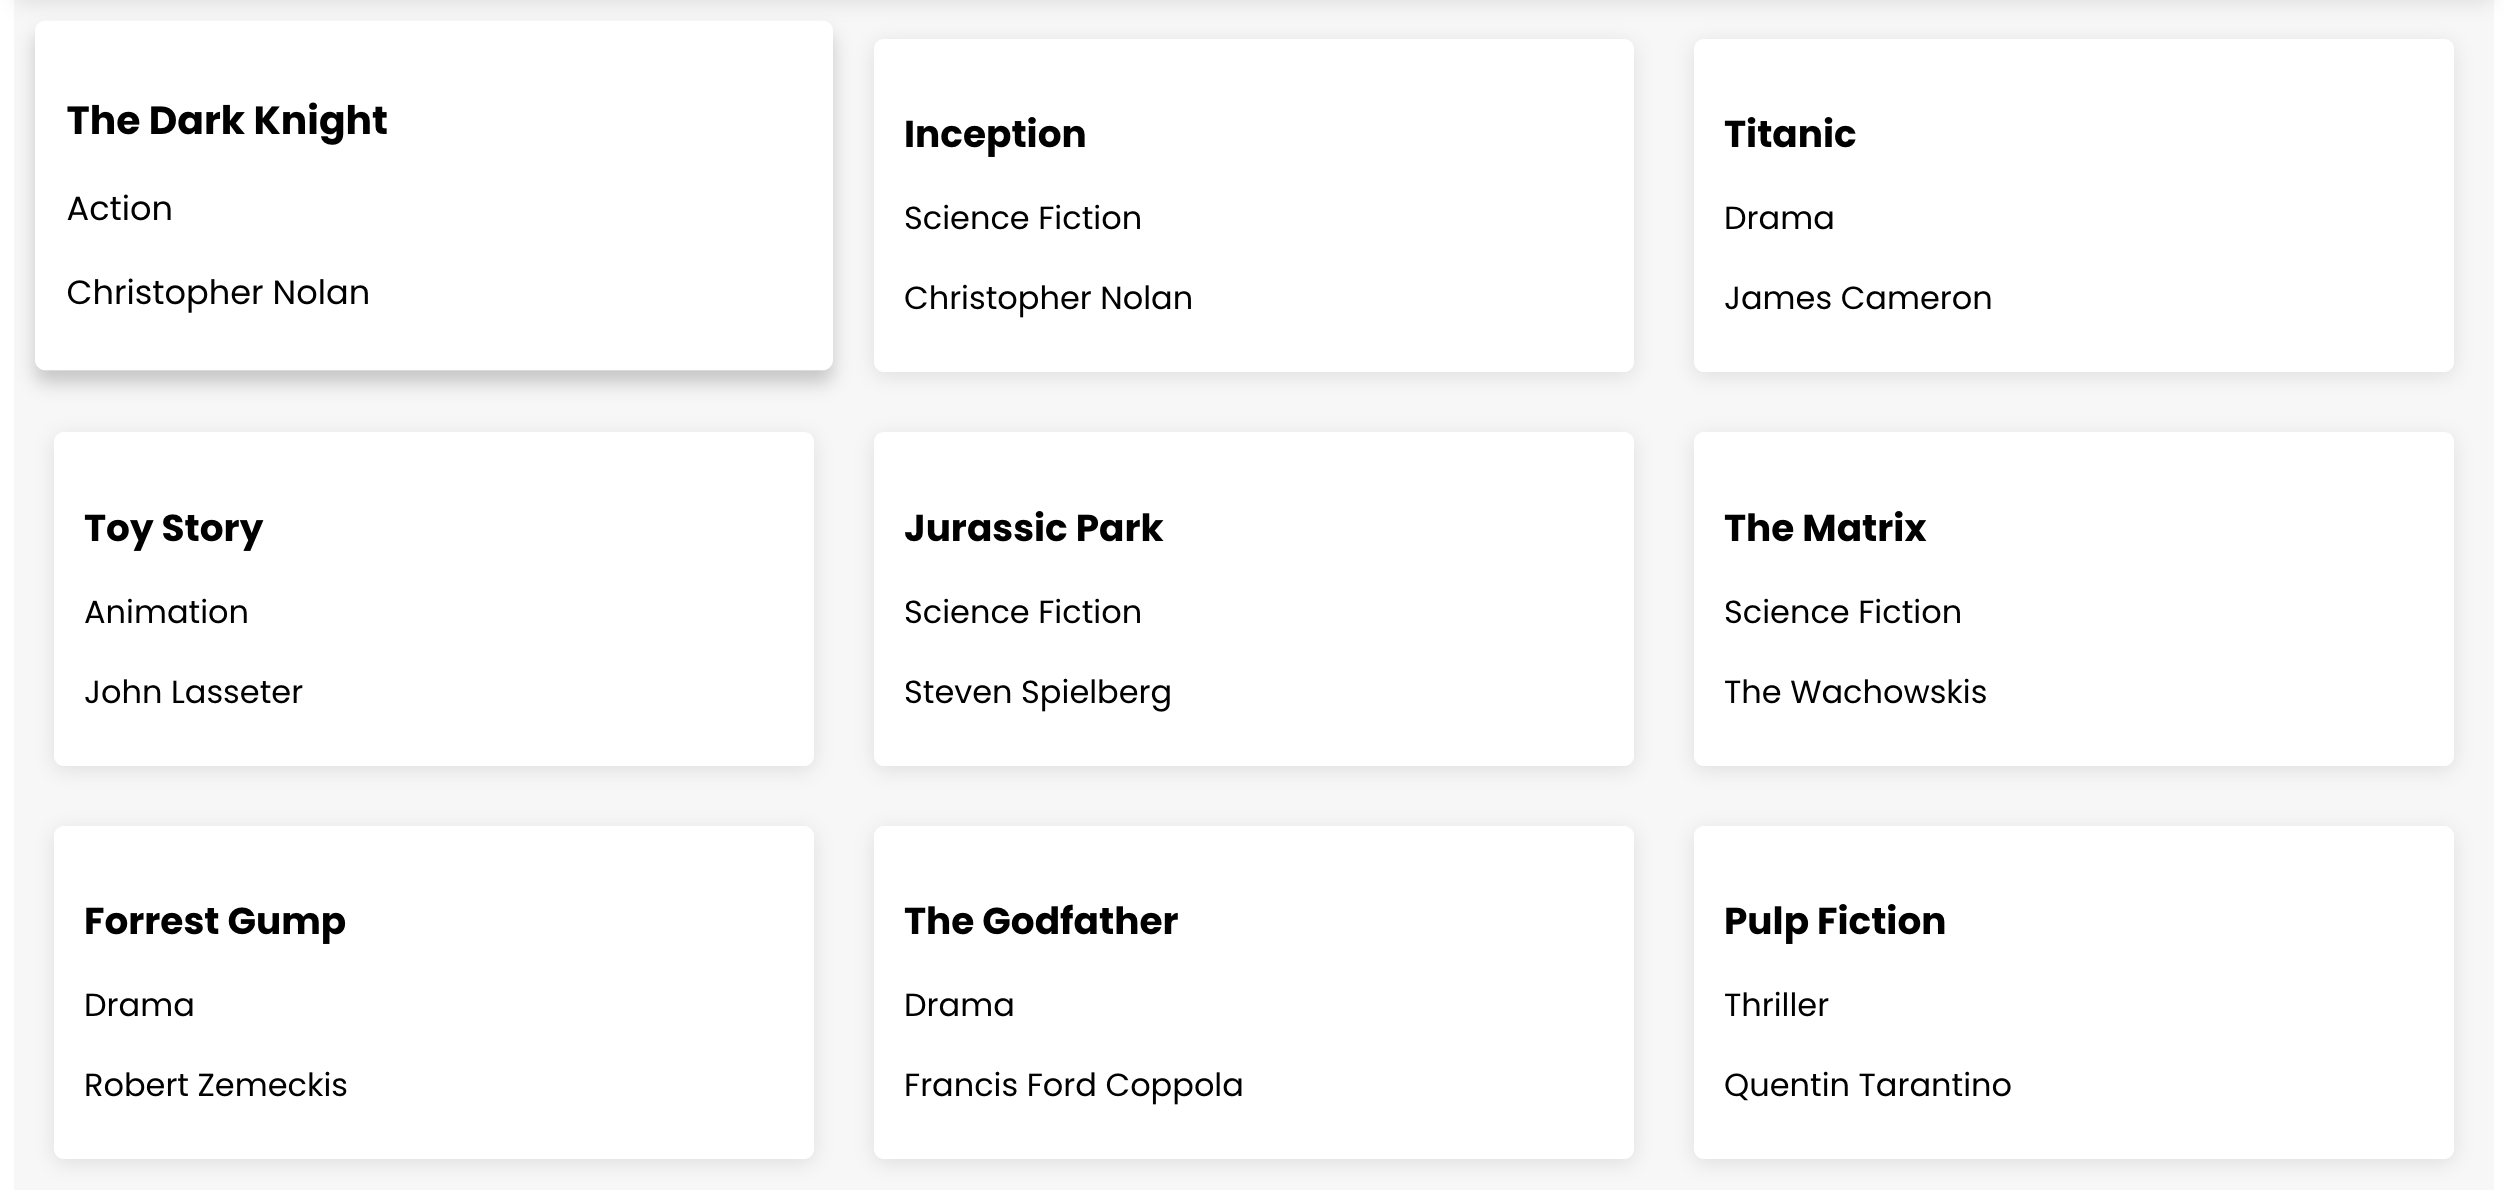
We need to create a new component called MoviesList.js in the src folder. This component fetches a list of movies from our 8base backend using the GraphQL query GET_MOVIES. This query is one of the automatically-generated GraphQL queries and mutations added to your API for every table - in this case for Movies table.
import React from 'react';
import { gql, useQuery } from '@apollo/client';
import { Link } from 'react-router-dom';

const GET_MOVIES = gql`
  query getMovies {
    moviesList {
      items {
        id
        title
        genre
        director
      }
    }
  }
`;

function MoviesList() {
  const { loading, error, data } = useQuery(GET_MOVIES);

  if (loading) return 'Loading...';
  if (error) return `Error: ${error.message}`;

  return (
    <div className="movies-container">
      {data.moviesList.items.map(movie => (
        <Link key={movie.id} to={`/movie/${movie.id}`} className="movie-card">
          <h3>{movie.title}</h3>
          <p>{movie.genre}</p>
          <p>{movie.director}</p>
        </Link>
      ))}
    </div>
  );
}

export default MoviesList;
We also handle the loading and error states, and then map through the fetched movies to display them in a card-like format.
Adding Movie Details View
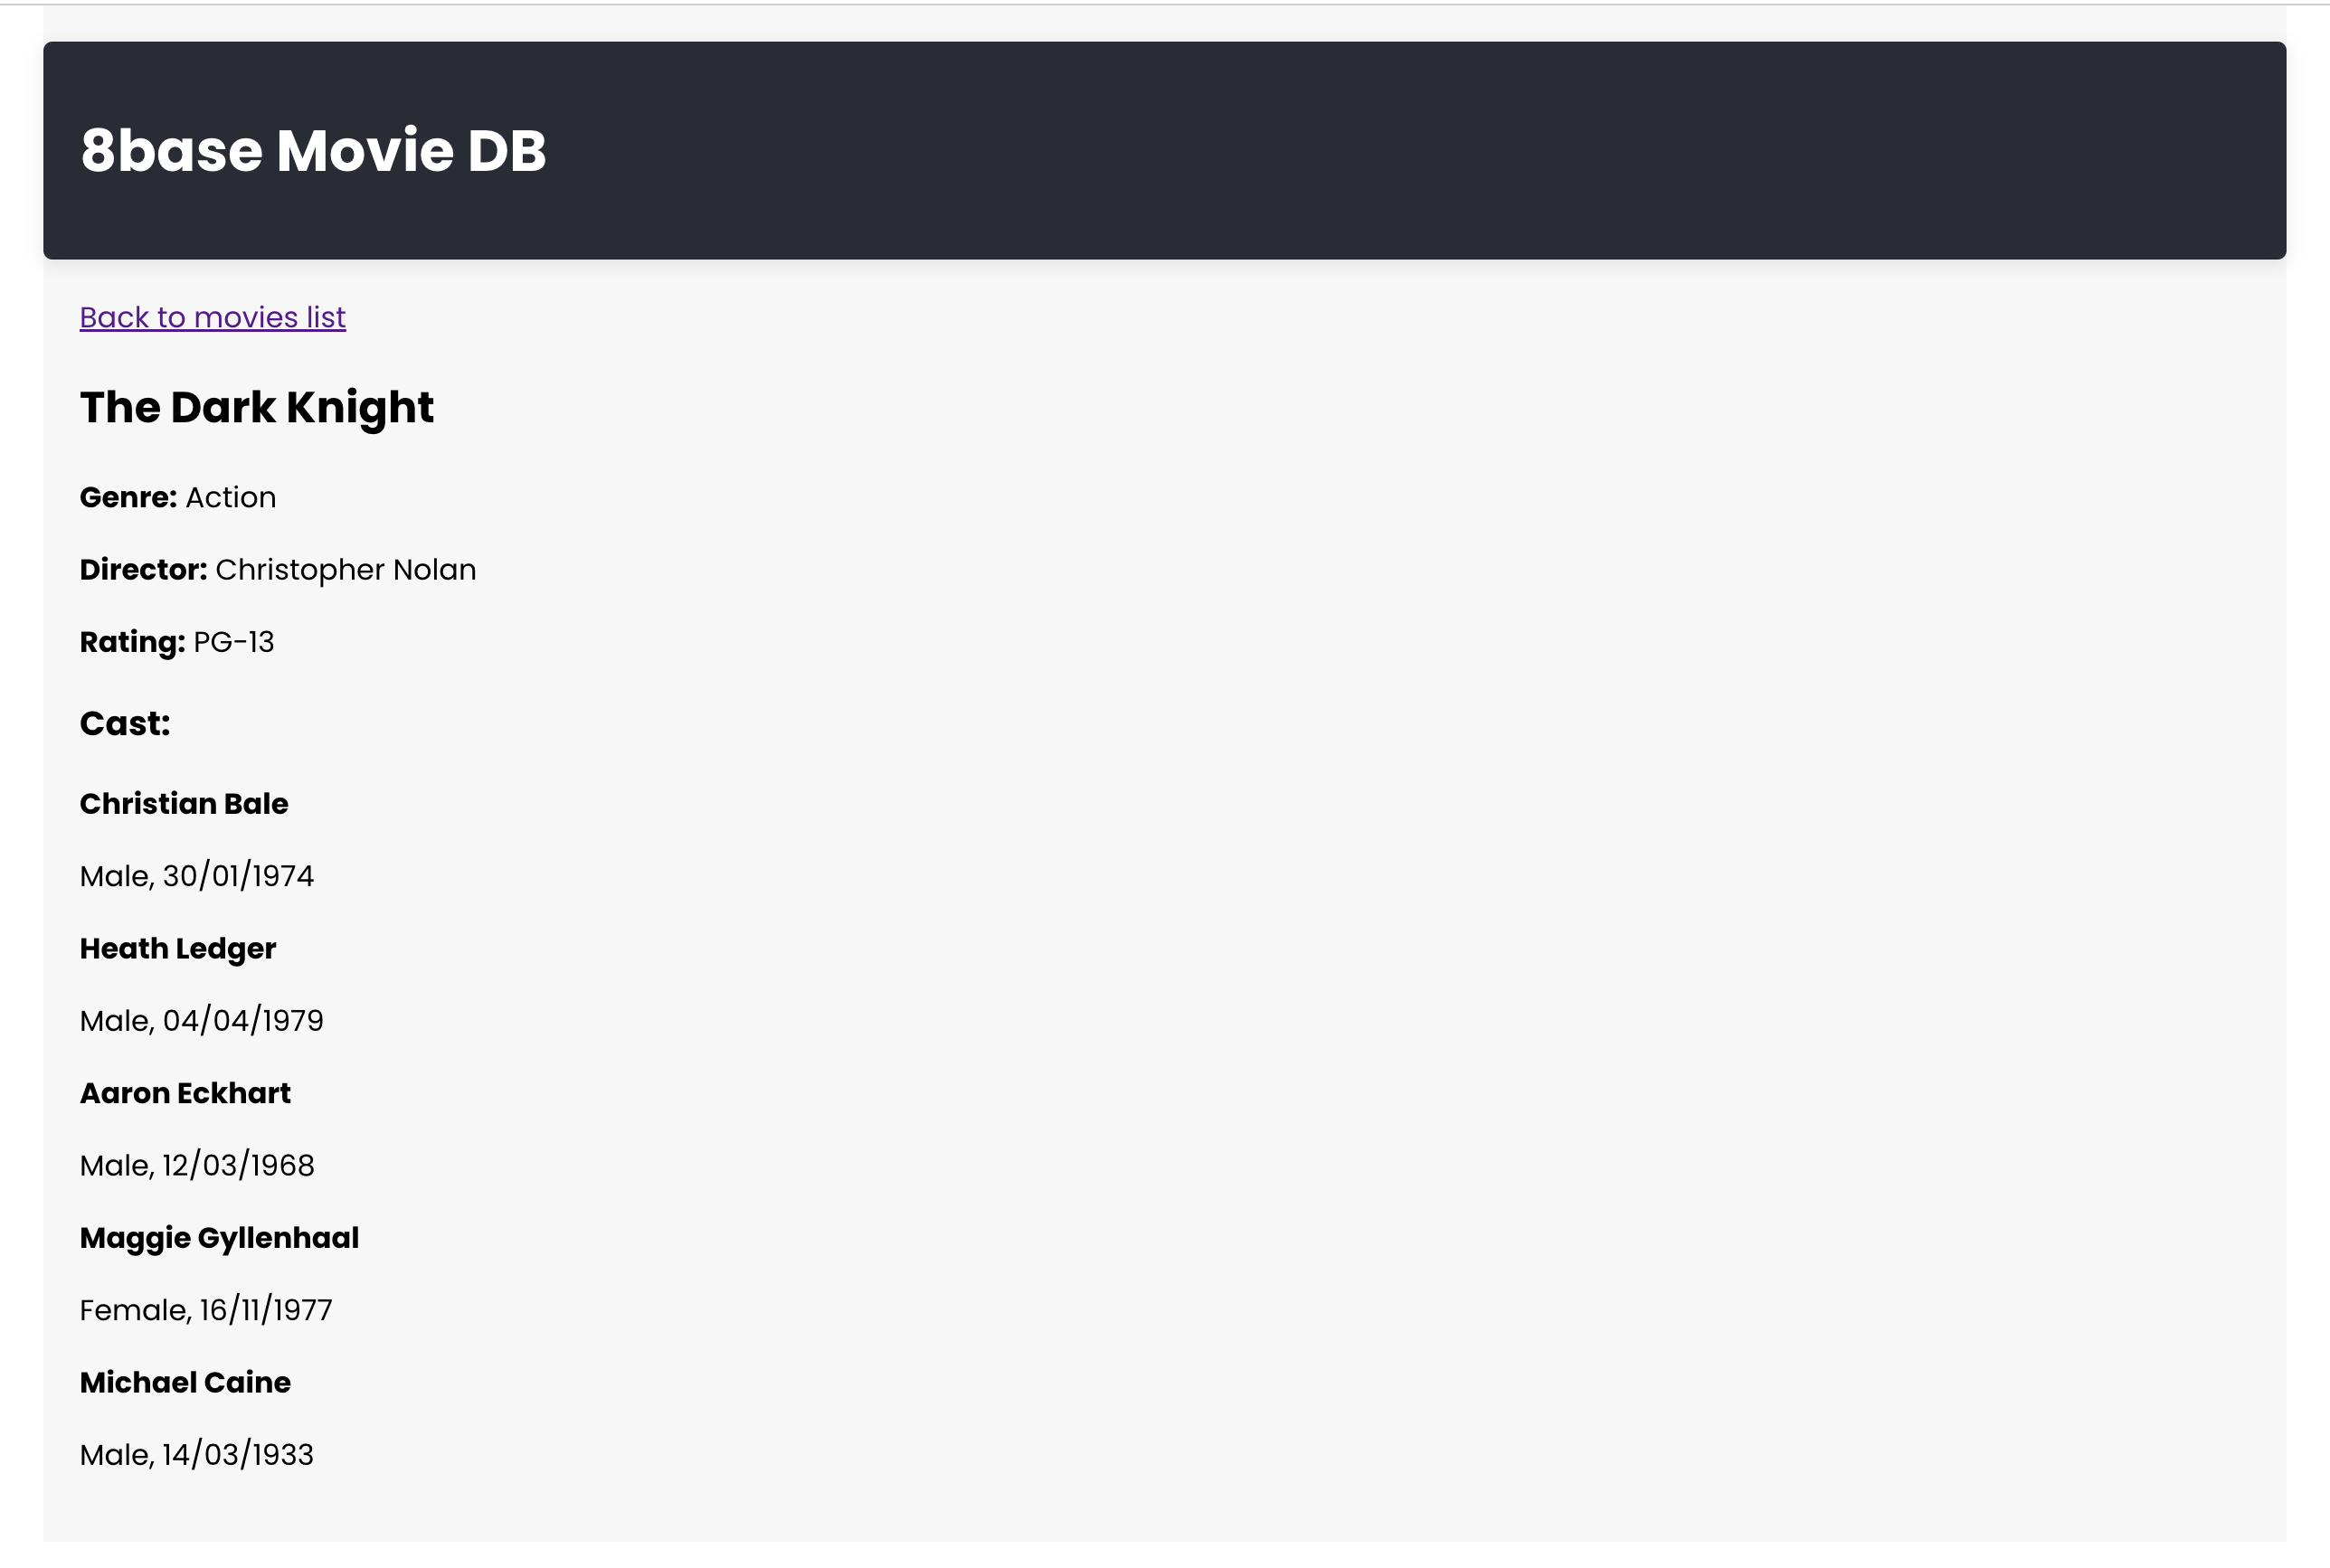
Next, we will create another component src/MovieDetail.js. Here, we'll fetch detailed information of a single movie using the GraphQL query GET_MOVIE_DETAILS.
import React from 'react';
import { gql, useQuery } from '@apollo/client';
import { useParams, Link } from 'react-router-dom';

const GET_MOVIE_DETAILS = gql`
  query getMovieDetails($id: ID!) {
    movie(id: $id) {
      title
      genre
      director
      rating
      cast {
        items {
          firstName
          lastName
          gender
          dOB
        }
      }
    }
  }
`;

function MovieDetail() {
  const { id } = useParams();
  const { loading, error, data } = useQuery(GET_MOVIE_DETAILS, {
    variables: { id },
  });

  if (loading) return 'Loading...';
  if (error) return `Error: ${error.message}`;

  return (
    <div className="movie-detail-container">
      <Link to="/" className="back-button">Back to movies list</Link>
      <h2>{data.movie.title}</h2>
      <p><strong>Genre:</strong> {data.movie.genre}</p>
      <p><strong>Director:</strong> {data.movie.director}</p>
      <p><strong>Rating:</strong> {data.movie.rating}</p>
      <h3>Cast:</h3>
      {data.movie.cast.items.map((actor, index) => (
        <div key={index} style={{ marginBottom: '10px' }}>
          <p><strong>{actor.firstName} {actor.lastName}</strong></p>
          <p>{actor.gender}, {new Date(actor.dOB).toLocaleDateString()}</p>
        </div>
      ))}
    </div>
  );
}

export default MovieDetail;
Just like in our MoviesList component, we handle the loading and error states. Once data is fetched, display the movie details along with its cast.
Integrating Changes and Styling the App
Let's integrate all of our components into our main App.js component, wrapping everything with ApolloProvider . This makes the Apollo Client instance (client) available to all child components, enabling them to make GraphQL requests.
Routes determines which component to render based on the current URL. There are two defined routes:
/movie/:id: Displays the
MovieDetailcomponent, which fetches and shows detailed info about a movie with the given ID./: Displays the
MoviesListcomponent, which fetches and lists all the movies.
import React from 'react';
import { ApolloProvider } from '@apollo/client';
import client from './apolloClient';
import MoviesList from './MoviesList';
import MovieDetail from './MovieDetail';
import { Routes, Route } from 'react-router-dom';
import './App.css';

function App() {
  return (
    <ApolloProvider client={client}>
      <div className="App">

        {/* Header Section */}
        <header className="app-header">
          <h1>8base Movie DB</h1>
        </header>

        <Routes>
          <Route path="/movie/:id" element={<MovieDetail />} />
          <Route path="/" element={<MoviesList />} />
        </Routes>
      </div>
    </ApolloProvider>
  );
}

export default App;
Styling
Let's add some basic styles for clean design and responsiveness, by replacing the content of App.css with the provided snippet:
.App {
  max-width: 1200px;
  margin: 0 auto;
  padding: 20px;
  font-family: 'Poppins', sans-serif;
  font-weight: 400;
  background-color: #f7f7f7;
  display: flex;
  flex-direction: column;
  align-items: center;
}

.back-button {
  align-self: flex-start;
}

.app-header {
  width: 100%;
  padding: 15px 20px;
  color: white;
  margin-bottom: 20px;
  background-color: #282c34;
  box-shadow: 0 2px 10px rgba(0, 0, 0, 0.1);
  border-radius: 5px;
  display: flex;
  align-items: center;
}

.movies-container {
  display: flex;
  flex-wrap: wrap;
  gap: 20px;
  justify-content: space-between;
}

.movie-card {
  box-sizing: border-box;
  width: calc(33.333% - 20px);
  padding: 15px;
  margin-bottom: 10px;
  background-color: #fff;
  border-radius: 5px;
  box-shadow: 0 2px 10px rgba(0, 0, 0, 0.1);
  text-decoration: none;
  color: black;
  transition: transform 0.3s ease, box-shadow 0.3s ease;
}

.movie-card:hover {
  transform: translateY(-5px) scale(1.05);
  box-shadow: 0 6px 8px rgba(0, 0, 0, 0.2);
}

.movie-card h3, .movie-card p {
  margin-bottom: 10px;
  user-select: none;
}

.movie-detail-container {
  width: 100%;
  text-align: left;
}

/* Responsive styles */
@media (max-width: 768px) {
  .app-header {
    flex-direction: column;
    text-align: center;
  }

  .movie-card {
    width: calc(50% - 10px);
  }
}

@media (max-width: 480px) {
  .movie-card {
    width: 100%;
  }
}
We will also add the Poppins font into our app, by adding following line to public/index.html file:
<link href="https://fonts.googleapis.com/css2?family=Poppins:wght@400;500;700&display=swap" rel="stylesheet">
Running the App
Finally, run your app by typing npm run start in your terminal!
Well done! You have completed the guide and built a basic frontend app powered by 8base Backend GraphQL API. Keep experimenting and happy coding!