Building a Full-Stack App
In this guide, we will build a simple full-stack application leveraging the "Jumpstart with accelerators" template. Make sure to follow the quickstart tutorial to provision your project
Configuring your Data Model
From your project dashboard, open your backend. You can also go to the Backend section and open it from there. Once in the backend, open the Data module to configure your data schema.
To create a table, click Add Table. Next, add fields to your table:
- Type in the field name.
- Select the field type.
- Configure the details of the field in the properties pane.
- Click Create field.
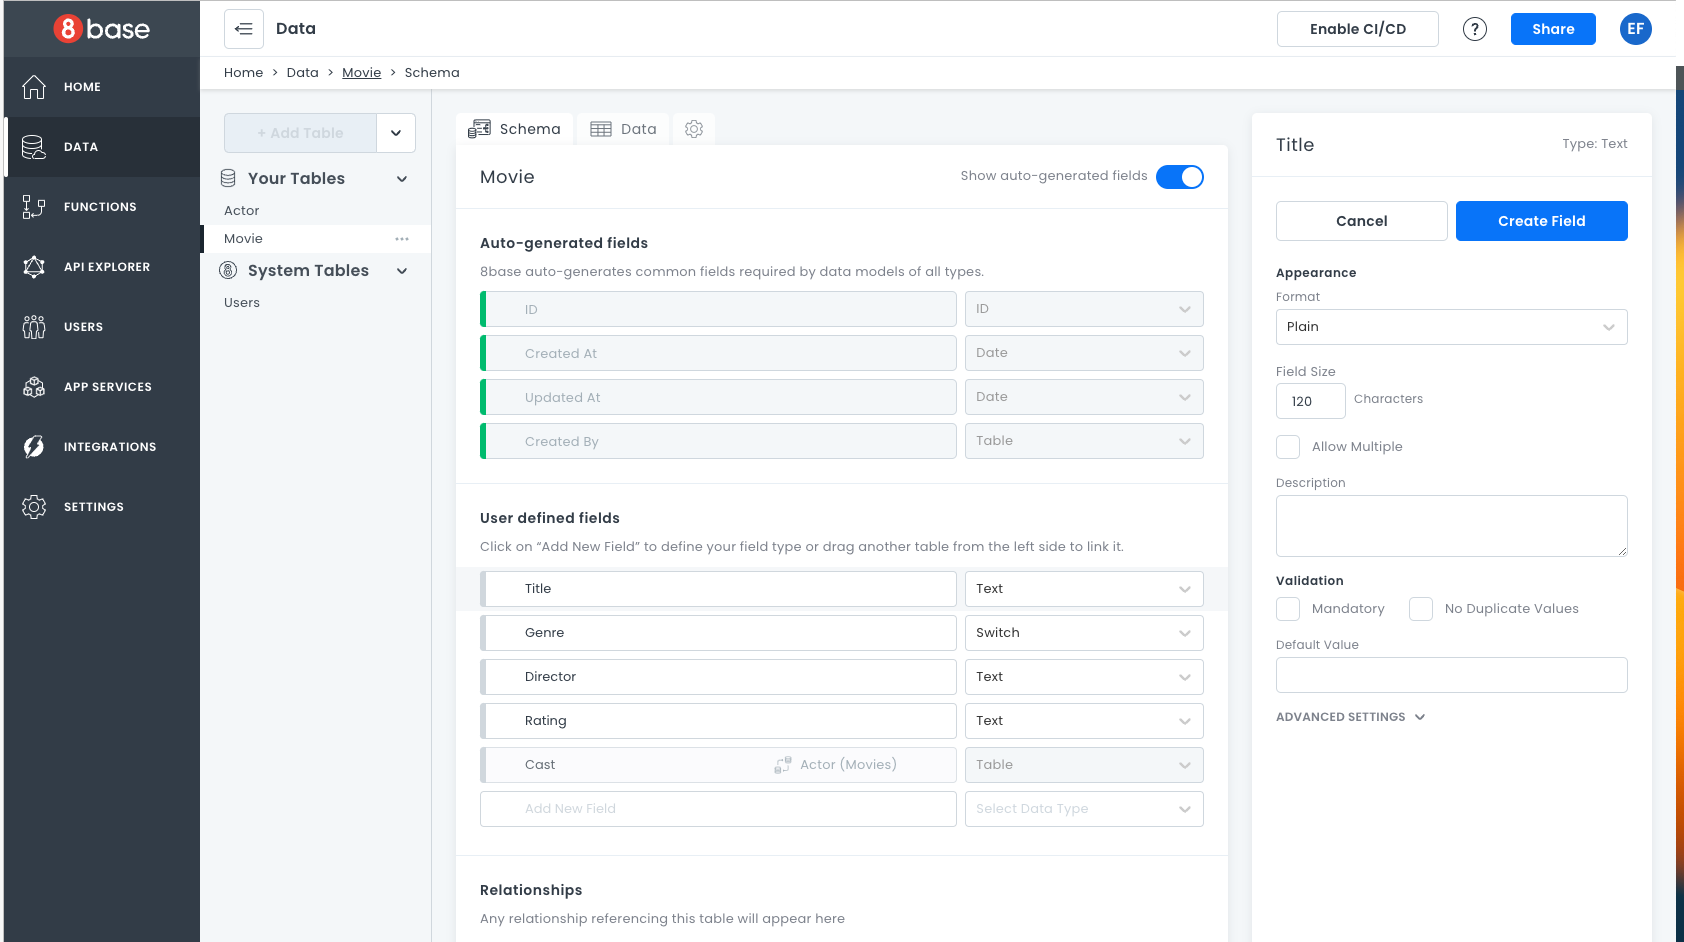
Repeat these steps to create the Movie table with this structure. (Skip the Cast field for now.)
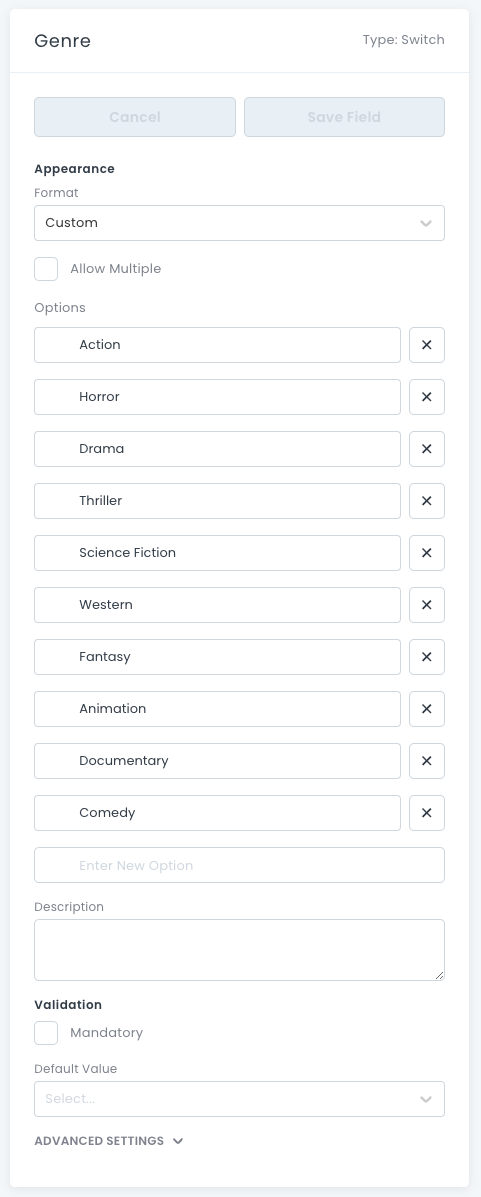
For the Genre field, select Switch as the type and Custom for Format. Then, add options for the different genres.
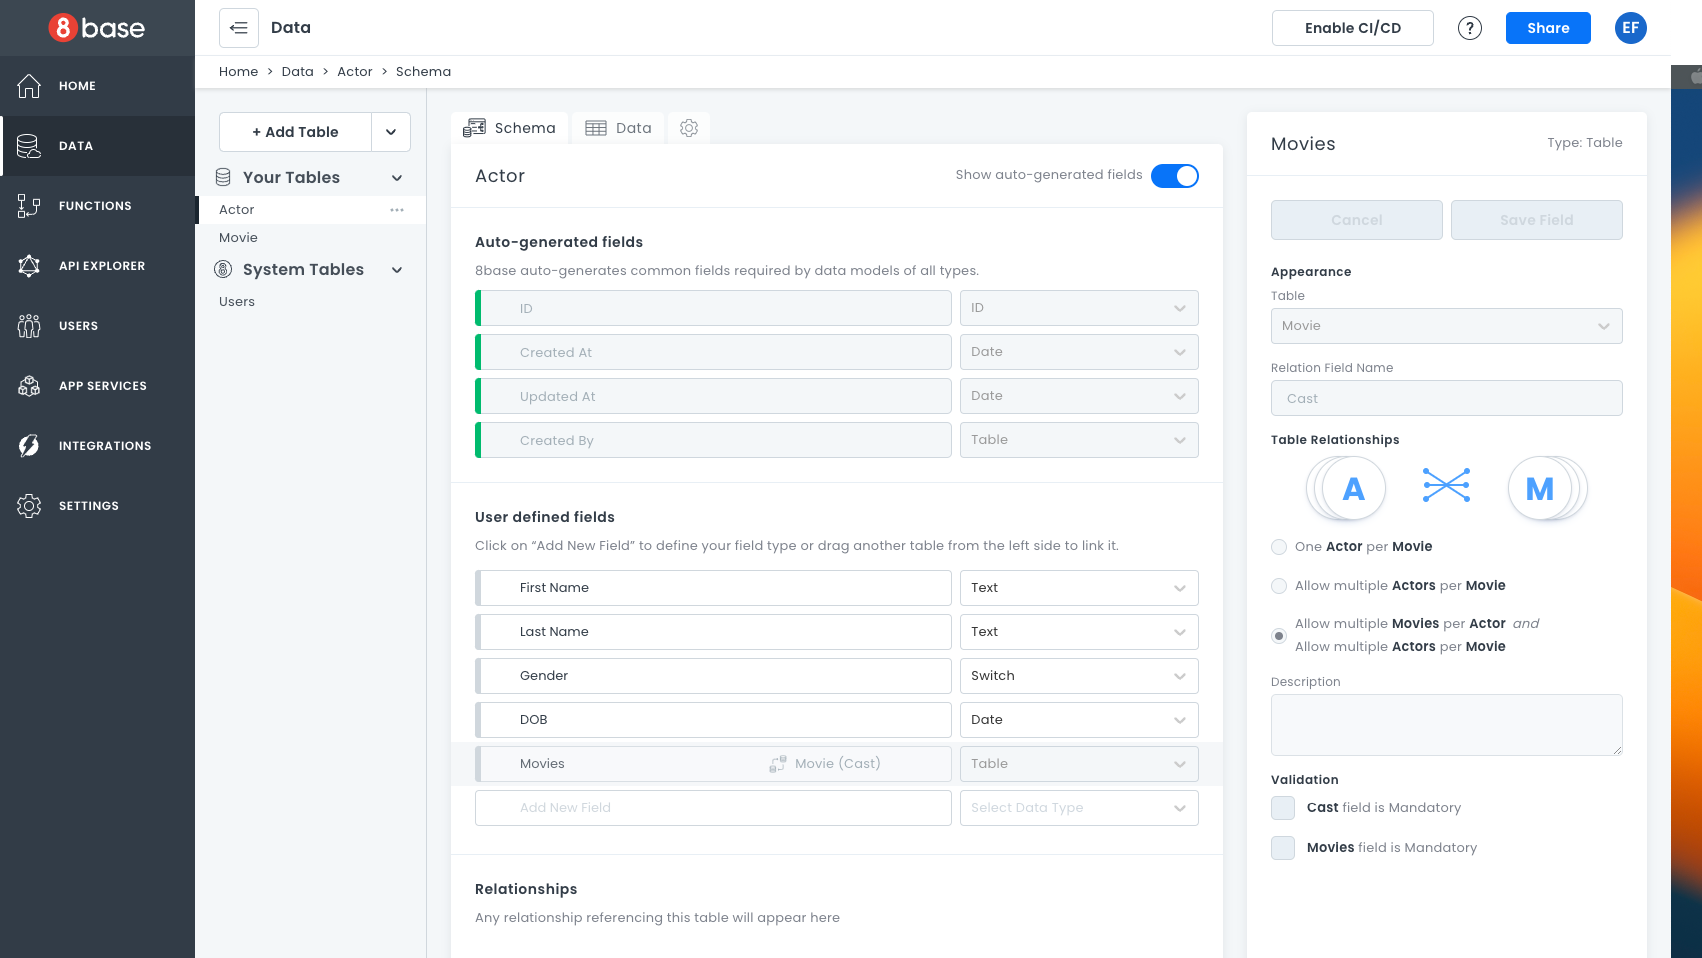
Now, create the Actor table. This time, you will create a relationship between both tables.
- Type in the field name.
- Select
Tableas the field type. - Select the target table, in our case:
Movie. - Name the relationship from the perspective of the target table. In our case, that would be
Cast. - Select the relationship type. In our case, a movie can have multiple actors, and an actor can participate in multiple movies. We will select Allow multiple Movies per Actor and Allow multiple Actors per Movie.
It may seem like all you have done is create two tables. But you have just created a complete GraphQL API to support all your client app needs!
Adding Data
Other than having client applications write data, you have two options to add records to your backend: Use the Data viewer or use the API explorer.
Adding Data with the Data Viewer
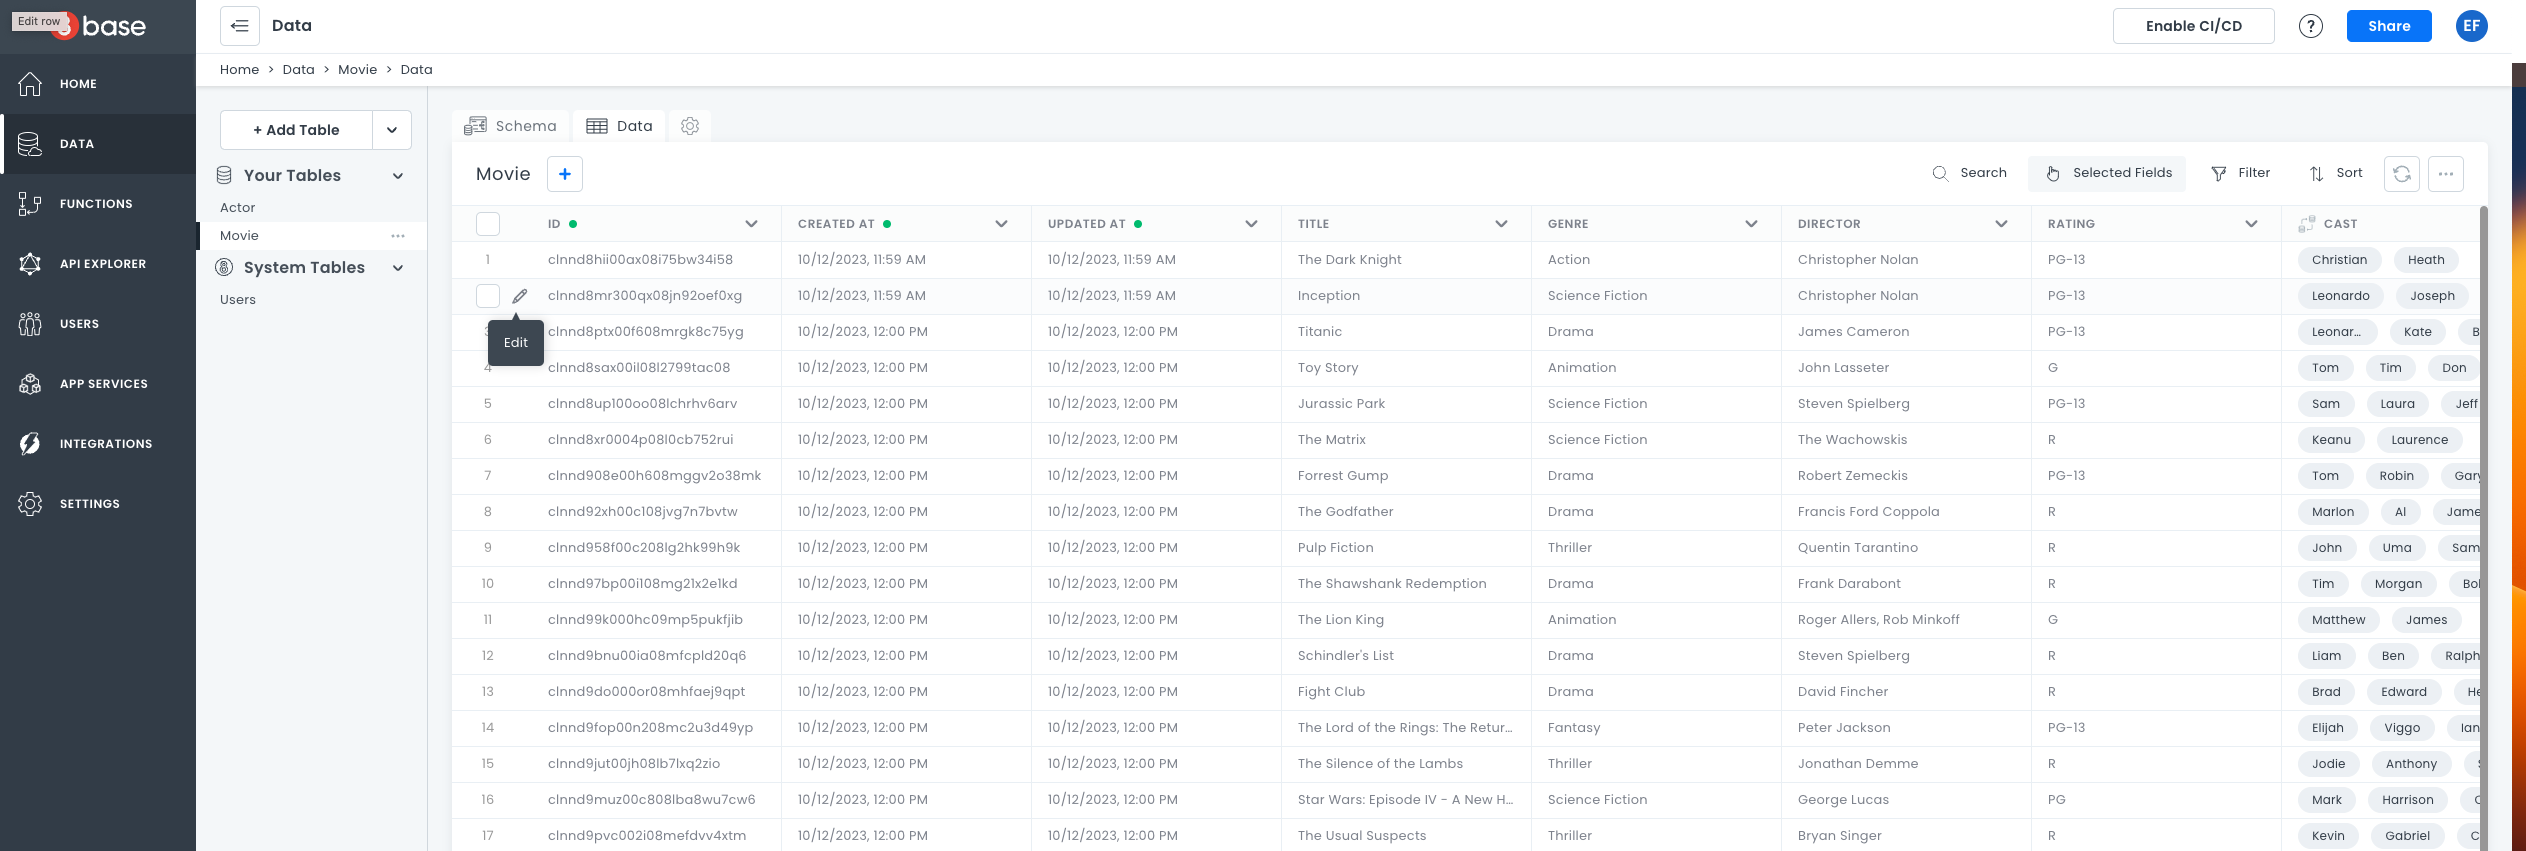
Open the data viewer by having a table selected and clicking on the Data tab.
Then click on the + icon. A modal will appear that will let you add records.
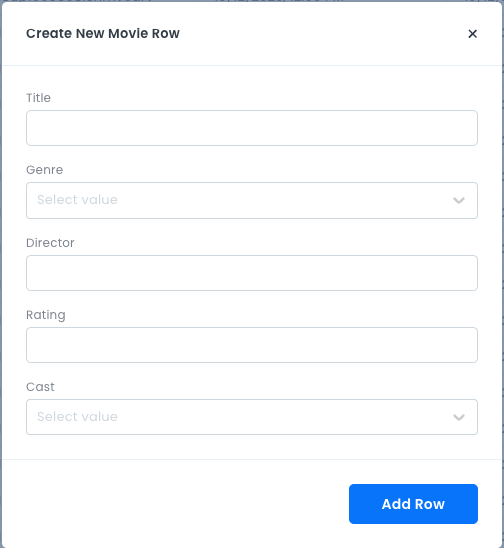
Add the information you need and click Add Row. Once the data is saved, you can see it in the viewer and use the pencil icon to edit records.
Adding Data with the API Explorer
A much more fun way to create data is by writing your own GraphQL mutation. We can even create related information in one transaction. The best part is that you do not need to be an expert in GraphQL.
Navigate to the API Explorer, click on Explorer and then on Add New Mutation.
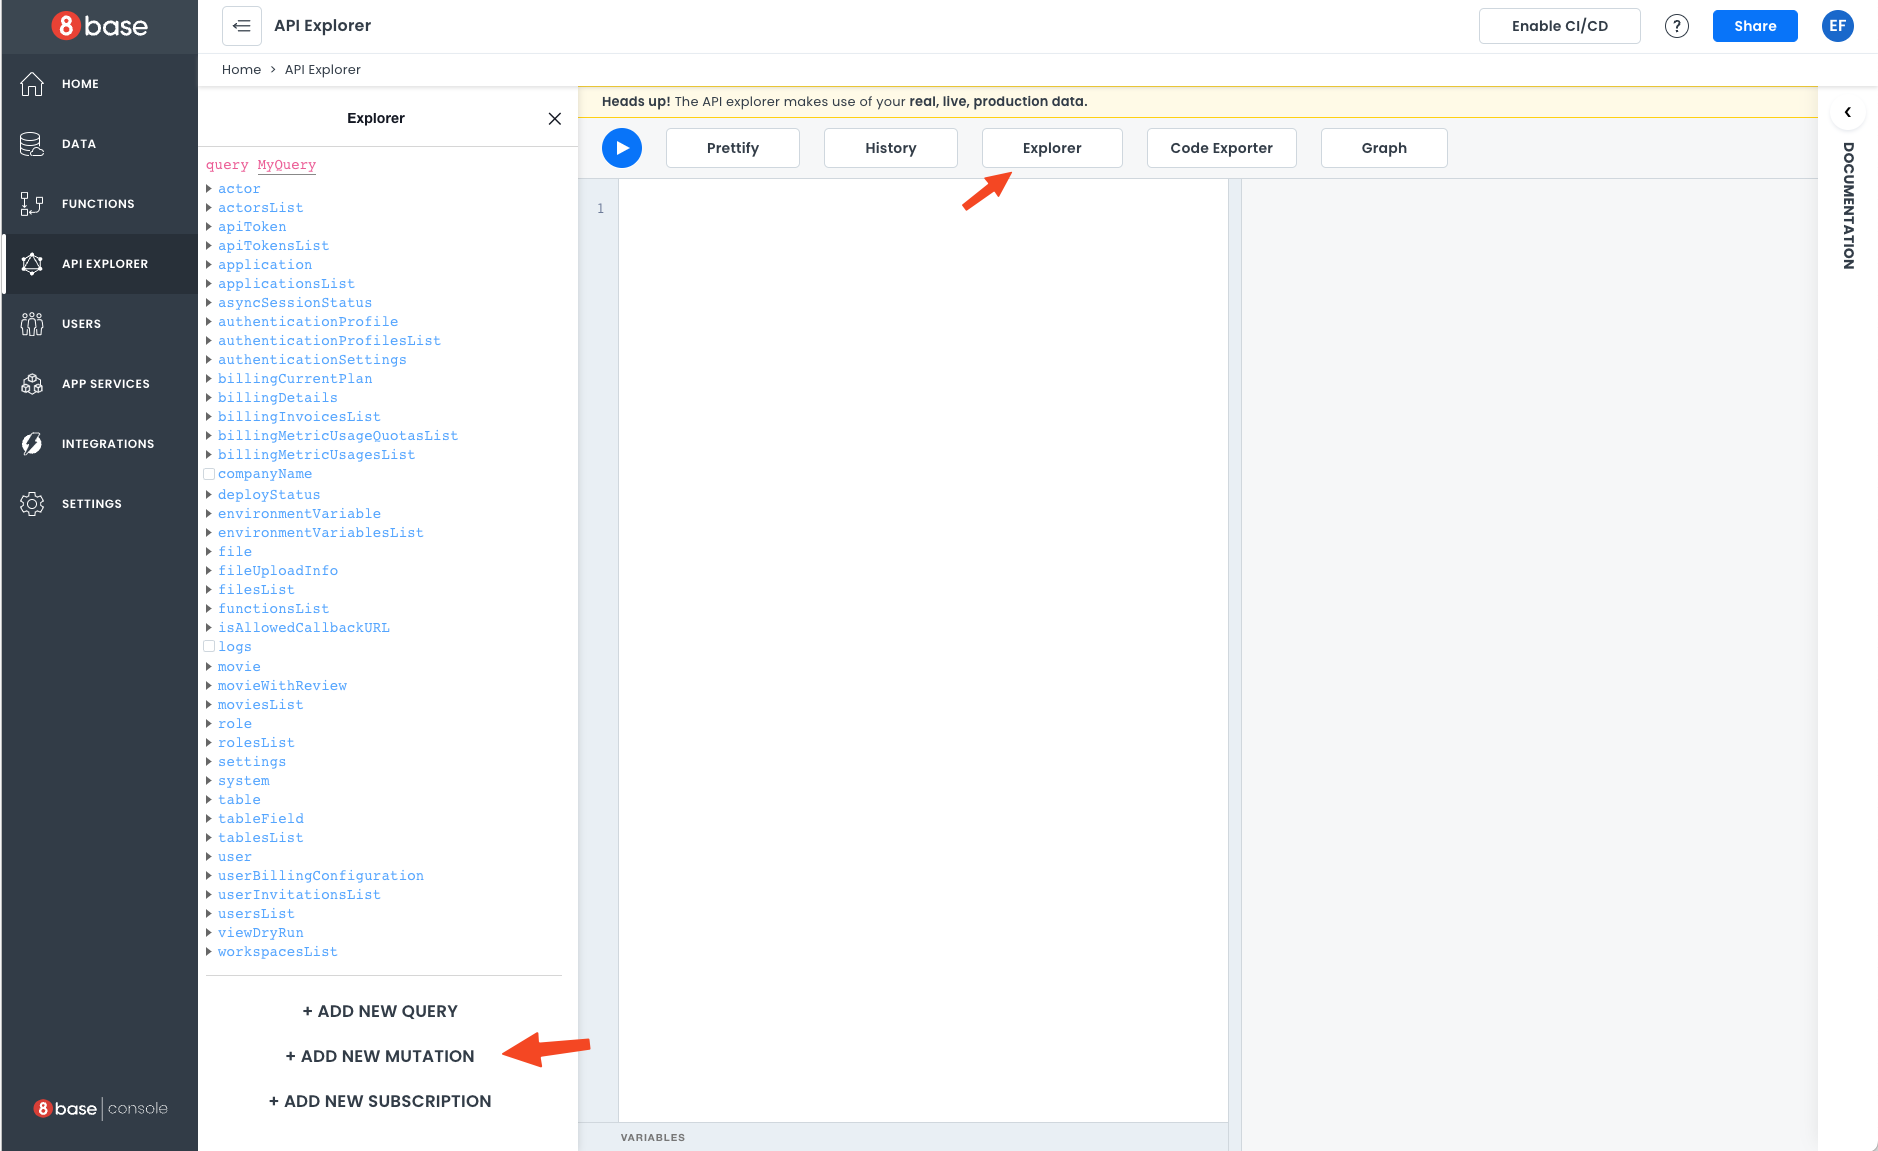
Search the list of mutations for movieCreate and expand it. Use the data section in red to pass the arguments and select what you want to return from the blue fields. Notice that the proper GraphQL code is created for you as you choose and enter values.
If you provide values like this:
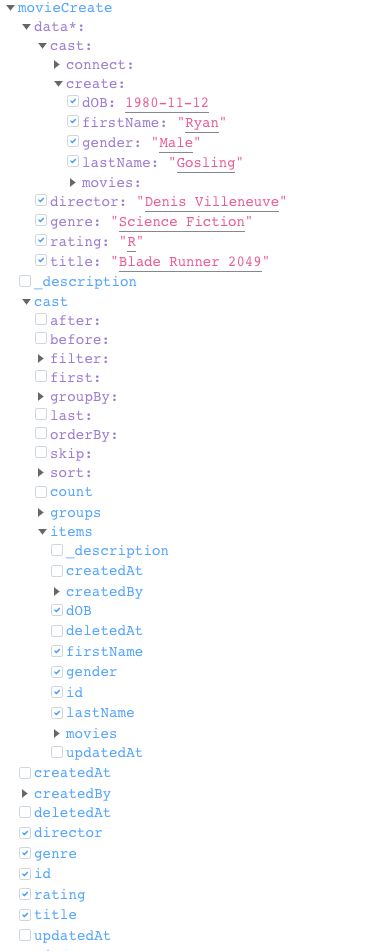
You will get GraphQL code that looks like this:
mutation MyMutation {
  __typename
  movieCreate(
    data: {
      title: "Blade Runner 2049"
      rating: "R"
      genre: "Science Fiction"
      director: "Denis Villeneuve"
      cast: {
        create: {
          firstName: "Ryan"
          lastName: "Gosling"
          gender: "Male"
          dOB: "1980-11-12"
        }
      }
    }
  ) {
    id
    title
    rating
    genre
    director
    cast {
      items {
        id
        firstName
        lastName
        gender
        dOB
      }
    }
  }
}
Click Prettify to format your code.
Once you hit the Play button, you will get results like these:
{
  "data": {
    "movieCreate": {
      "id": "clnxtoyh000gm08iddnng0vj7",
      "title": "Blade Runner 2049",
      "rating": "R",
      "genre": "Science Fiction",
      "director": "Denis Villeneuve",
      "cast": {
        "items": [
          {
            "id": "clnxtoyhz00gp08id54swb9bo",
            "firstName": "Ryan",
            "lastName": "Gosling",
            "gender": "Male",
            "dOB": "1980-11-12"
          }
        ]
      }
    }
  }
}
The Explorer is a great tool to create complex GraphQL statements easily!
Creating Queries for our Frontend
In our frontend app, we will implement two pages:
- A paginated list of movies.
- A page to show the details of the movie.
There is no particular order in which pages like this are implemented. You will need to craft the statements your app will use at some point. Since we are already in the API Explorer, let's get do it now.
Making a Paginated List
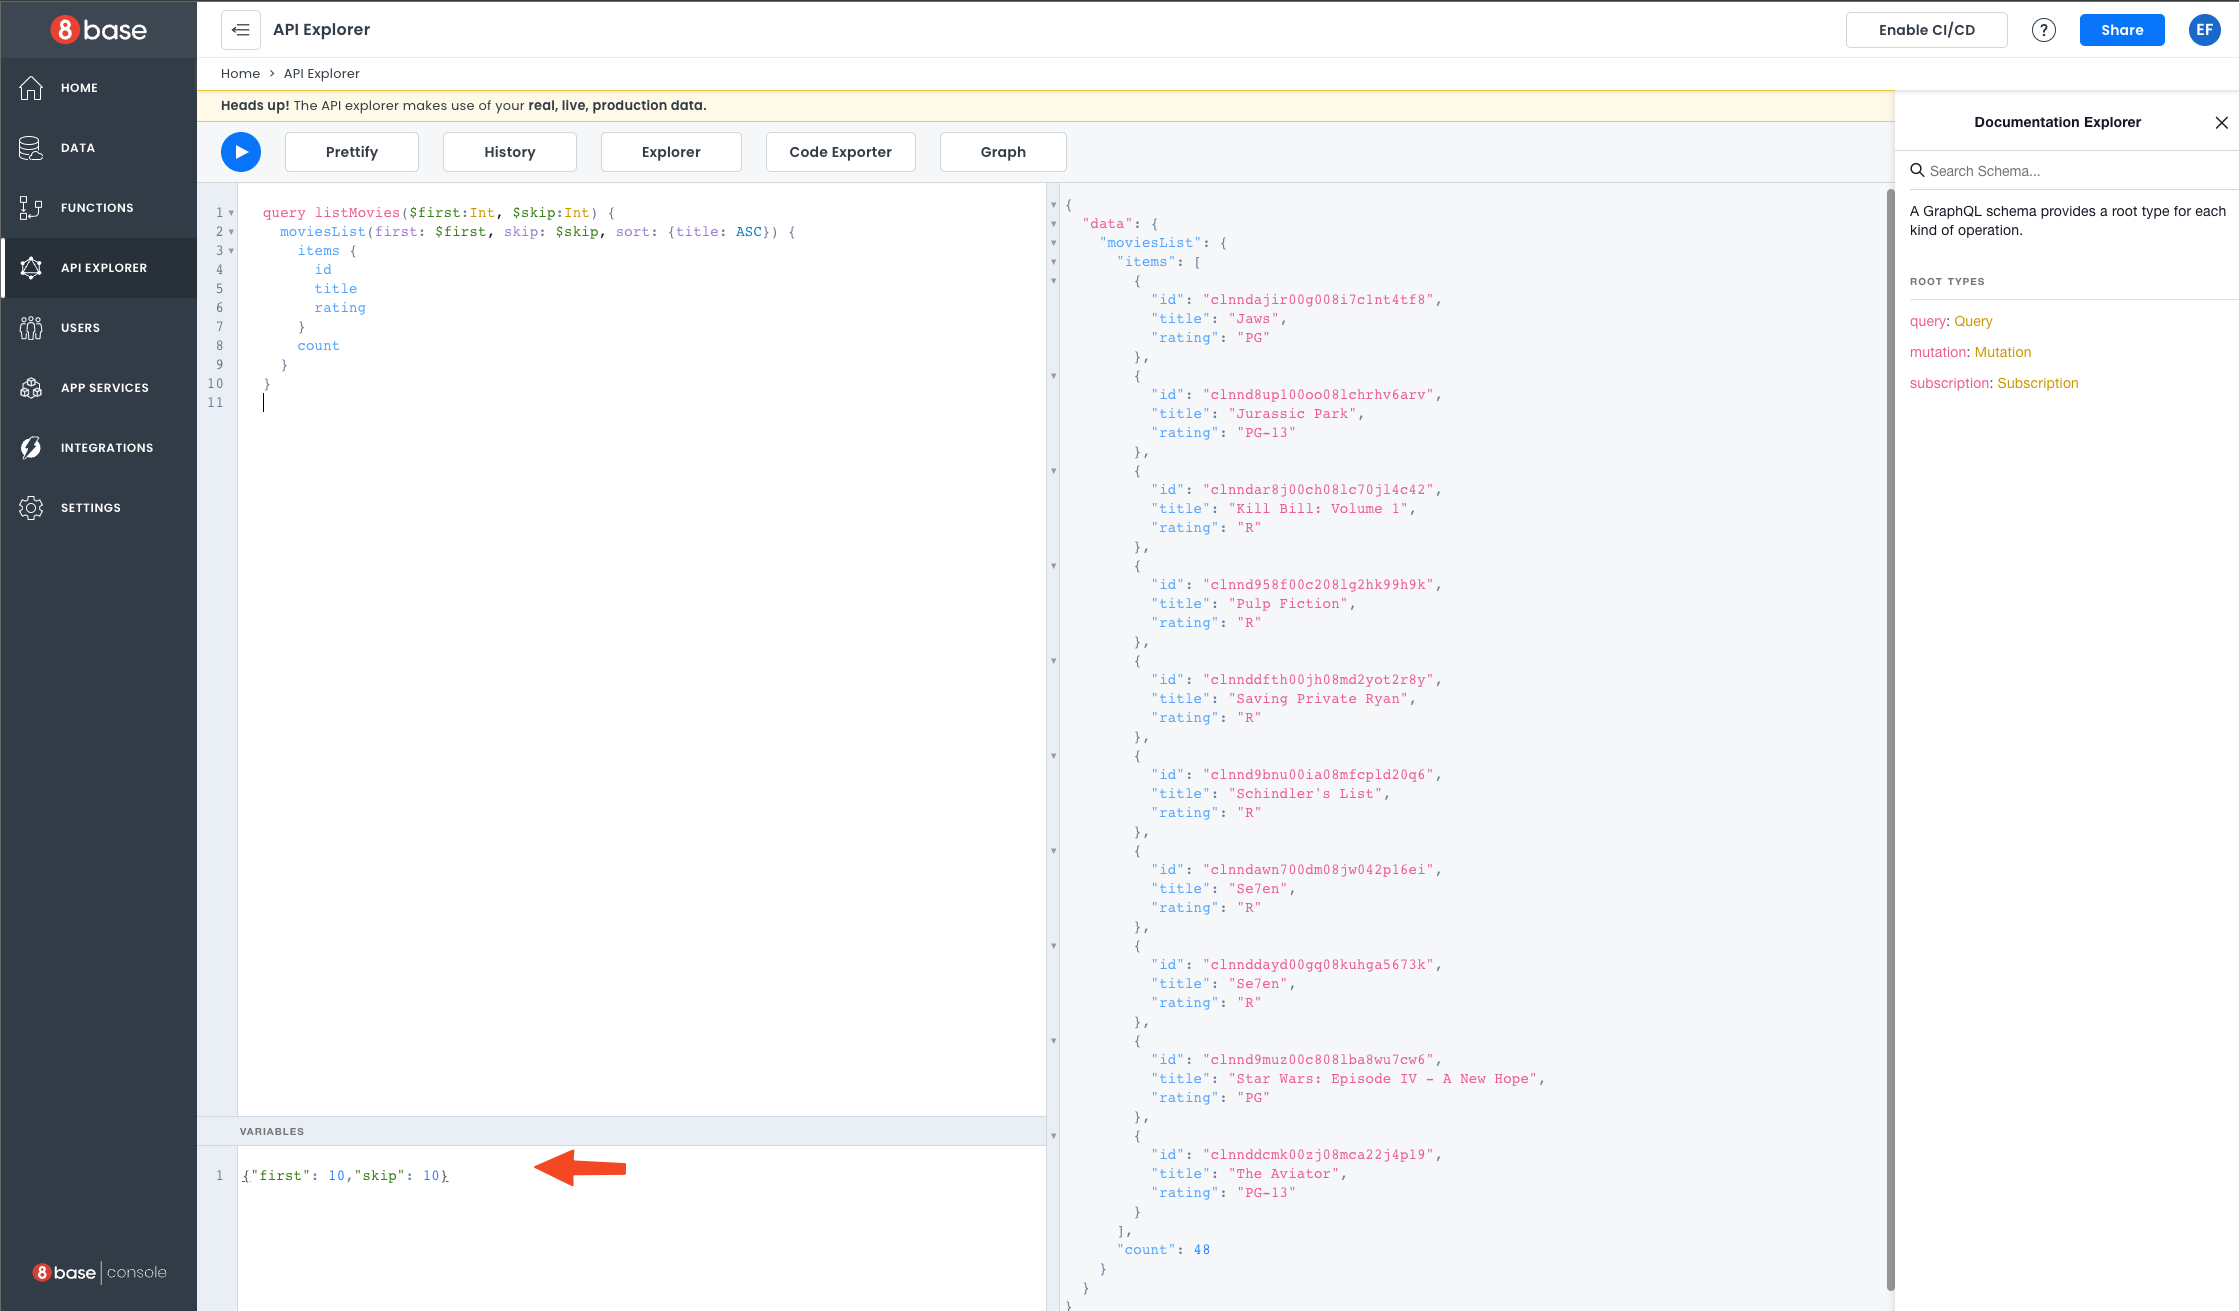
We will use the standard arguments first and skip to implement a paginated list. Because these are meant to be passed by the client app, we will set variables in our GraphQL statement. It will also be a good idea to have it return the number of records so the client app can implement the pagination logic.
Here is our query:
query listMovies($first:Int, $skip:Int) {
  moviesList(first: $first, skip: $skip, sort: {title: ASC}) {
    items {
      id
      title
      rating
    }
    count
  }
}
In the API explorer, you can click on the Variables section to bring up an editor where you can add a JSON document with your variables values. It would look similar to this:
Adding Movie Details
We will use the movies query and pass the movie we want the details as a variable. We will query the related information in the Actor table in this case.
query getMovieDetails($movieID: ID) {
  movie(id: $movieID) {
    id
    title
    genre
    rating
    director
    cast(sort: {lastName: ASC}) {
      items {
        id
        firstName
        lastName
        gender
        dOB
        movies(sort: {title: ASC}) {
          items {
            id
            title
          }
        }
      }
    }
  }
}
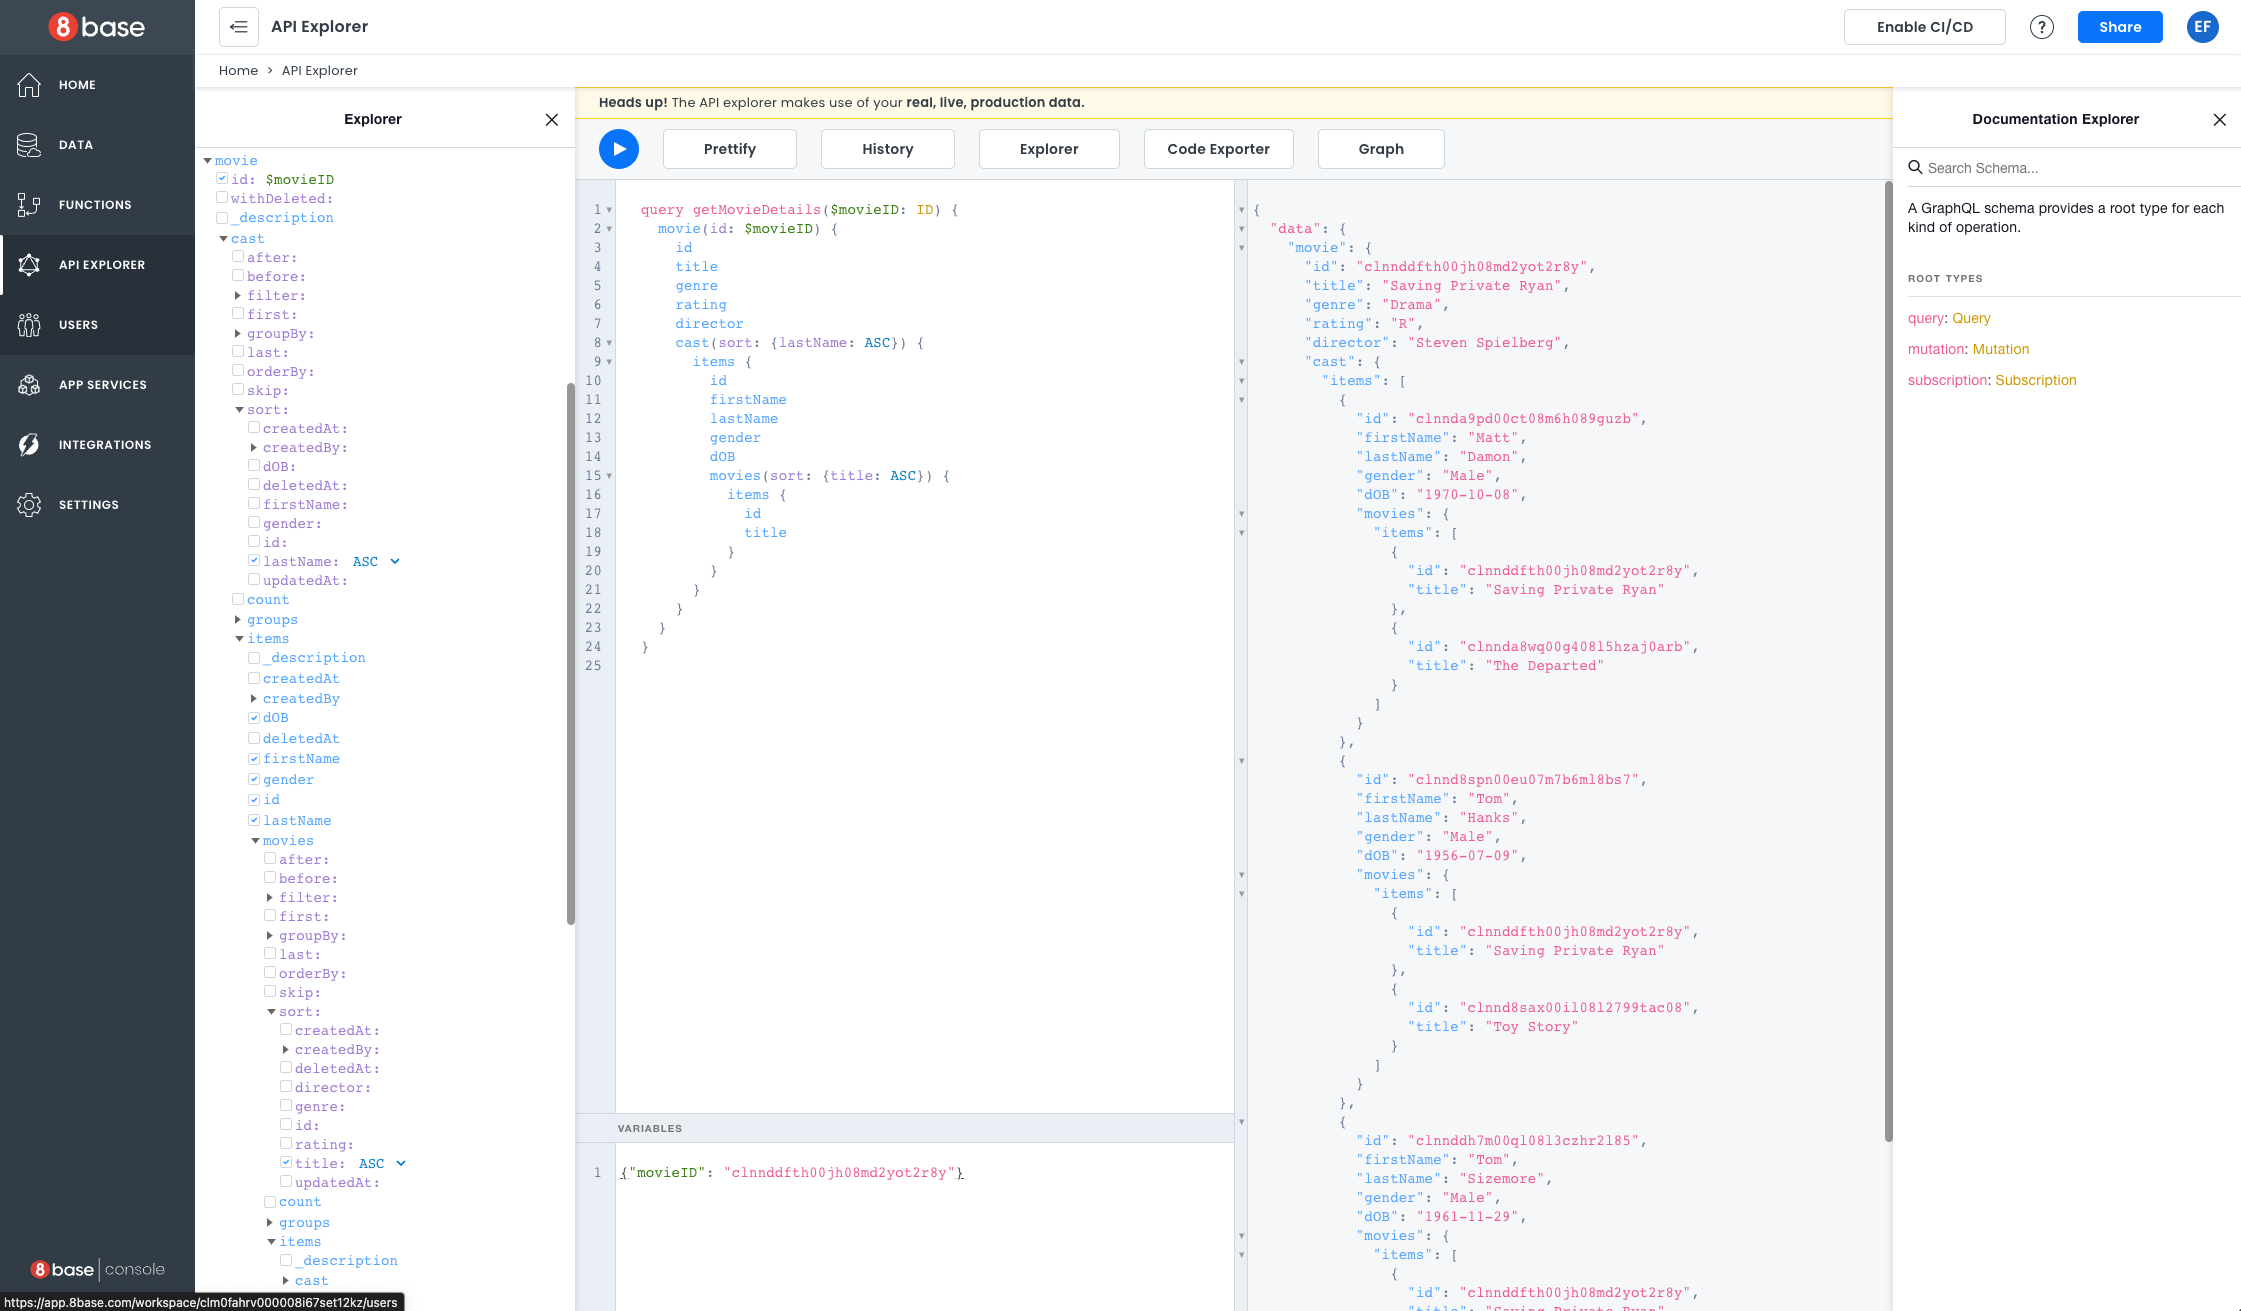
A movie will load a list of actors, and each actor will load the list of movies. In both cases, we can control how the sorting of those lists would work. Here's an example of how this would look like in the API Explorer:
Building the Frontend
Go back to your project dashboard and open your frontend. This will get you to App Builder.
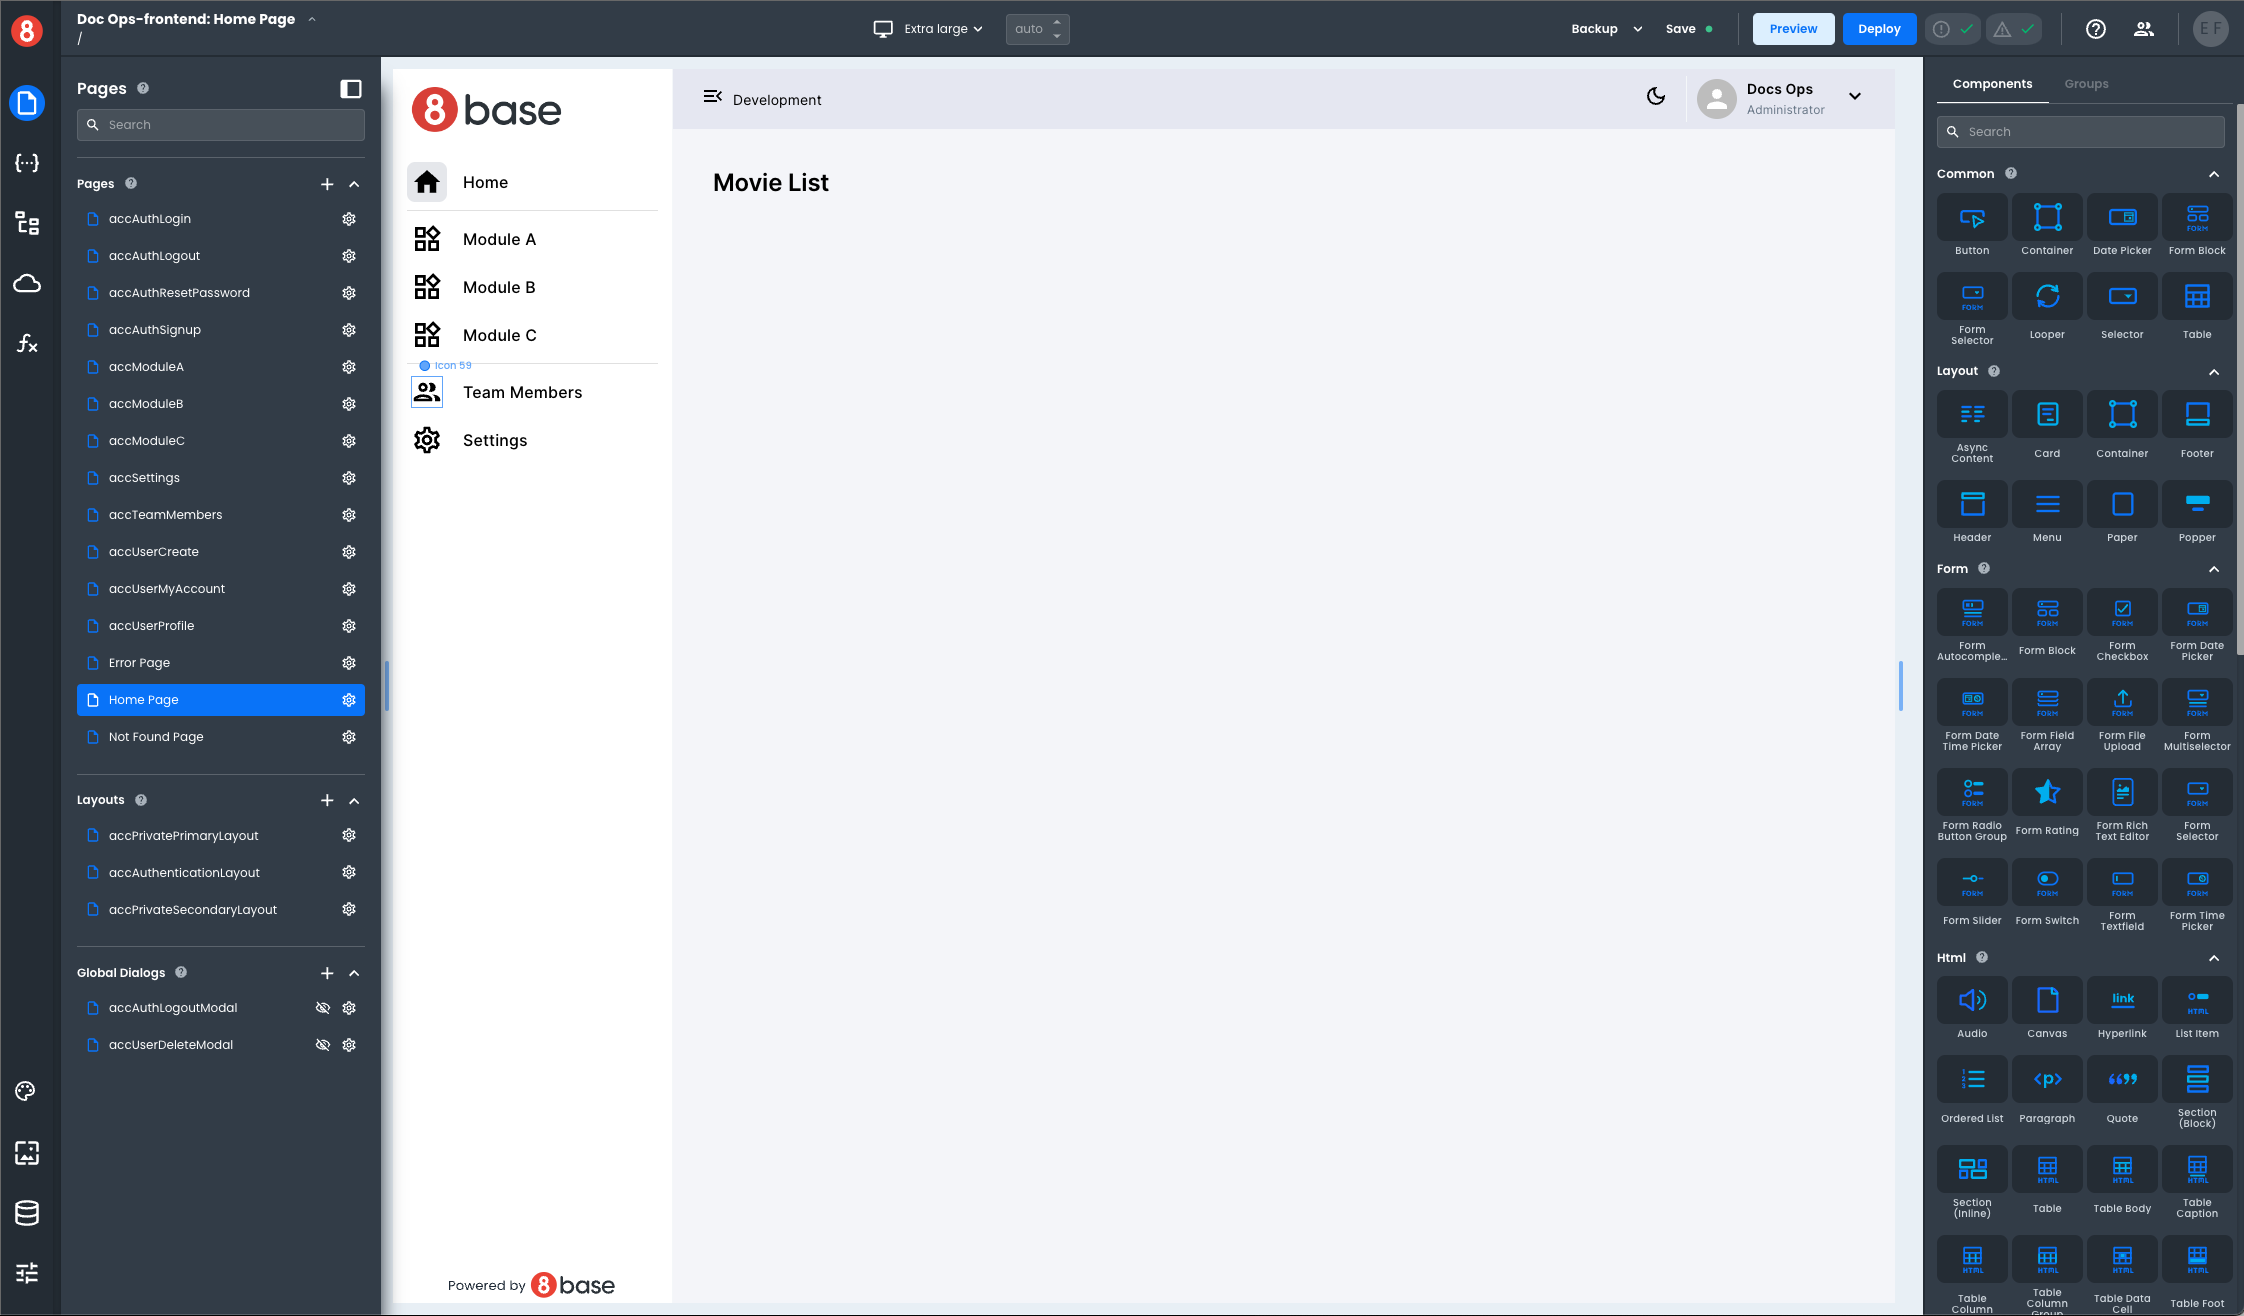
We are using the "Jumpstart with accelerators" template. Before we start, we will do some cleanup to begin tailoring our application. Delete any elements on the homepage that you do not need. You can use your delete key or the context menu. Something like this will work great:
Implementing the Paginated List
Our goal will be to display a list of movies as a set of cards, render in each card the movie title, genre, and rating, make available a couple of buttons to navigate through the list, and have a button to go into the details of the movie. We already crafted our query, but it expects two parameters. We will use a state to hold the value to send in the $skip parameter. This will make it very easy to update the data every time the user clicks Previous or Next.
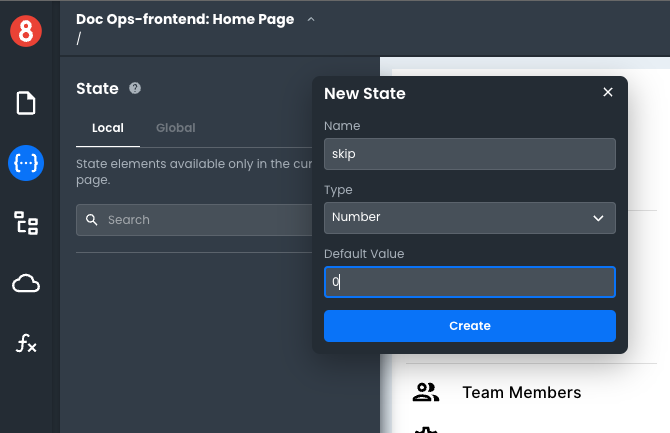
Click on the State pane in the left bar to open it. We will want this new state entry to be available only on the homepage. We will stay in the local scope and click the + button to Create a new state. Call skip, make it a number, and set the default value 0:
This template already has a Resource connected to our backend. If you tried to work with multiple backends or started with a blank template, you can add additional resources in the Resources section.
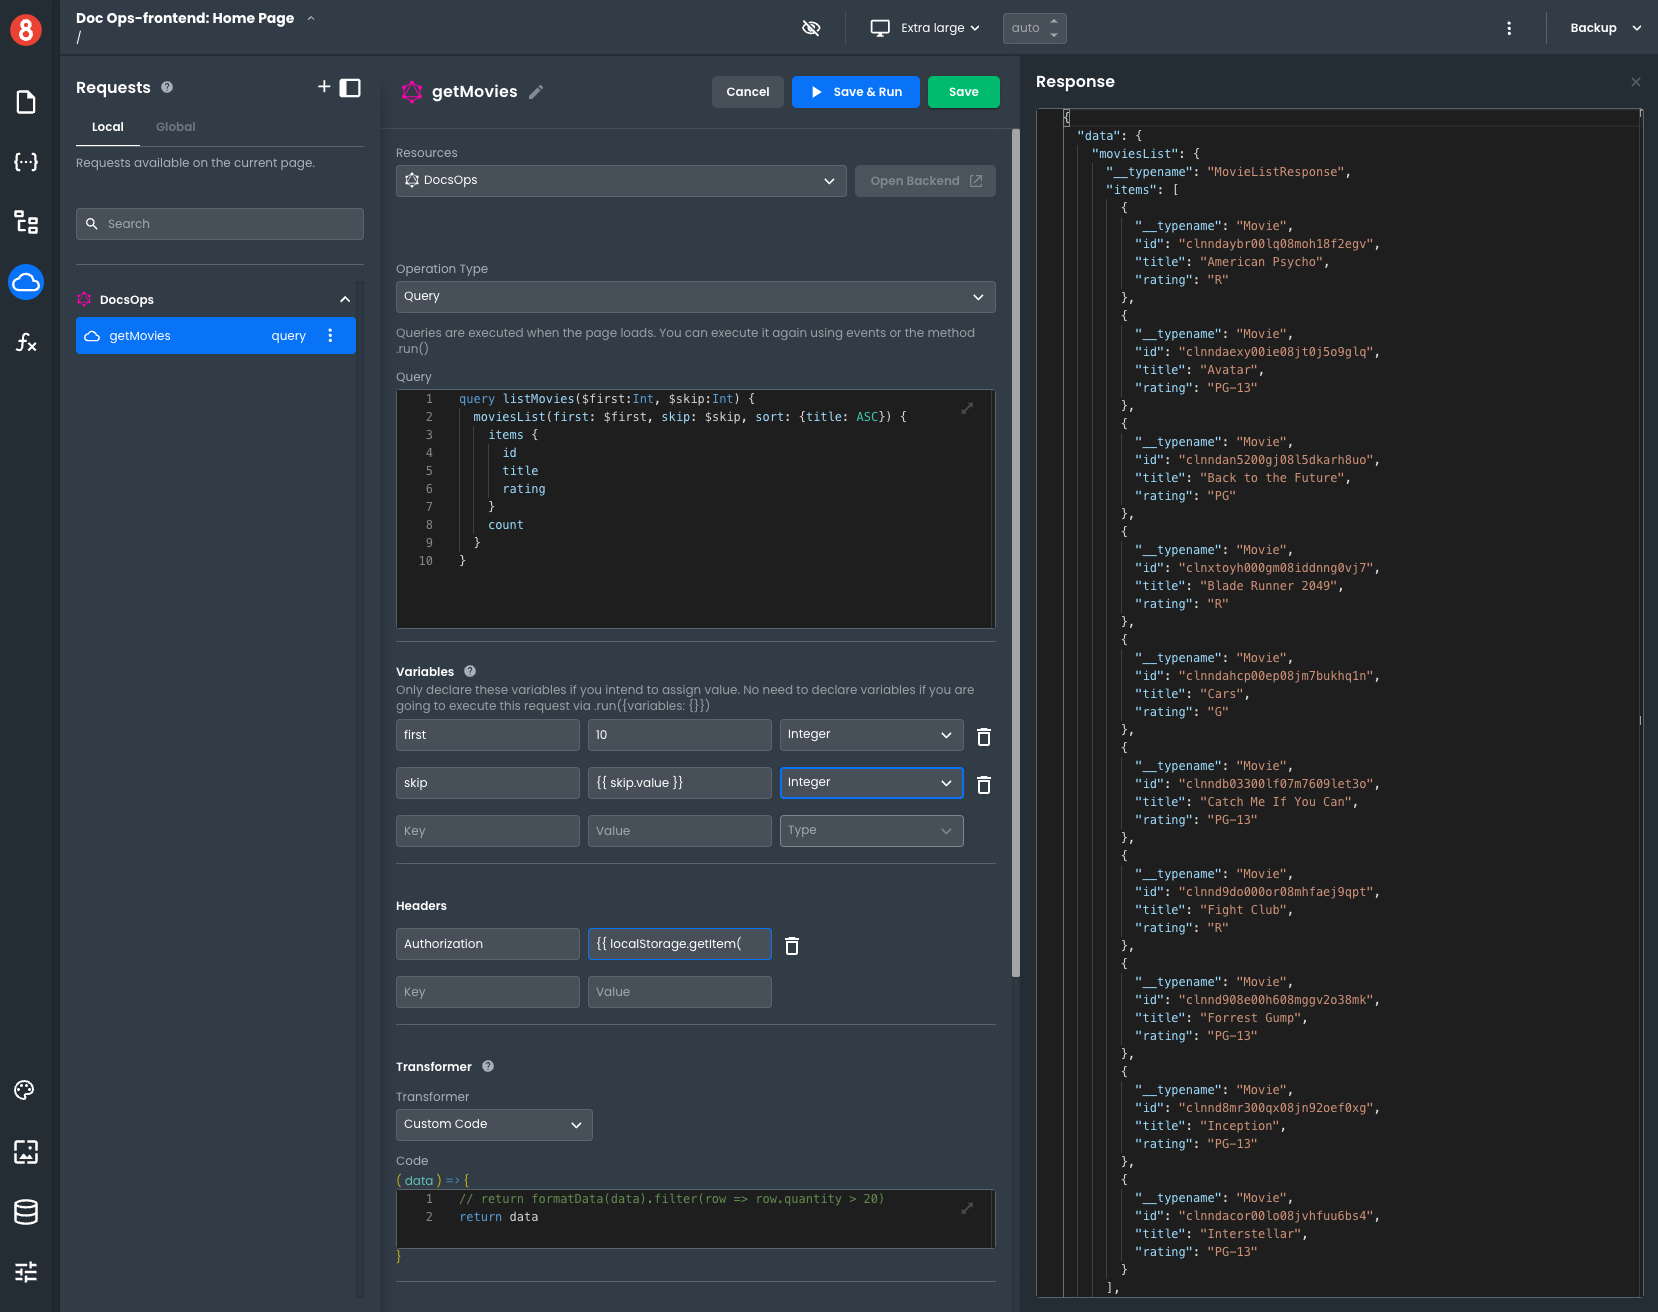
As things had been set up for use, we can go straight into the Requests pane and add a local request. Similar to the state, we only want this request to be available on the homepage. We will want to change the operation type to Query, as these execute automatically when the scope is mounted (in our case, when the homepage is loaded).
After copying our query, we will want to declare our variables. This is optional if you intend to run the query using a code block, but that won't be necessary in our case. For the first variable, we can set up a fixed value of 10, which always returns ten entries at the most. We want to use the value stored in the state we created above for the skip variable. We will accomplish this with a handlebar expression, which is an inline javascript expression. It will look like this: {{ skip.value }}. Notice we used double curly brackets to enclose our handlebar expression.
Information within 8base is secured by default, so we need to pass a proper Authorization header with the calling user's identity to ensure the caller has permission to access the data.
Your frontend in App Builder is a live application. This makes it very easy to understand how the application will look and behave, but it also forces the developer to deal with the fact that the application is running. Authentication against backends is a common situation where you need to consider how to pass the identity to the server while still in development. There is no prescribed way to achieve this, so you can implement it as it makes better sense for your application.
The "Jumpstart with accelerators" makes it easy to use as it already implements the entire the authentication flow. When users are authenticated, their identity is available as a JWT token in the browser's local storage under the key tokenID. Conveniently, that key will be available within App Builder as well, so we can set the value of our Authorization header to a handlebar expression like this {{ localStorage.getItem('tokenID')}}
Name your query "getMovies" and put it all together. It should look like this after click Save and Run:
Executing your query populates an associated state, which makes developing your application easier. Let's put together our page to render the data.
First, select the homepage and change the Layout configuration so the content stretches and occupies the available space.

Drop an Async content component on the page. This component will allow us to show the user we are loading data from the backend. We will want its Loading attribute to be tied to the execution of our query. You can copy the path to that property from the state pane.
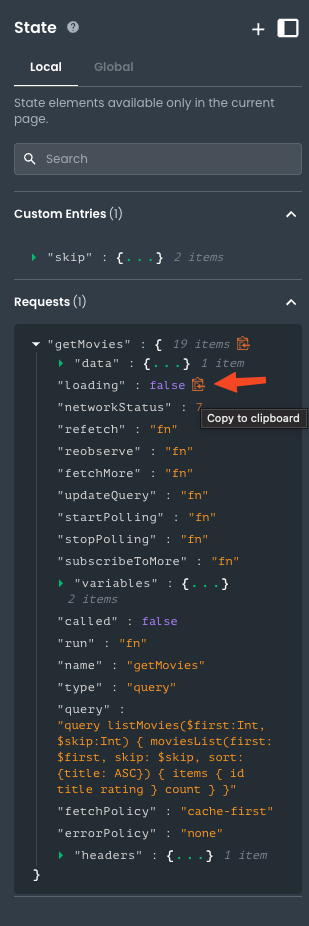
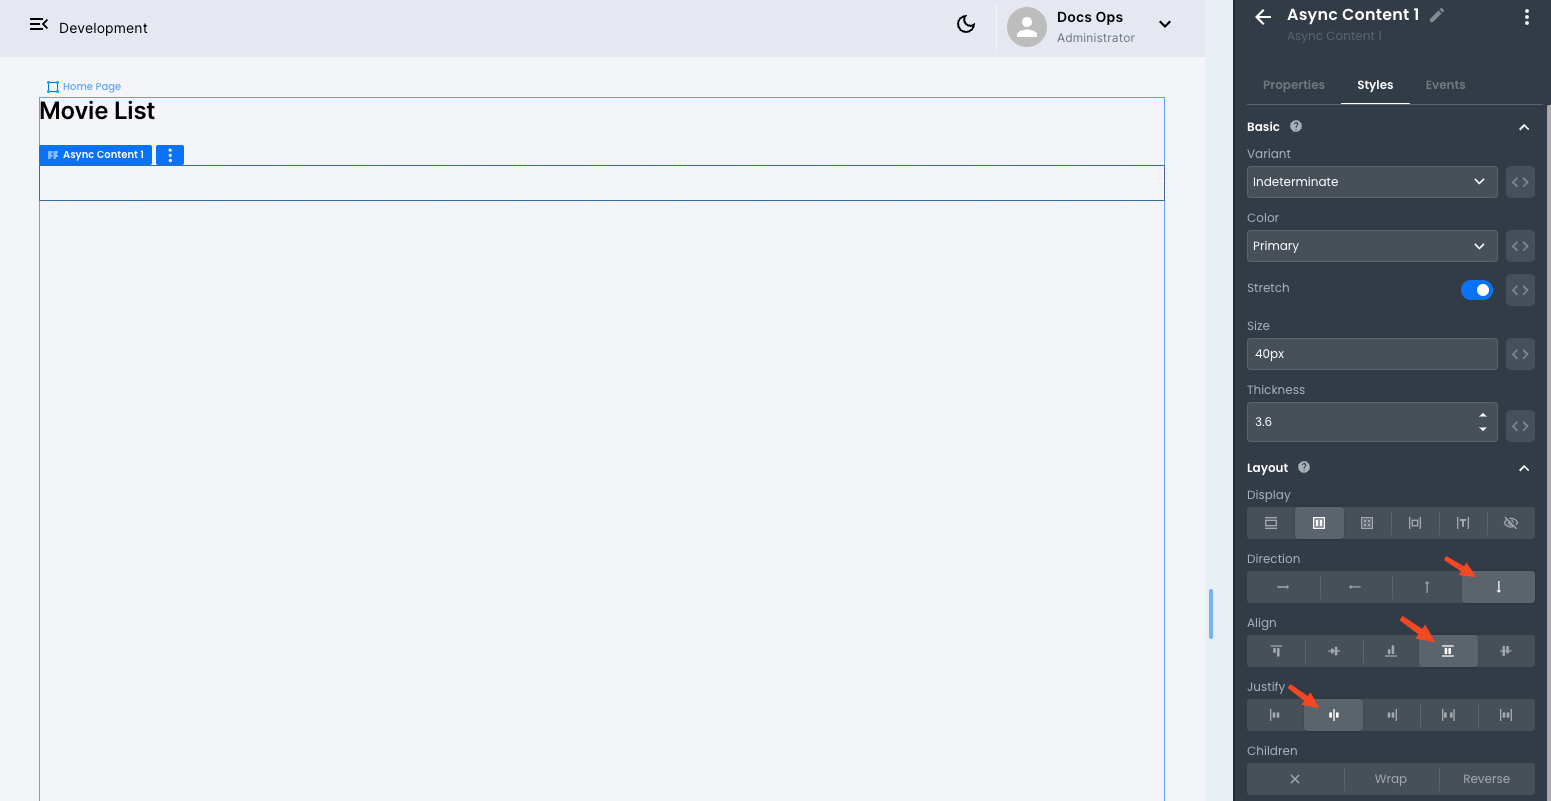
Then select the Async component from the canvas, go to properties, click on the button next to the Loading attribute to switch to Code, and write the expression {{ getMovied.loading}} to bind the attribute. You can also change the styling pane so the spinner appears centered and children's components are organized from top to bottom, taking all the space.

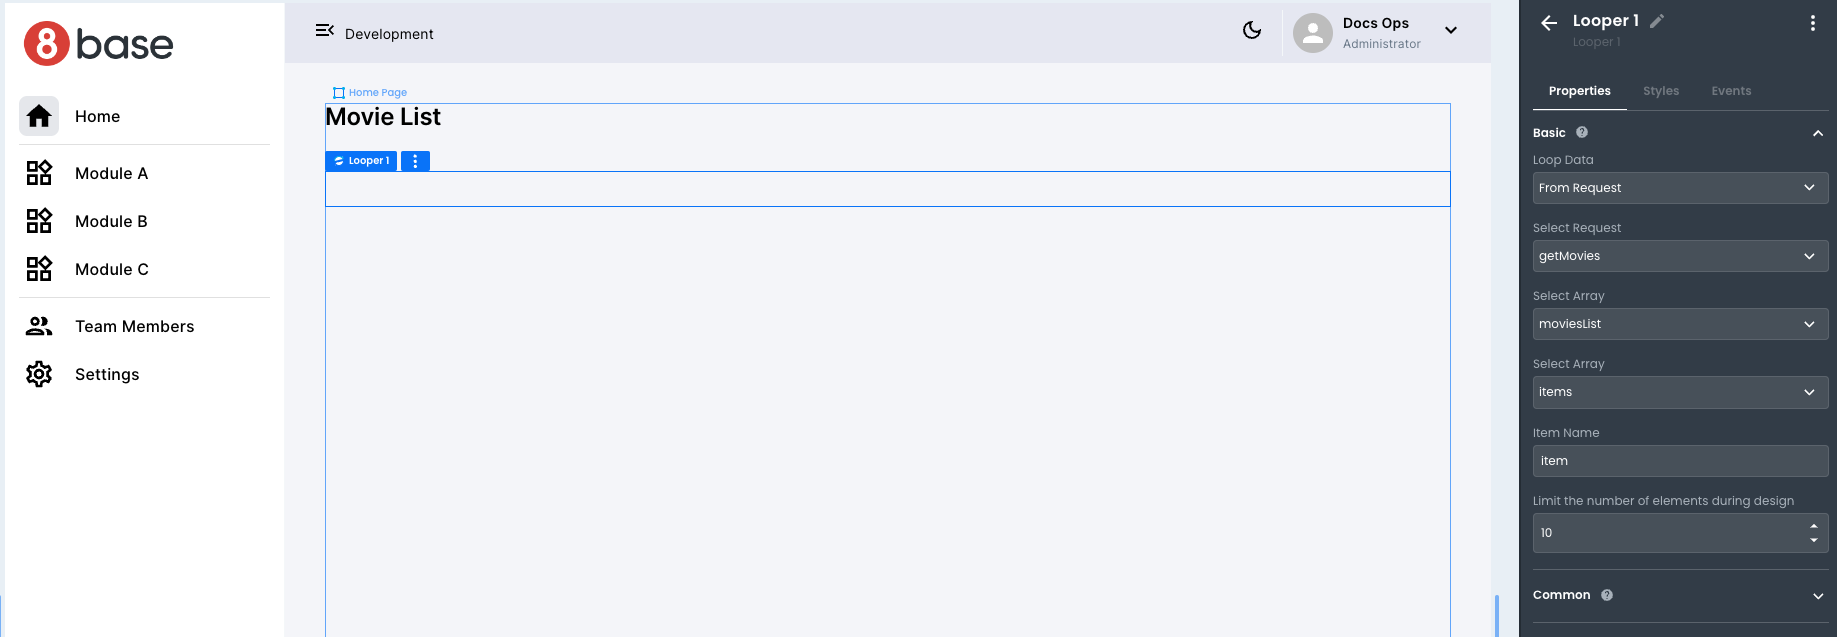
It is time to drop a Looper inside our Async content component. The Looper is a special component that allows us to iterate over an array. Use the property pane to set it up to use the data in our query. You can change the number of elements to render during design to control how much content you have to deal with while working on your app. This setting does not affect the execution.
Set up your looper as shown below:
Now, drop a card inside the looper. You should see more than one! That's because the application is live and showing you what the results will look like.
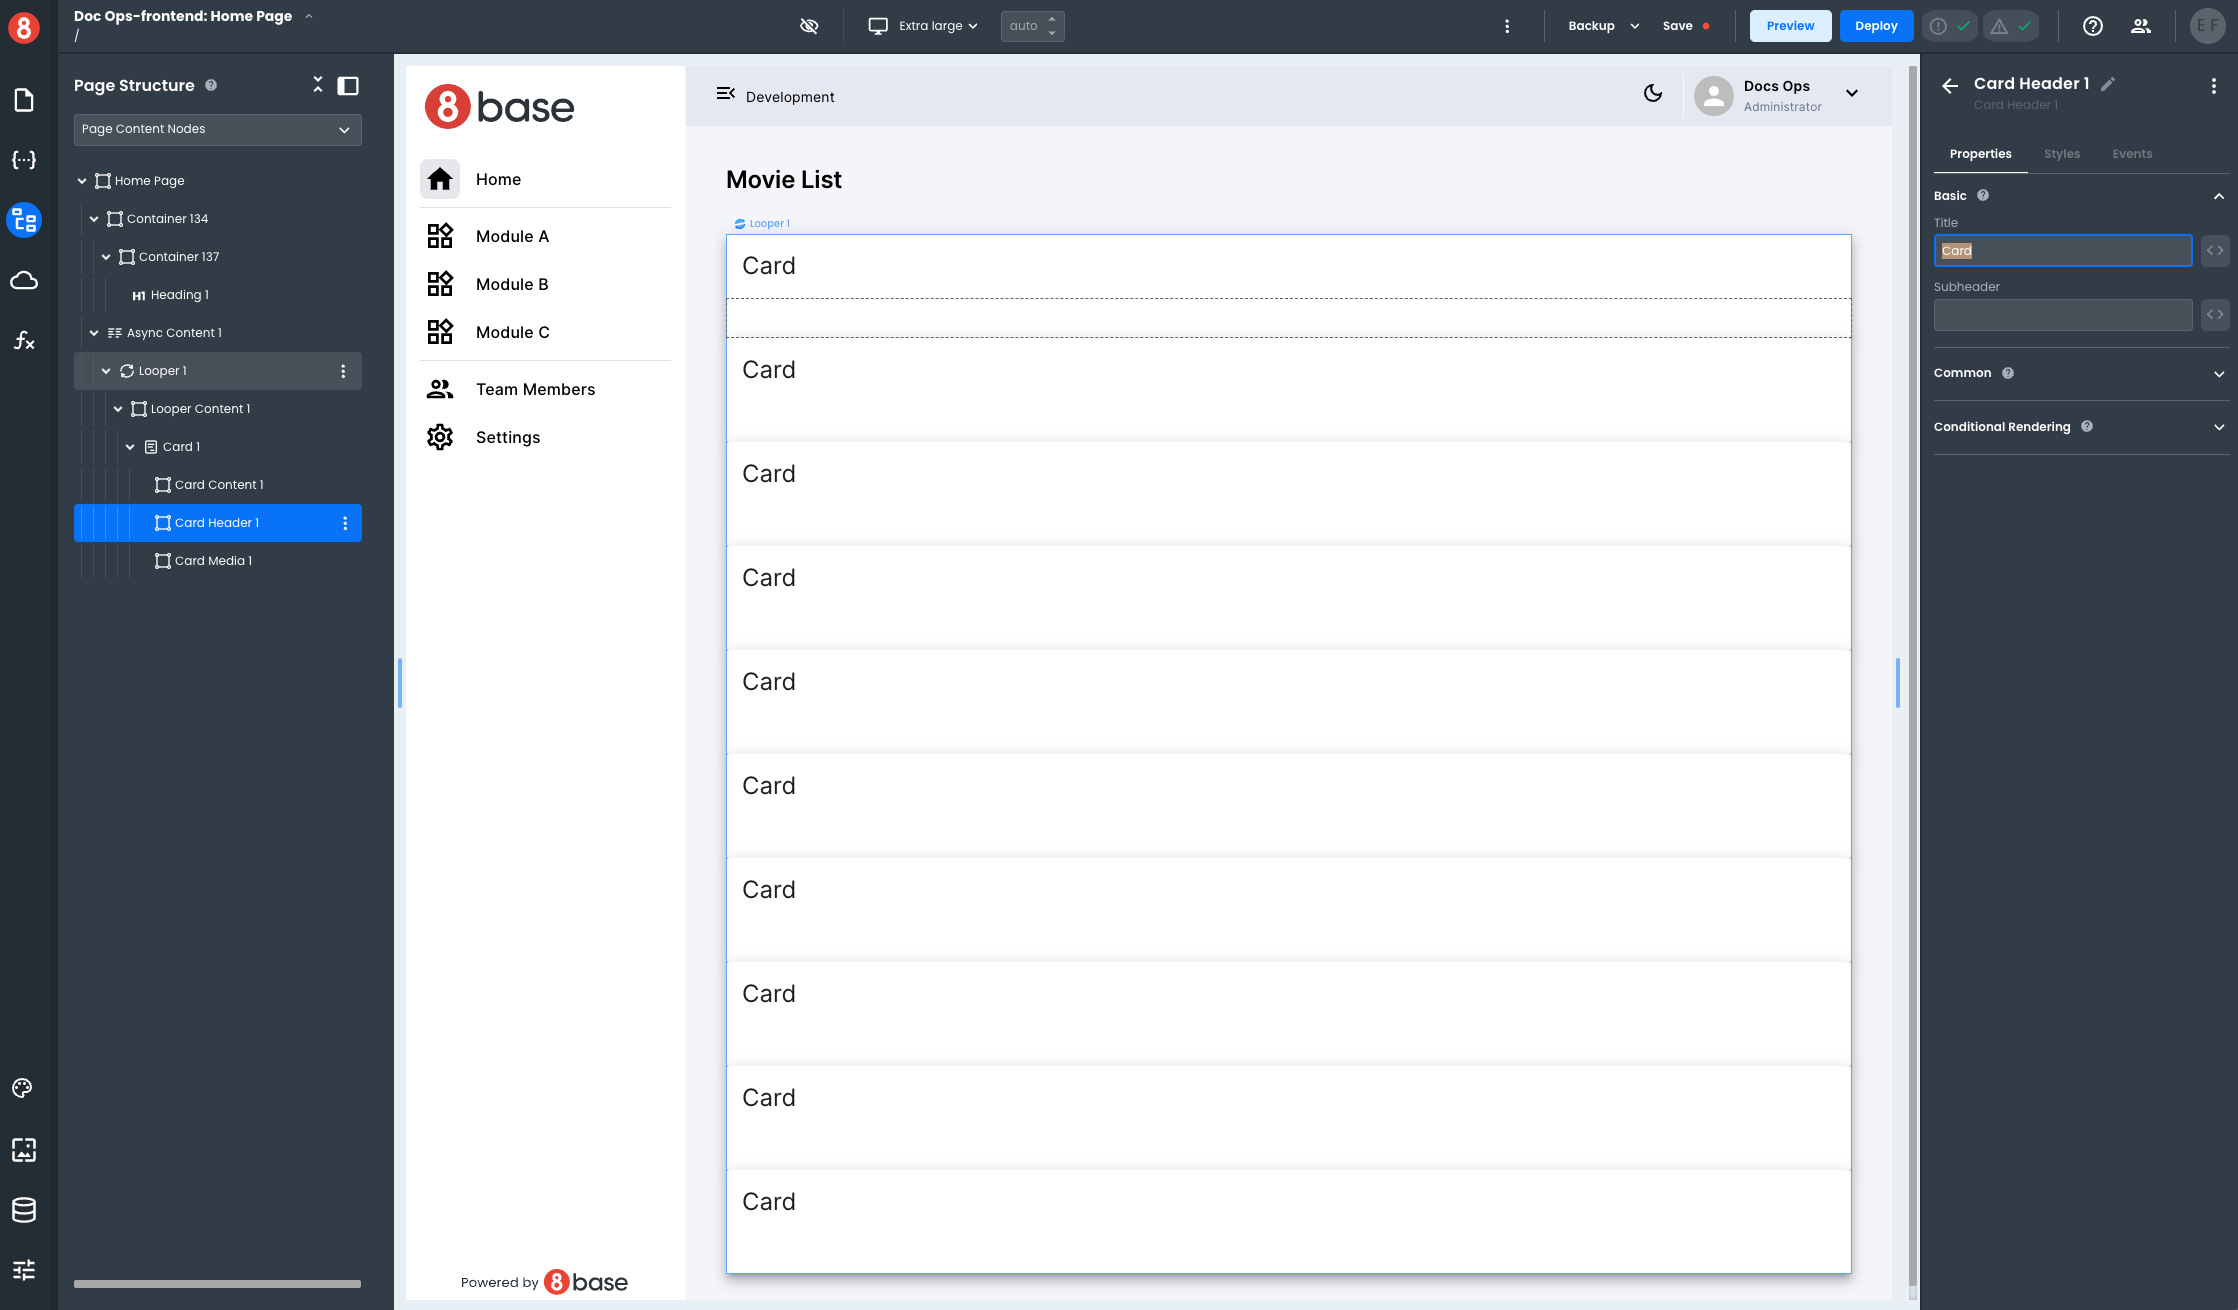
This is useful, but it could look better. Let's fix that by configuring the layout of the looper. Use the Page Structure pane to select the looper and reach the style pane. Change the layout to your liking. Here is the configuration we used:
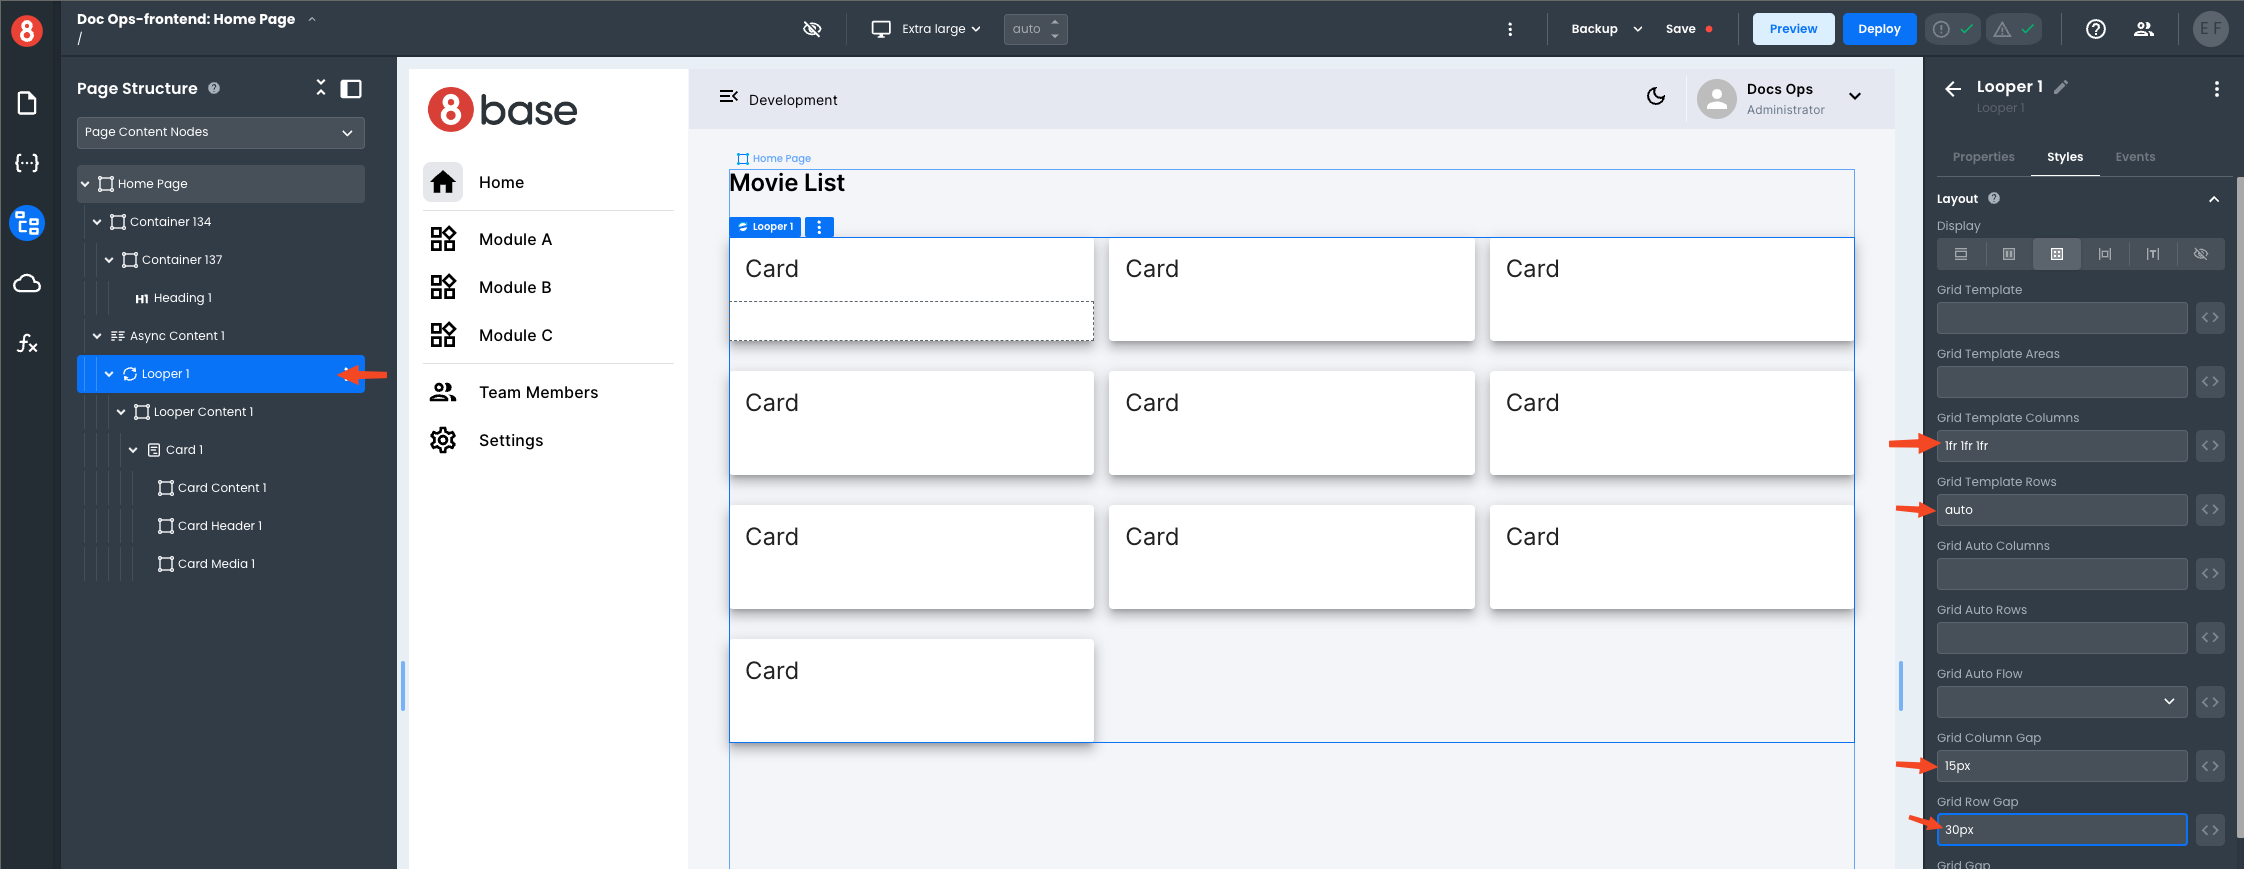
The page structure pane is a handy way to select between multiple components. You can also move them directly in the page structure and access the context menu for operations like copy or clone.
Configuring the Pagination Layout
Now, we want to achieve the following:
- Show the movie title as the header of the card.
- Show the movie rating as subheader.
- Add a button to navigate to the details.
Using the page structure, select the card header and add handlebar expressions to show the data. In our looper configuration we set it up for each item to be referenced as item, so in our handlebar expressions we can do item?.title and item?.rating. It is a good practice to use optional chaining here, because we do not want our app to fail if for some reason item becomes undefined.
Then drop a Button inside the card content and change the label to "View". It should look like this:
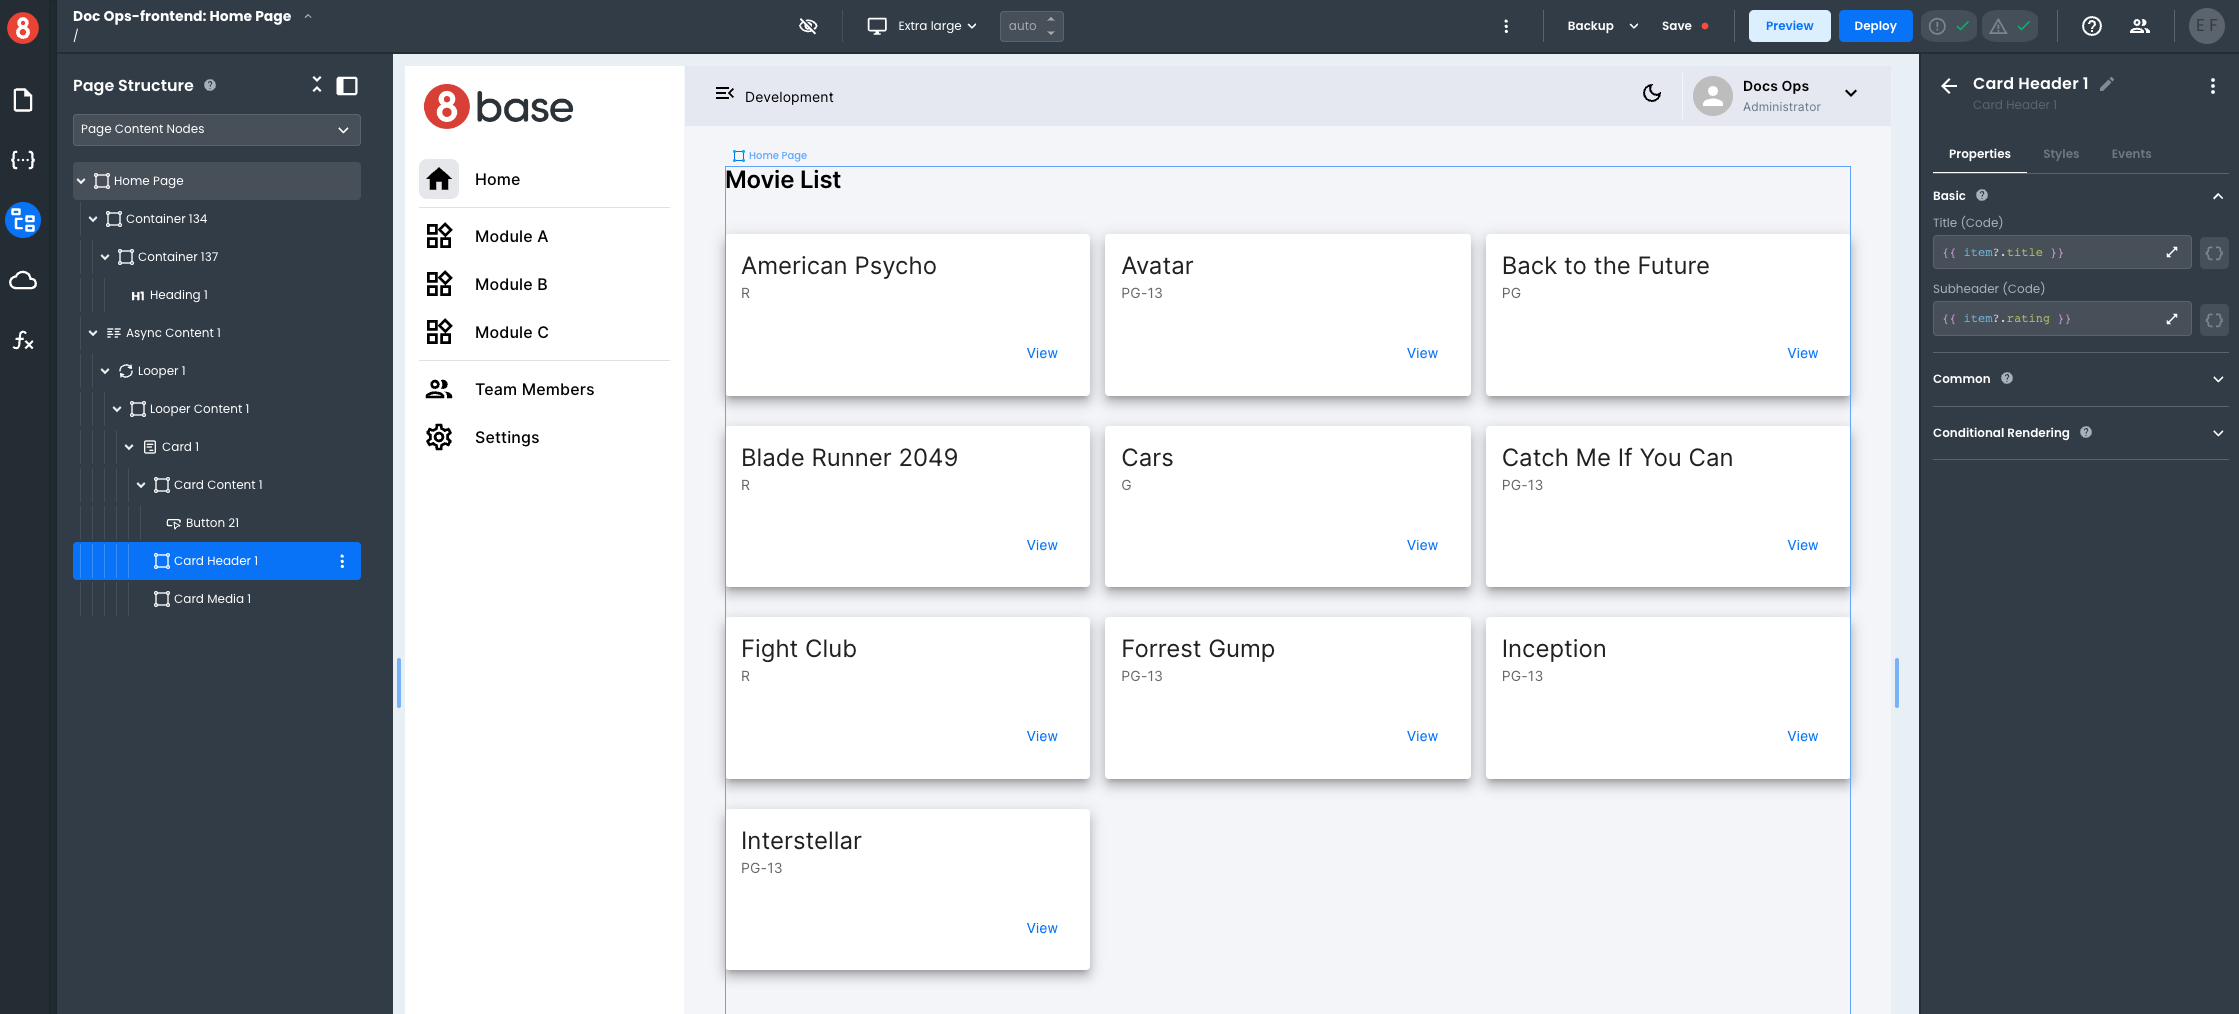
We changed the style layout of the card content, to use Flex with direction set as Row reverse. This is why our button shows right-aligned.
Now we want to add buttons to paginate through the data. Follow these steps:
- Drop a container below the async content.
- Drop two buttons inside the container.
- Change the lables of the buttons to "<< Previous" and "Next >>".
- Set up stying with flex layout, space between justification and left and right padding.
It should look like this:
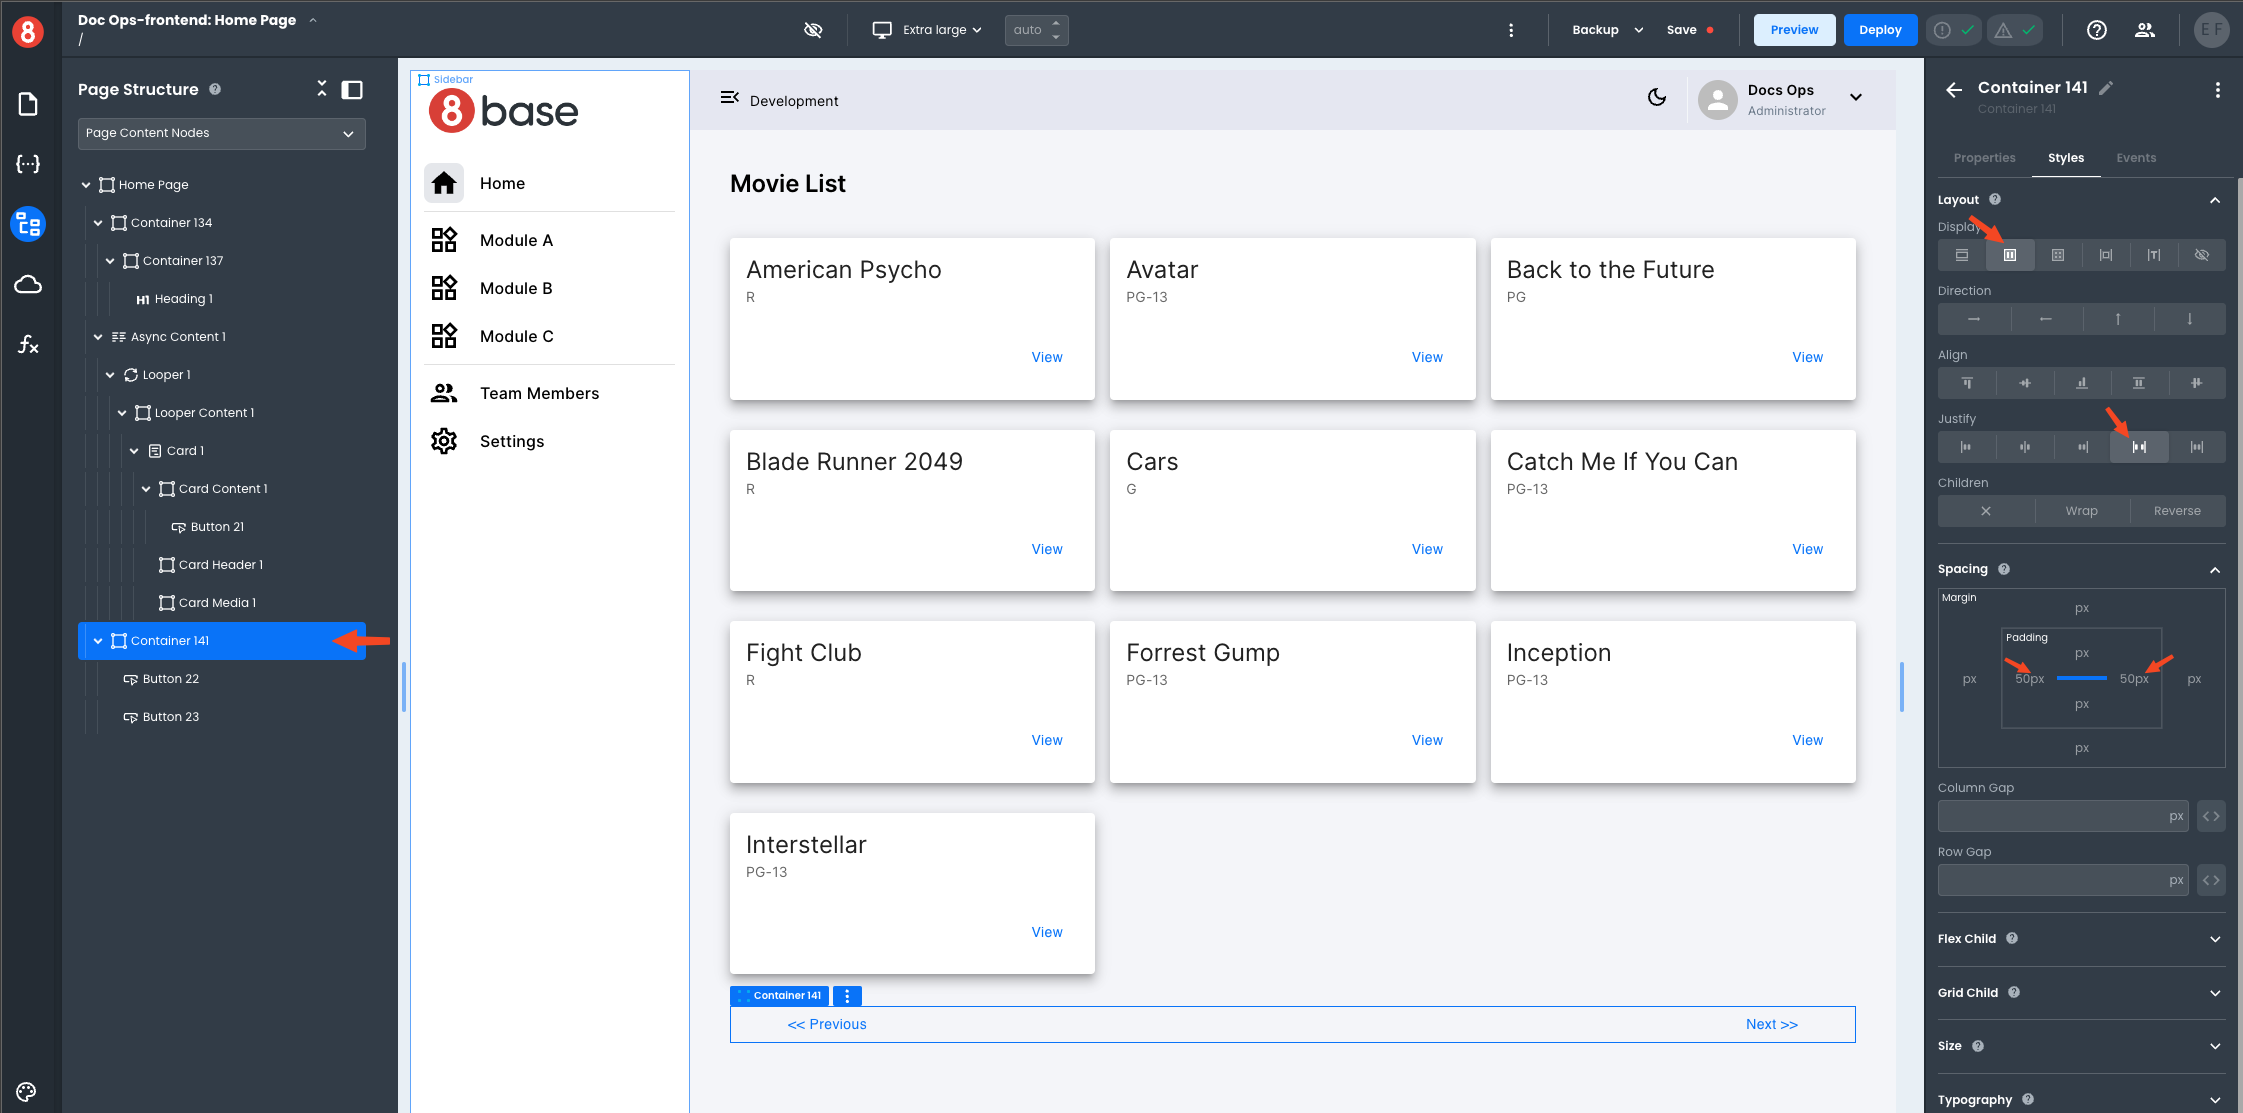
Now the fun part: We want to change the value of our skip state. As this state is used as the value of a variable in the query, every time it changes the query will be executed again and the data in our page will be updated.
We will add this functionality as events in the buttons. Follow these steps
- Select the button with the label "Next >>".
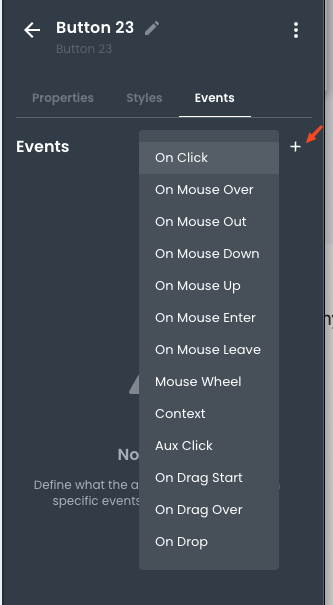
- In the right pane, select Events and click the + icon.
- Select
On Click.
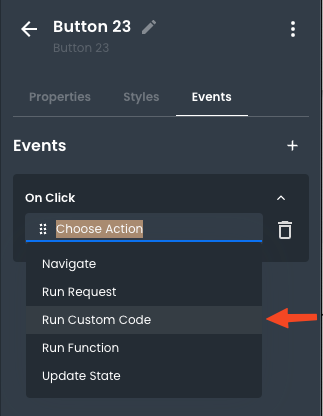
- In the action options, select Run Custom Code.
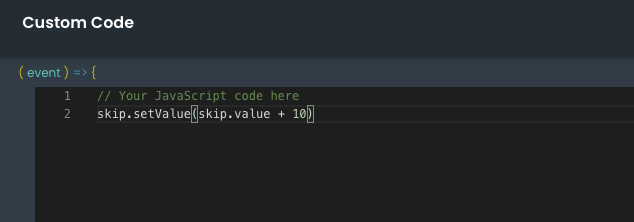
- Click Add Custom Code to open the editor.
- Add your code:
skip.setValue(skip.value + 10)
- Click Done when ready.
Repeat those steps for the button labeled "<< Previous", but this time, substract from skip:
skip.setValue(skip.value - 10)
It is time for you to preview your application. Use the Preview button in the top bar and see how your application is behaving.
Adding the Movie Details Page
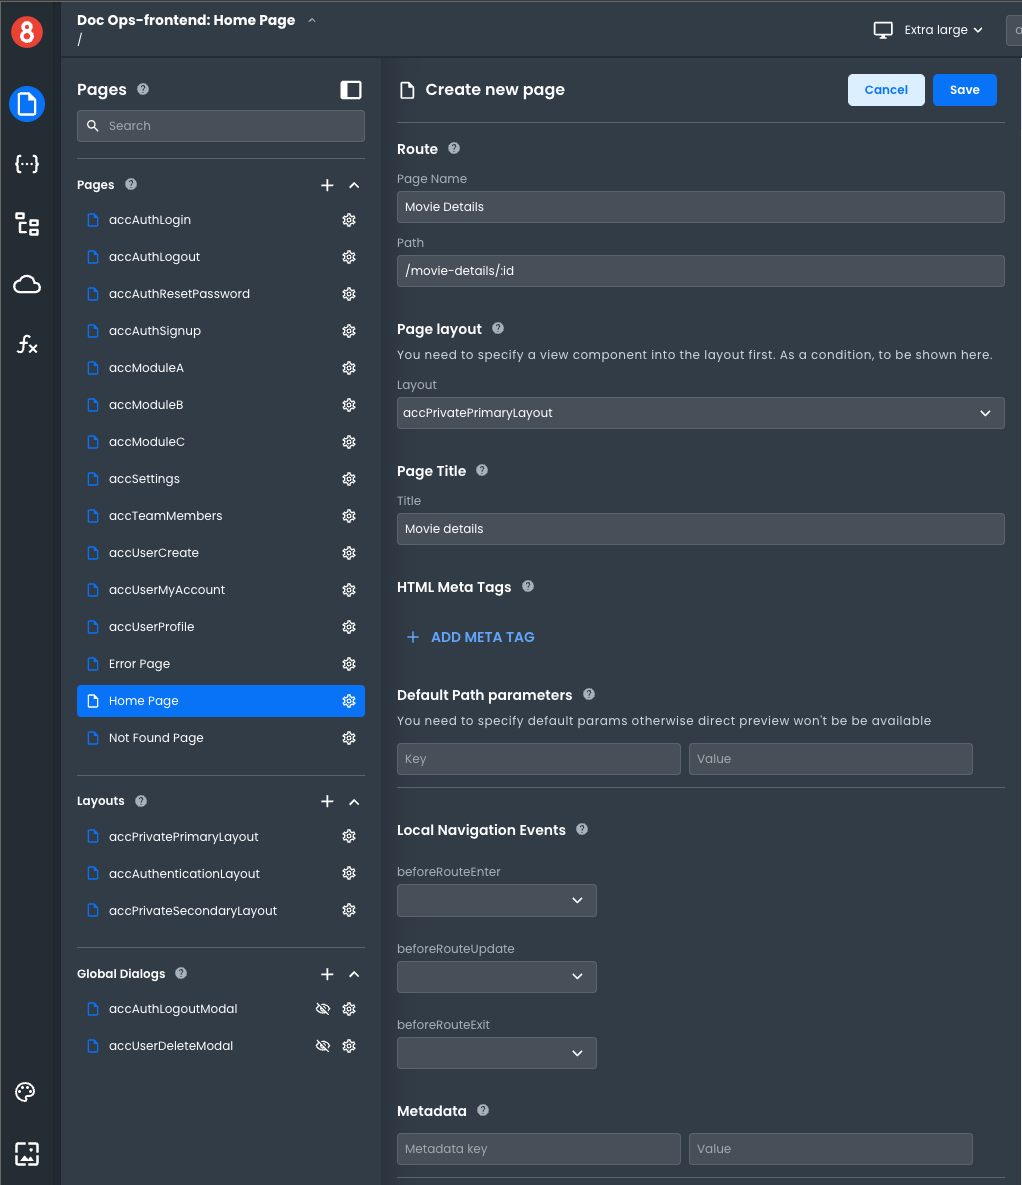
We must add a new page to our /movie-details/:id URL. Notice how we intend to pass the movie identifier as an argument. We can achieve that by using the [:param_name] notation in our page's Path attribute. Later, we will access this parameter through our code. Create the page using a configuration similar to the one shown below.
Got back to the homepage to implement the view button. If you do not see your data, just execute your query again.
The URL of the target page is dynamic, because we need to add the movie id to it. This can be achieved using the router object available in your global scope. This object provides a method navigate that will let you move between pages using code. Follow these steps to implement the navigation
- Select the view button that you dropped inside the card content.
- In the right pane, go to Events.
- Add an event handler for
On Click. - Select
Run Custom Codeas the action. - Add the following code:
// Your JavaScript code here
router.navigate(`/movie-details/${item?.id}`)
Go back to the Movie details page.
We will need to use the id parameter to retrieve the data we need. You can access this information directly from the router object. Open the State pane, select Global and scroll down. You'll see all the pages there which you can acces by name (Example router.homepage), a list attribute that let you retrieve the whole list of pages and currentRoute which is a reference to the current page. If you expand currentRoute, you can find where the id parameter will be available.

Notice that it has "id" as value. That's because the application right now has not recieved an argument (Remember, your app is live inside App Builder). This will create challenges for us when we assemble our app, but we can easily fix it by editing the page and providing a Default Path parameter. In the Page pane, use the gear icon next to "Movie details" to edit its configuration and add an ID that you know exists in your backend.
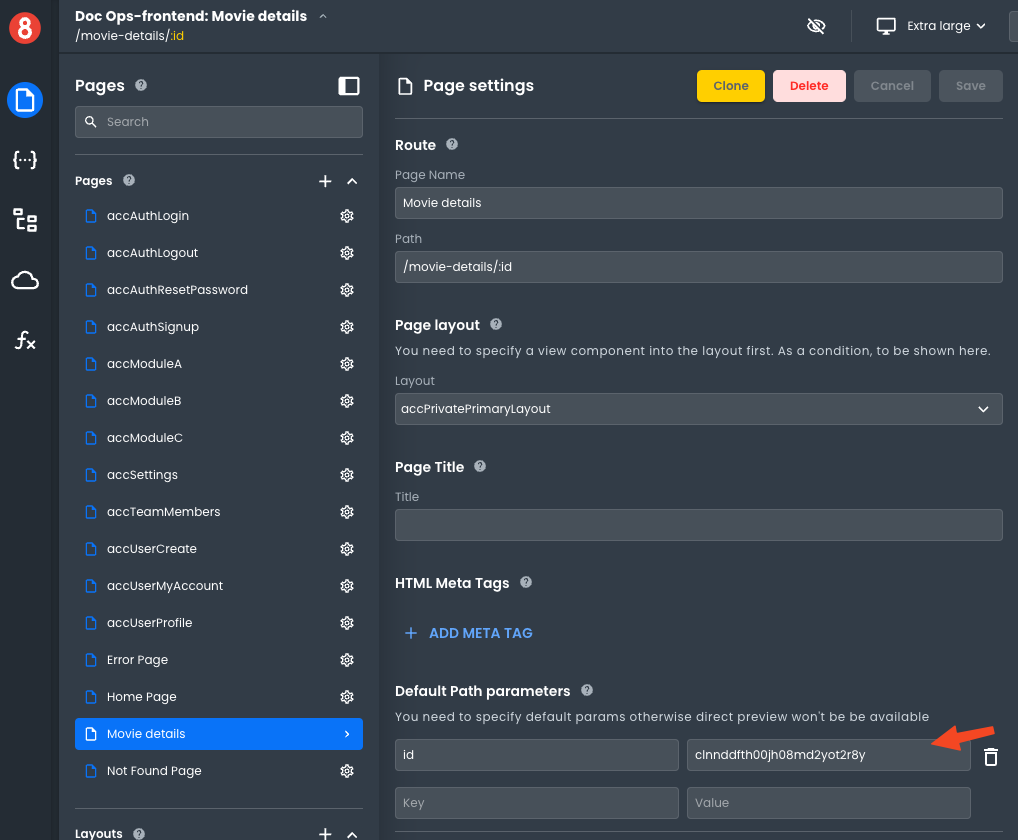
Now, we are ready to get our data. Just as we did in the homepage, let's add a local query:
- Create a local query.
- Name it
getMovie. - Set the type to Query.
- Copy the GraphQL statement we built before.
- Configure the variable
movieIDto{{ router.currentRoute.params.id }}. - Set up your
Authorizationheader to{{ localStorage.getItem('tokenID') }}. - Click Save and Run.
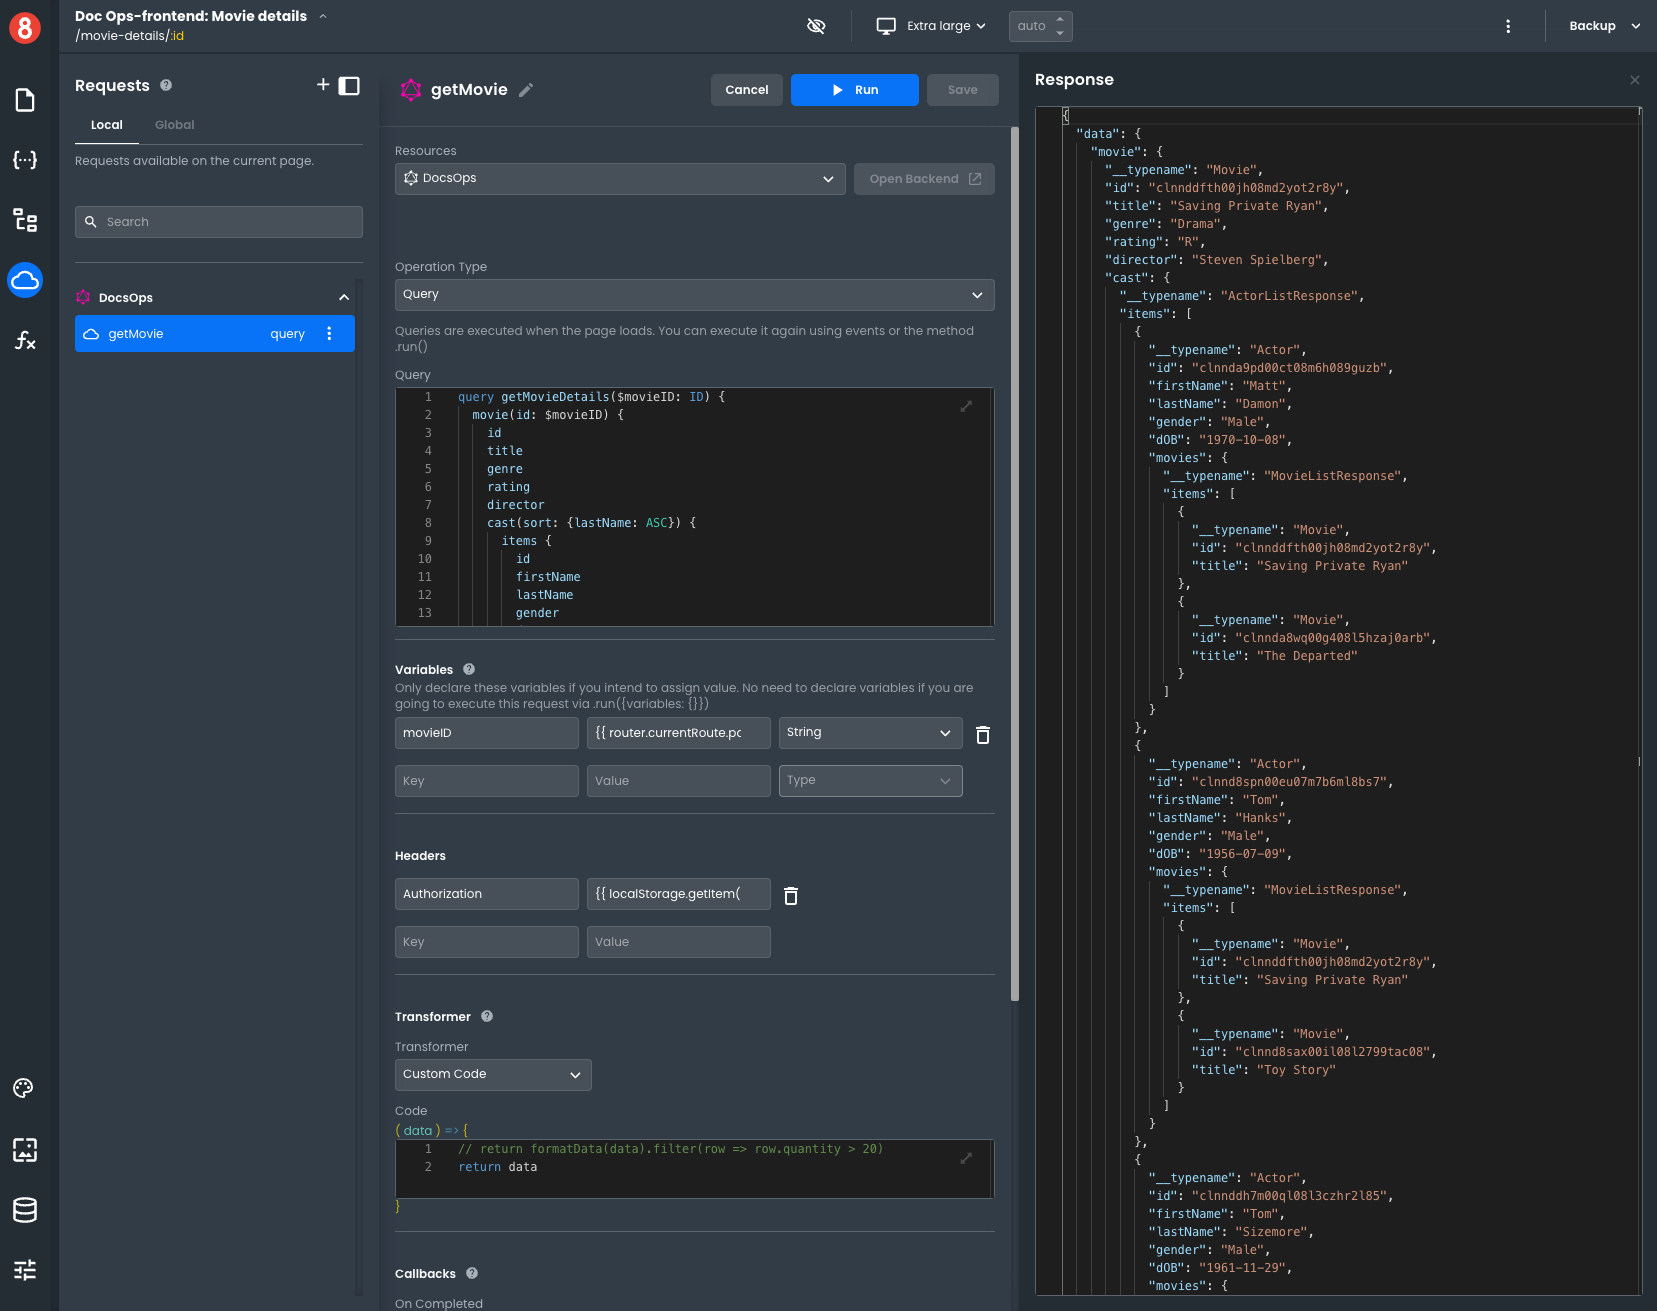
Now we are ready to assemble our page. We will do a simple design inside an Async component. Drop components so your page looks like this:

Here is how we set our attributes:
- Async content,
Loadingattribute:{{ getMovie.loading }}. - Heading,
Titleattribute:{{ getMovie.data?.movie.title }} - First typography,
Textattribute:{{ getMovie.data?.movie.genre + " - " + getMovie.data?.movie.rating }}. - Second typography,
Textattribute:{{ "by " + getMovie.data?.movie.director }}.
Let's use a table to display our cast:
- Drop a table component onto the canvas.
- Change the
Dataattribute to{{ getMovie.data?.movie.cast.items }}(You might see errors while typing, but you can ignore them). - Click Autogenerate columns and accept the option to delete existing columns.
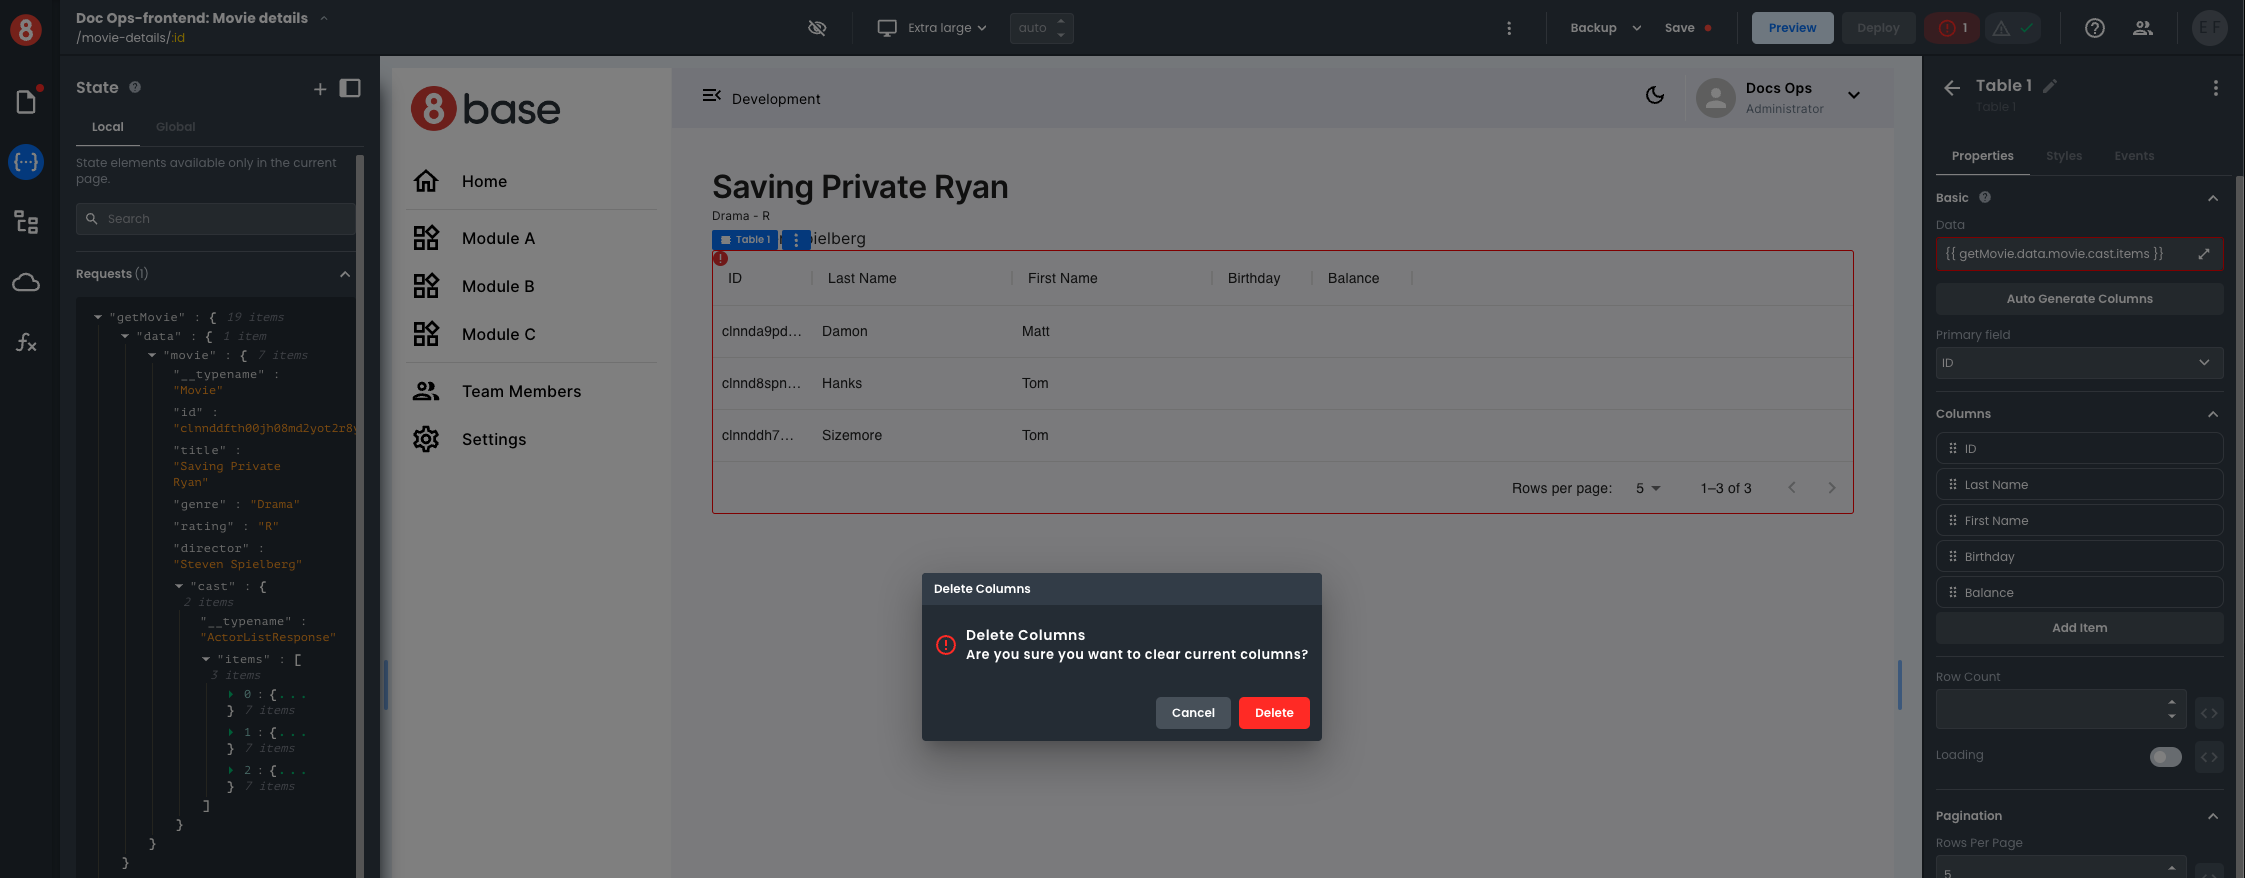
- Click the gear icon next to the
Moviescolumn and then delete the column.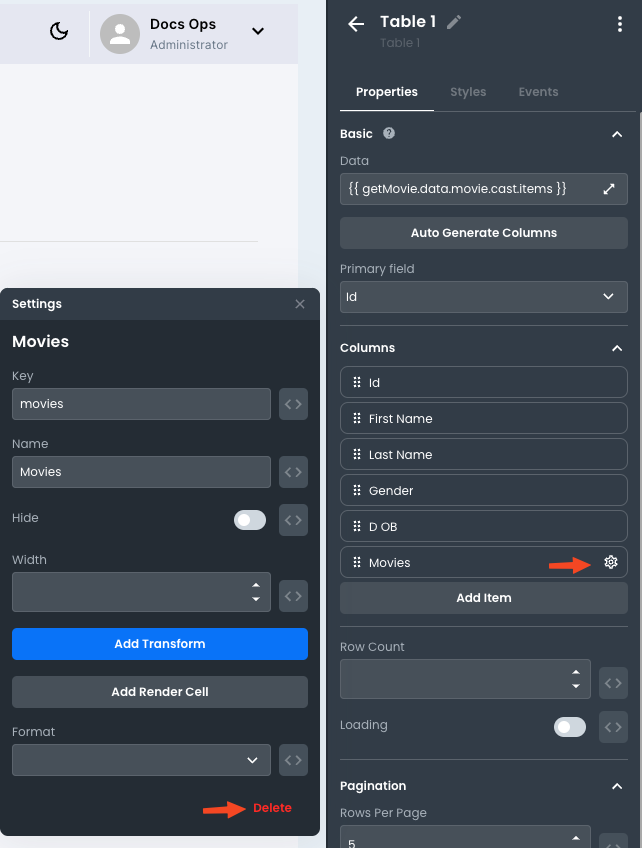
If you go to the homepage and preview the application, it should look similar to this:

Deploying the App
The deploy process will publish your app from App Builder into a production application. Start by clicking the Deploy button in the top bar to bring up the deploy modal. You can set up versioning there and then click the second Deploy button.
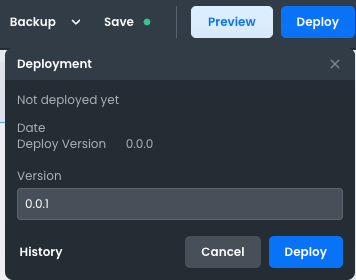
The process will start and take a few minutes.
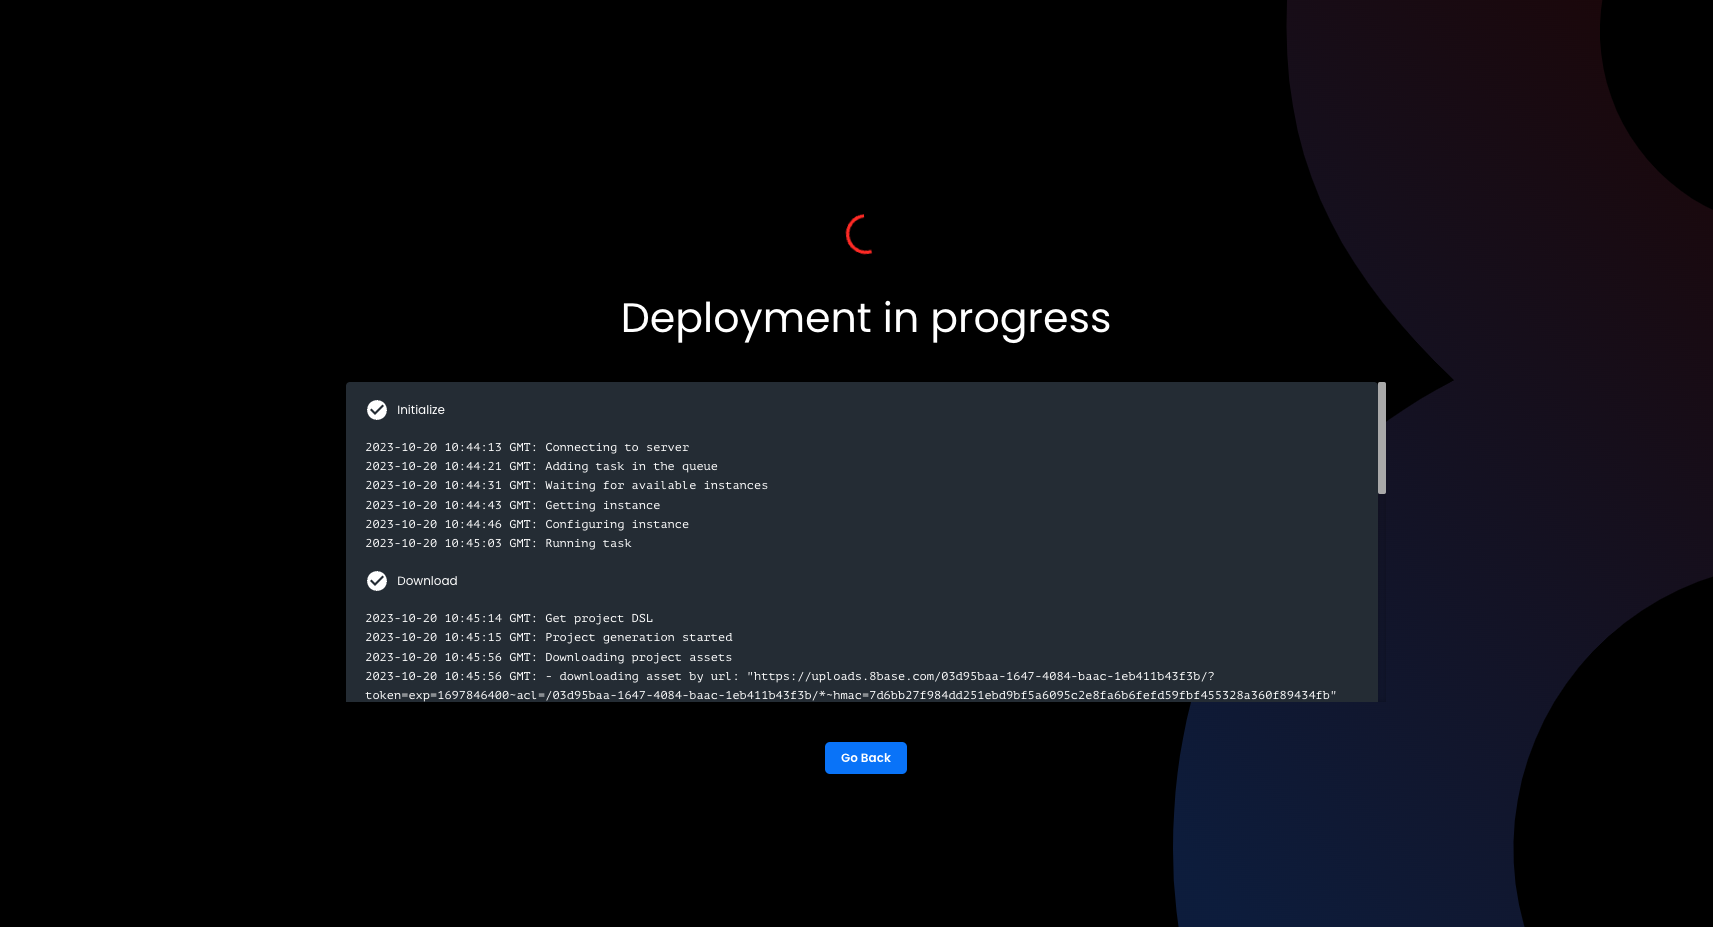
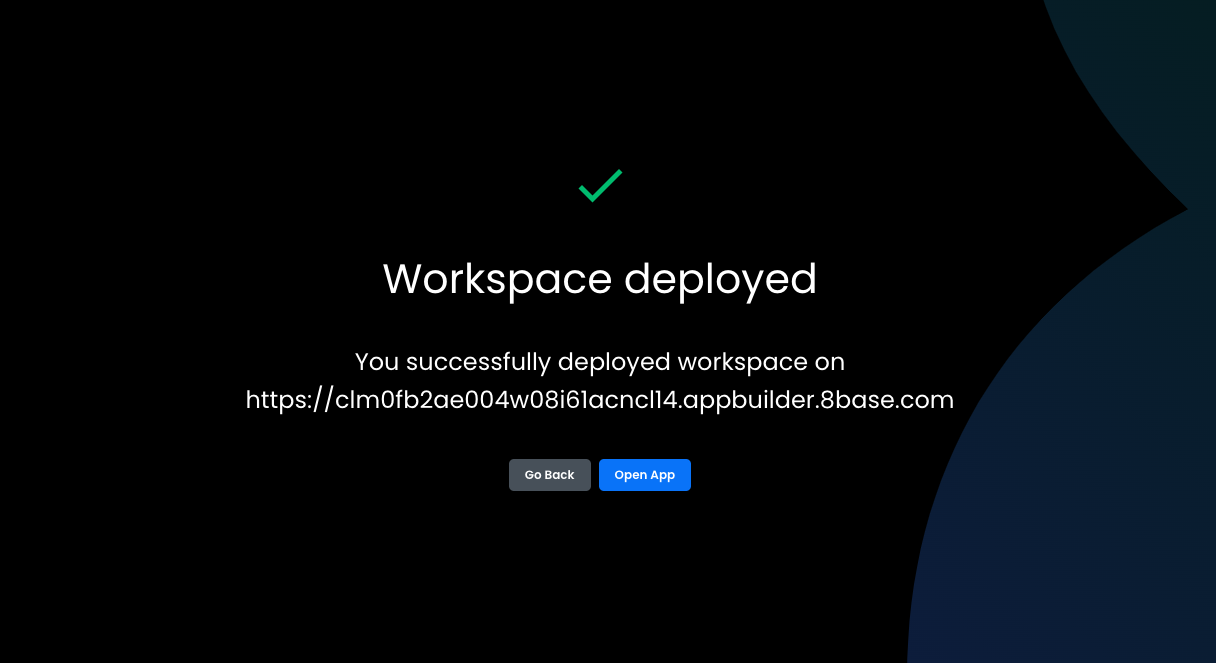
Once completed, you will see this screen and your application is ready to be enjoyed!
