Binding a Request to a Table
This example will demonstrate how to access data in a Request for use in a Table component.
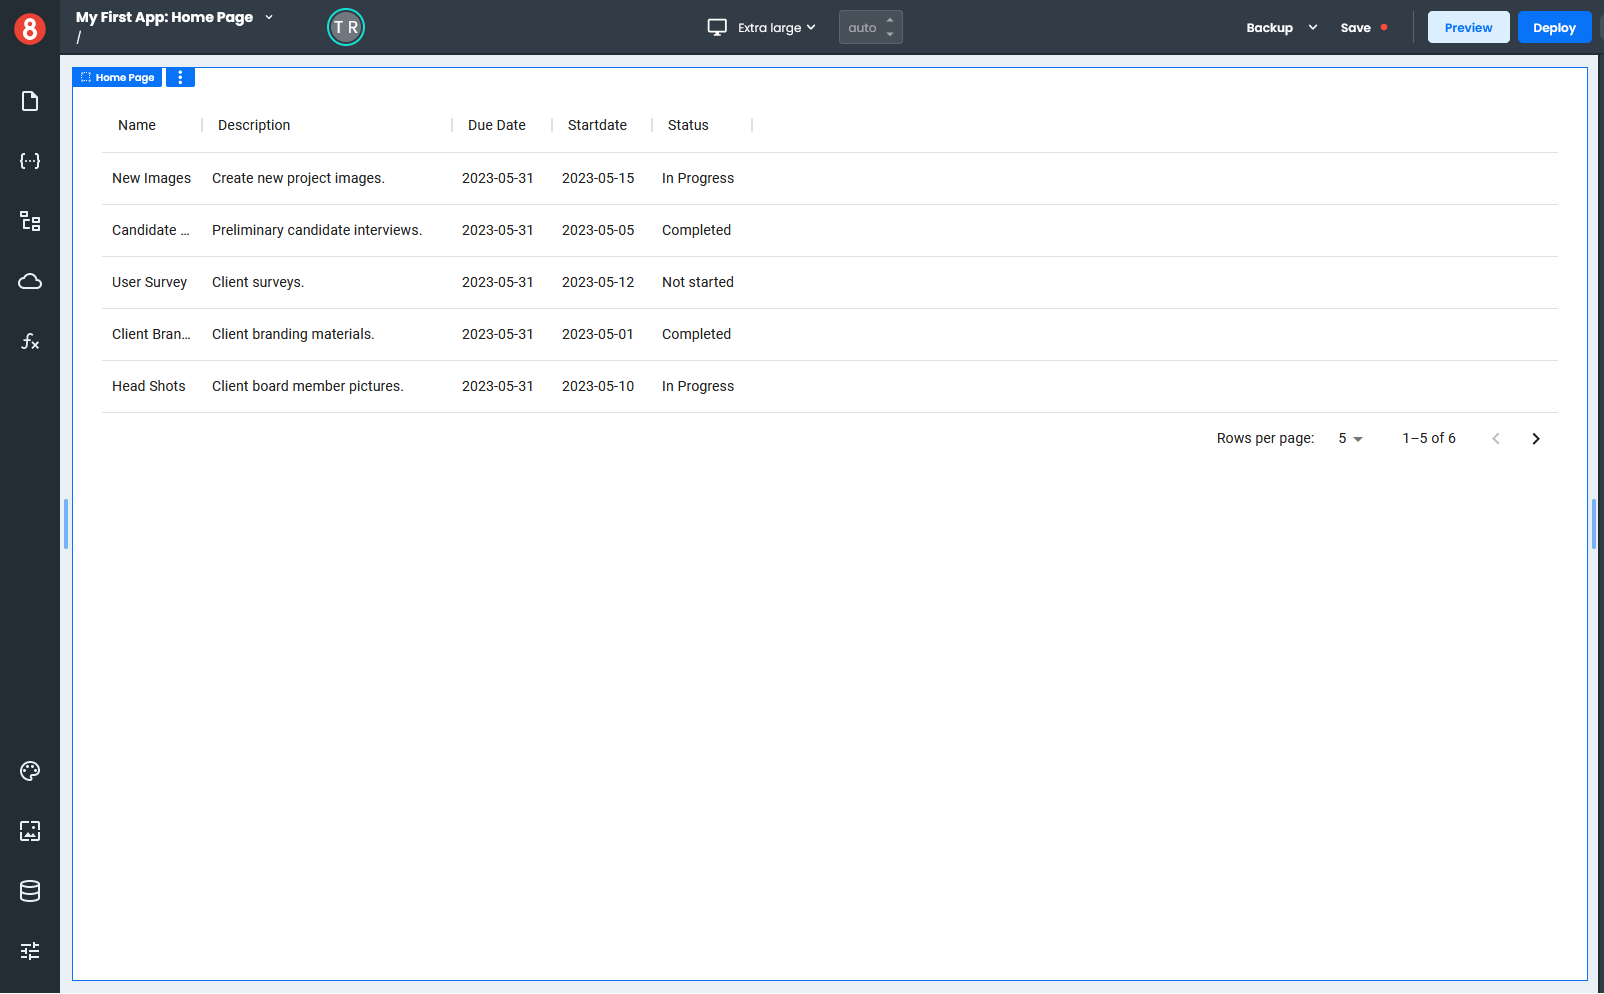
You will need a Page with no content and a Request called allTasks that contains an array of objects with the following properties: id, name, description, duedate, startdate, and status.
Adding a new Table component to your page creates a default set of columns. The columns are generated based on the array in the Data field on the Properties pane.
Each object in the array represents a row in a Table, and the properties in the object represent the columns in a Table.
Each object's id property is a primary key, which is required for the column to display in a Table.
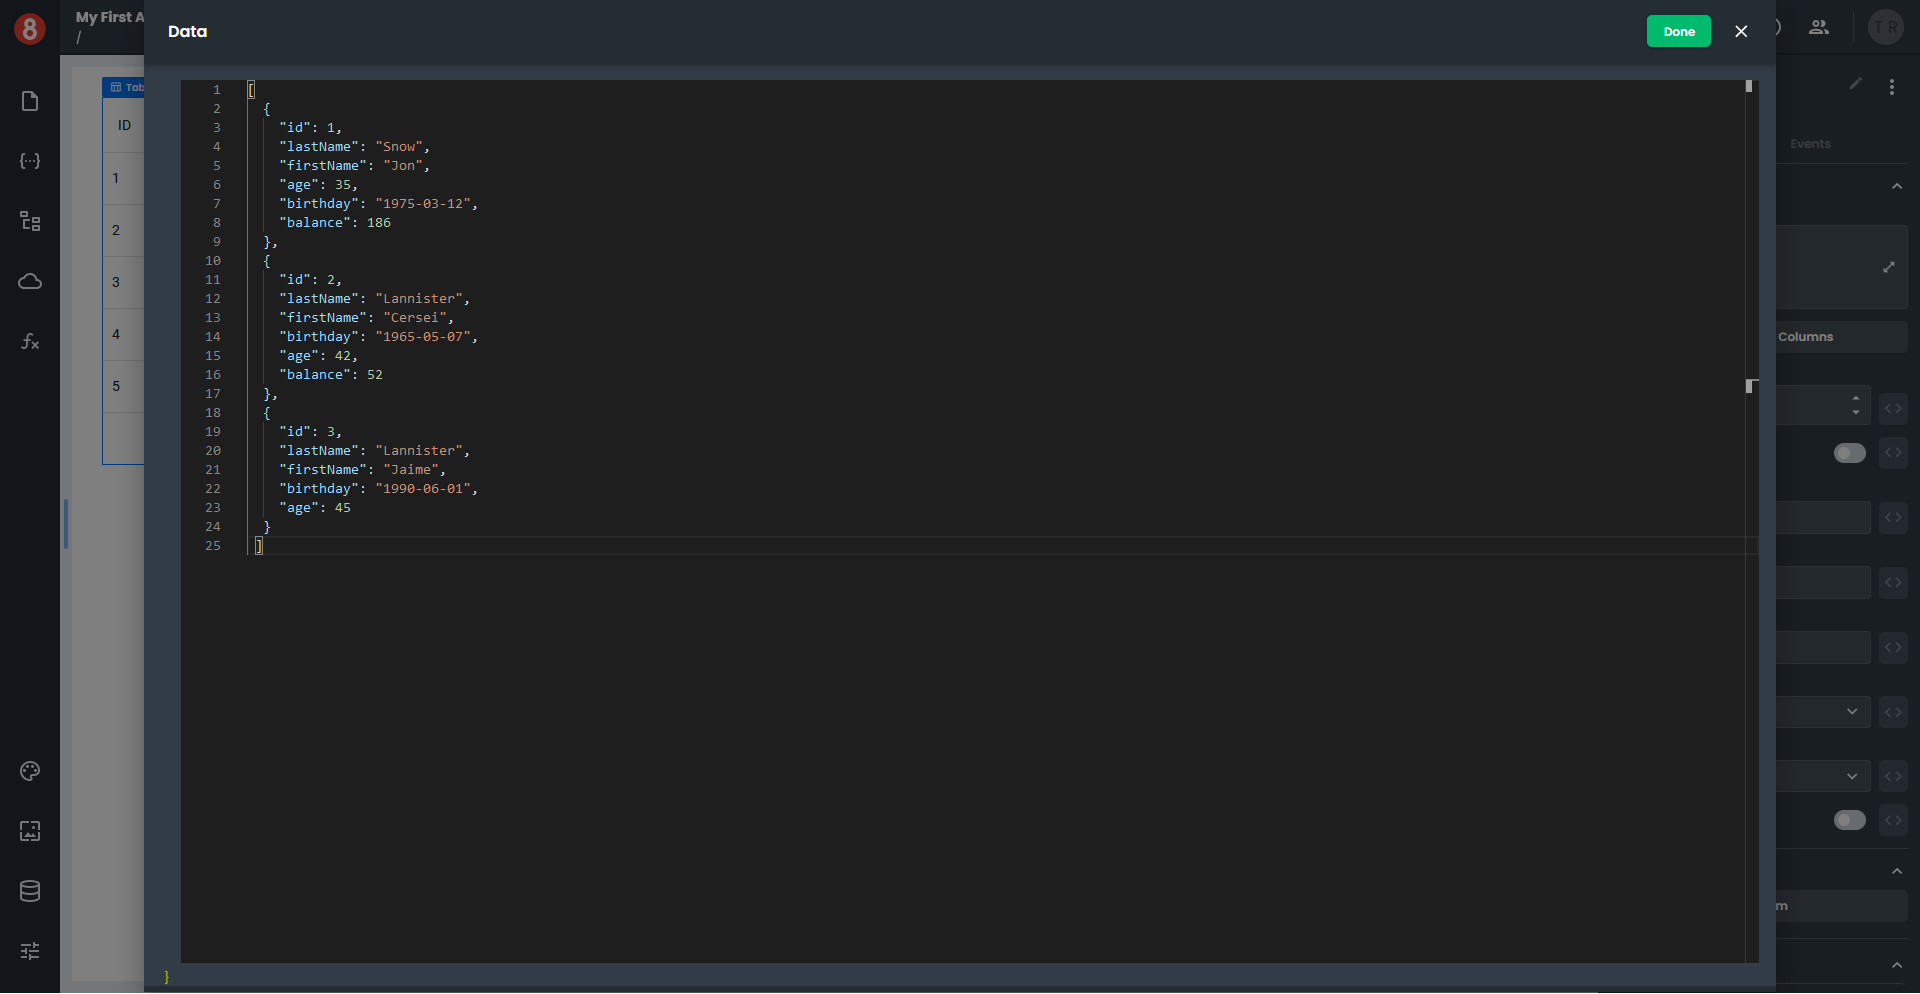
The following is an example of an object's appearance in a data array.
{
"id": 1,
"lastName": "Snow",
"firstName": "Jon",
"age": 35,
"birthday": "1975-03-12",
"balance": 186
}
- Select a Table component from the Common section of the Components pane and drag it onto your page.
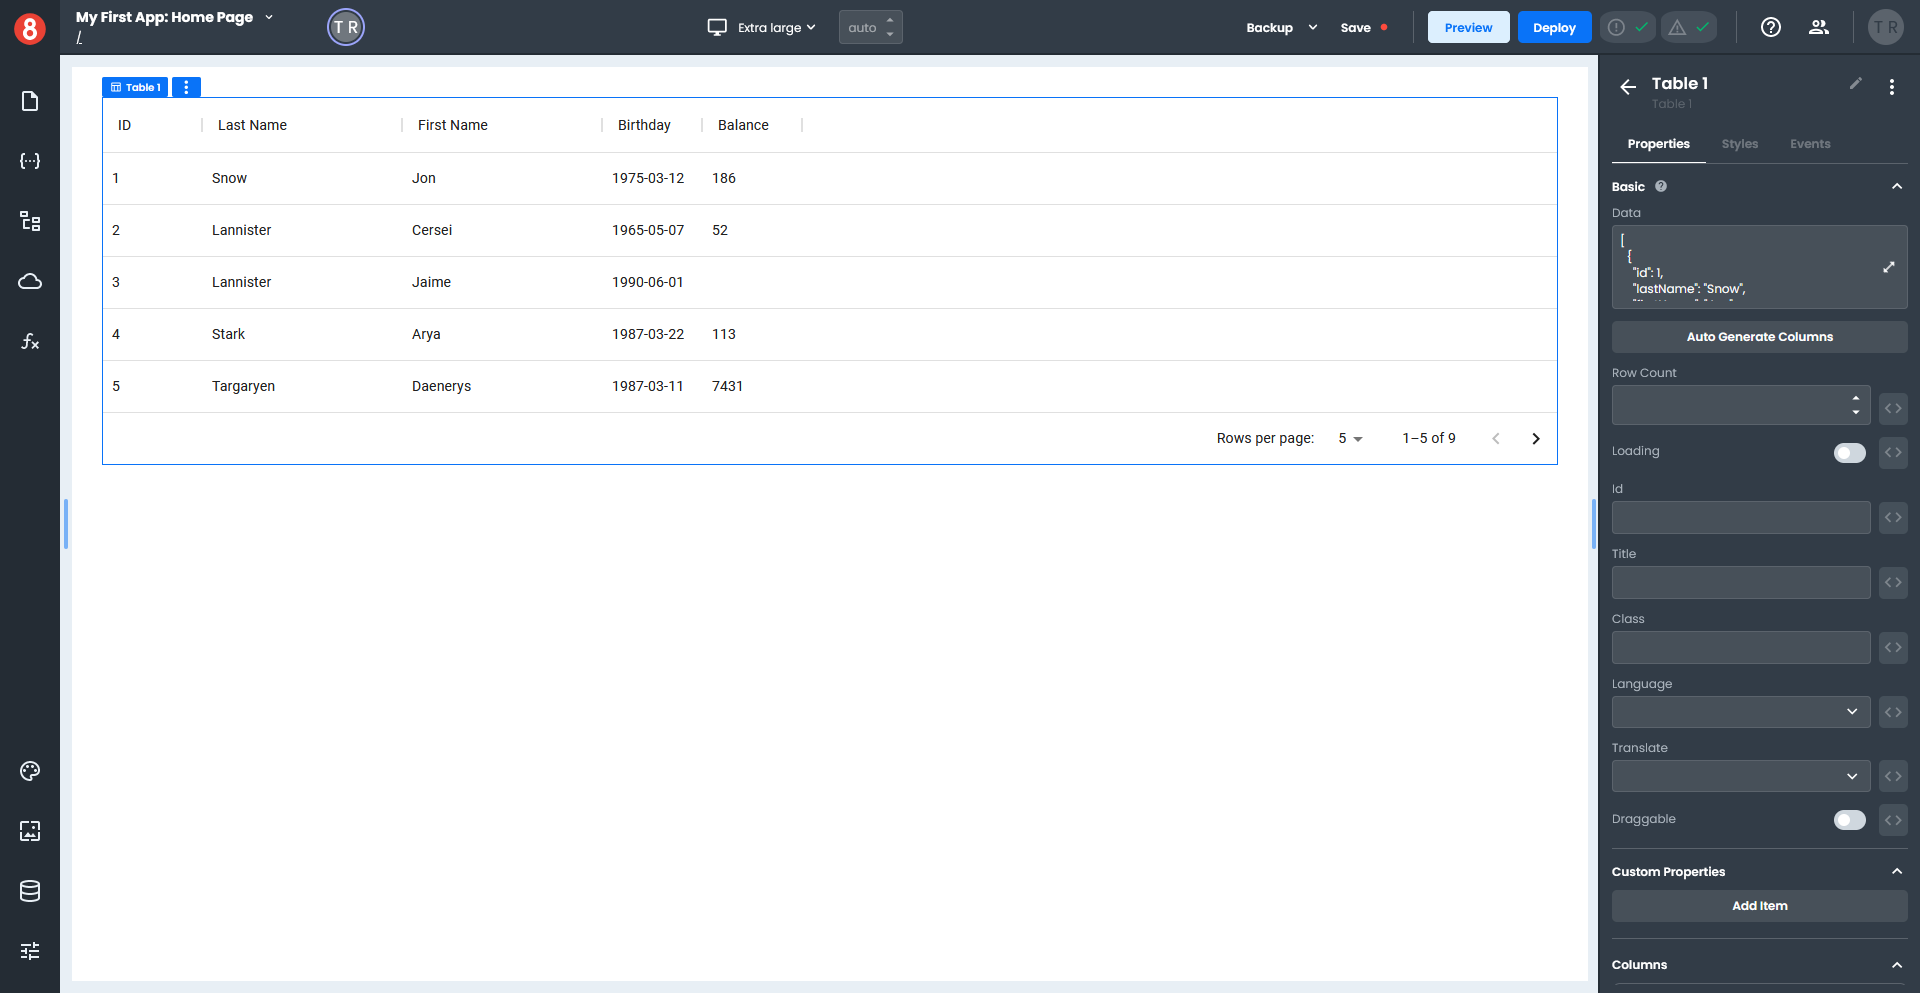
- In the Properties pane, click the expand arrow in the Data field to open the code panel.
- Select the array, delete it, and click "Done".
- Type your Request name into the Data field like this
{{allTasks.data}}. - You must click the "Auto Generate Columns" button to create new columns from the data in your Request.
- A confirmation window opens for you to confirm your action.
- Click "Delete" to create your new columns.
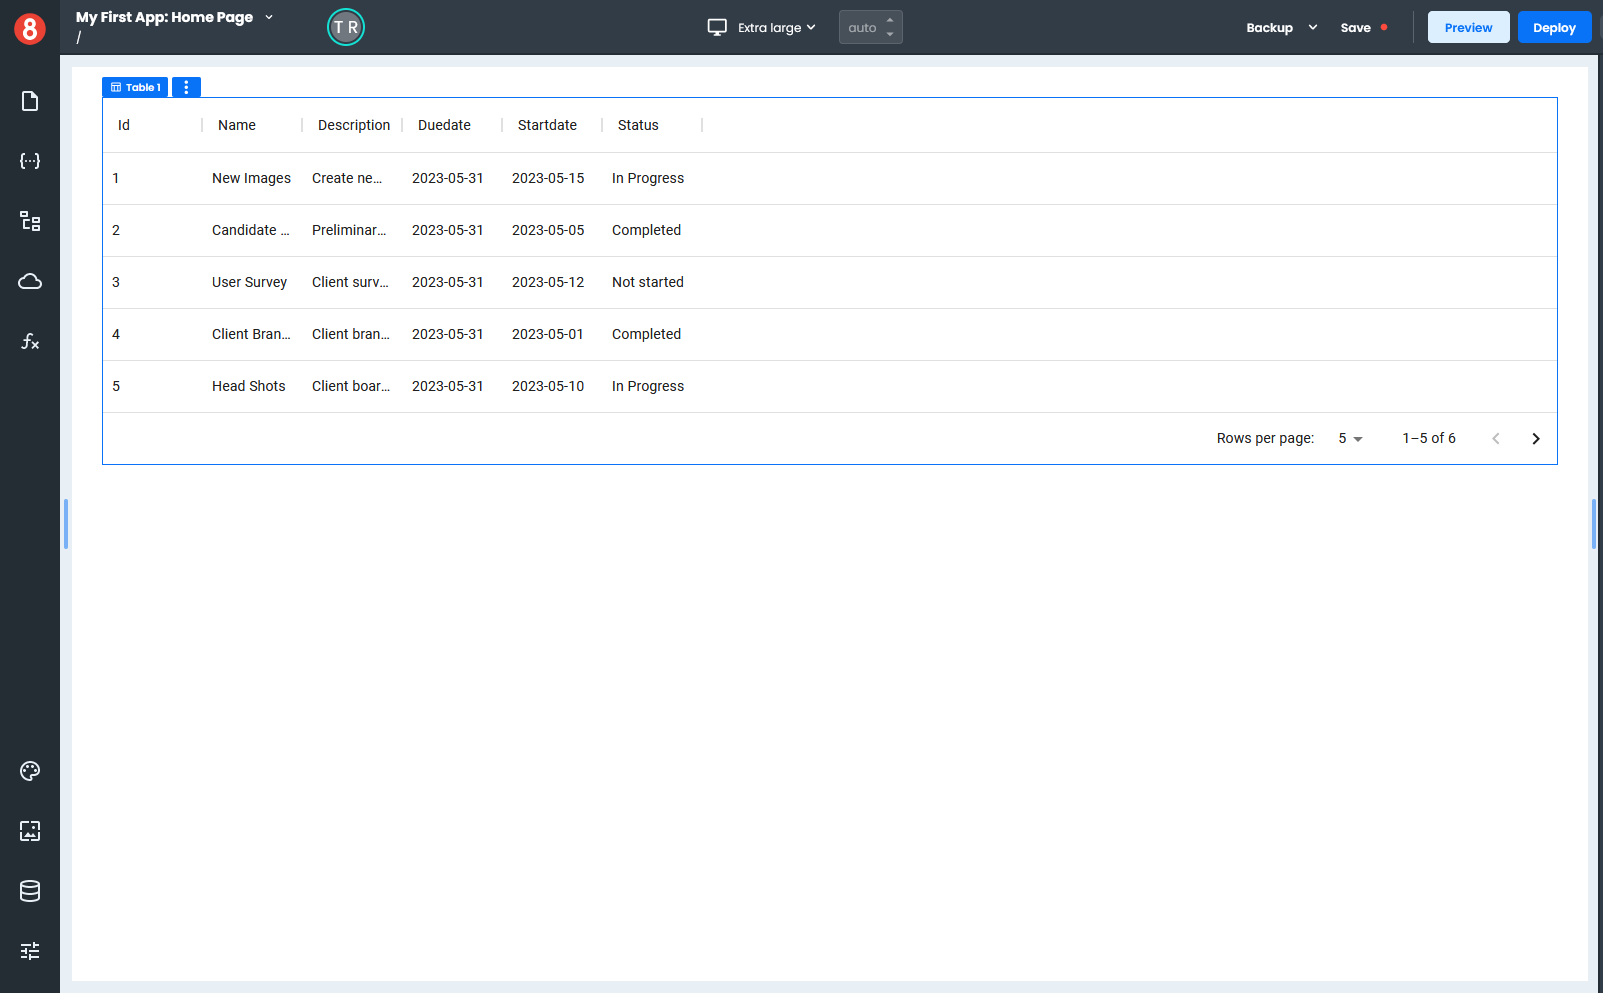
Each column has its own properties that you can customize independently of others.
You can see that some column sizes and names differ from what you would like them to be, so let's fix that.
- Scroll down to the Columns* section in the Properties pane.
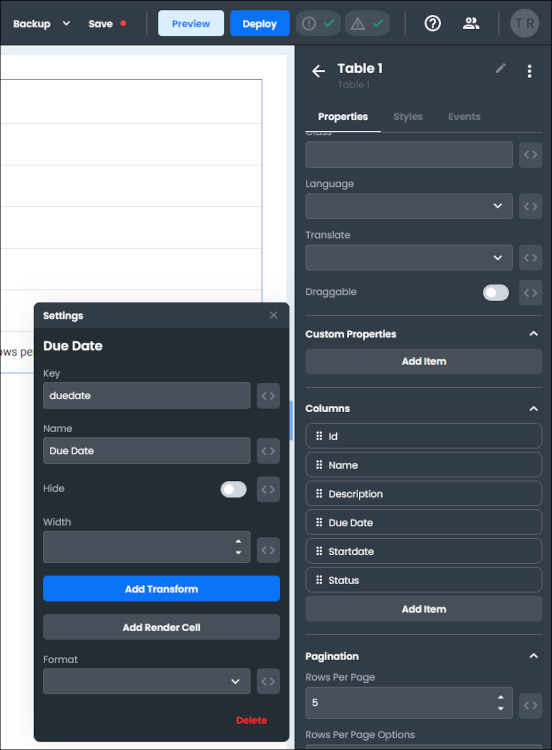
- Click the gear icon next to the Duedate column, which opens a pop-out settings pane.
- Enter "Due Date" in the Name field and click the "X" to close the pop-out.
- Click the gear icon next to the Startdate column to open the pop-out settings pane.
- Enter "Start Date" in the Name field and click the "X" to close the pop-out.
- Click the gear icon next to the Description column to open the pop-out.
- Enter 150 in the Width field and click the "X" to close the pop-out.
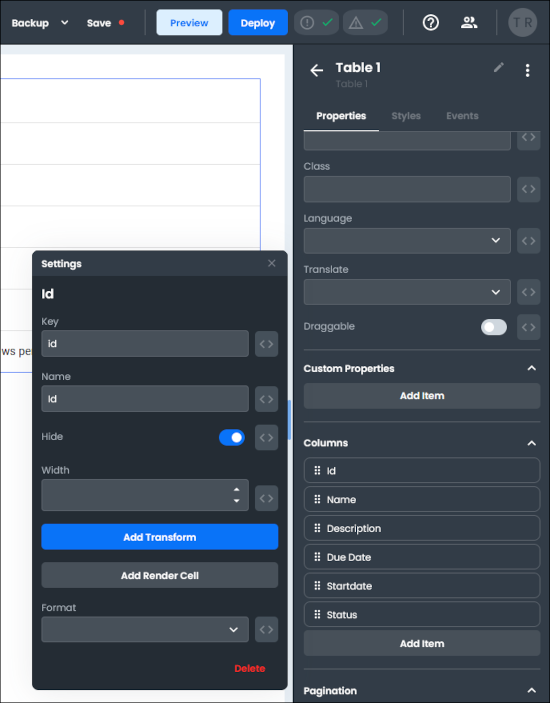
- Let's hide the Id column because we don't need to see it. Click the gear icon next to the Id column to open the pop-out settings pane.
- Switch the "Hide" toggle to on to hide the Id column and click the "X" to close the pop-out.
You now have all your column properties how you want them to display, and the data in your Request displays in your Table.